
DISCLOSURE: This post may contain affiliate links, meaning when you click the links and make a purchase, I receive a commission. As an Amazon Associate I earn from qualifying purchases.
If the light on your rice cooker does not turn on, you have to understand that it can indicate many things.
Some of the most common reasons the light may not turn on include a power cord fault, thermal fuse fault, power outlet fault, internal wiring fault, or a LED fault.
If your power cord is faulty, then the only solution is to replace it.
You cannot fix a faulty cable on your own without risking a serious short circuit that has the potential to destroy all of your appliances and wiring.

It’s generally better not to meddle with electrical wiring and components. If there’s a problem, replace it altogether.
If the fault is in the rice cooker’s internal wiring, then you will have to bring it to an electrician and have them take a look.
Primarily, experienced appliance repair technicians can fix this issue. No amateur should ever mess with the internal wiring – even if they know a thing or two about it.
Why Is The Light On My Aroma Rice Cooker Not On?
The Aroma Rice Cooker is such a frequently used appliance that a small fault may prevent you from making your favorite meals.
It’s generally recommended that you take it to an experienced technician as soon as you can for repairs.
In some cases, having a burnt-out thermal fuse is causing the problem. For replacement, you may want to refer to our thermal replacement article.
But, what if your rice cooker is cooking the rice beautifully without any problem, but the light on the display does not power on?
That’s a confusing sign, and in most cases, it’s probably not the cooker but the LED that’s at fault. Replacing the faulty LED is a simple fix, and you can easily do it on your own as well.
However, if you are not confident enough in installing a replacement LED on your own, it’s recommended that you take it to an expert.
We have listed the steps that will allow you to replace the rice cooker LED. Just follow the steps given below for a successful replacement with minimal hassle.
How To Replace The Rice Cooker LED
1. The first step in replacing the rice cooker LED is making sure you have all the required tools.
The tools required to replace the Aroma Rice Cooker LED are a multi-head screwdriver, highlighters of different colors, a needle nose plier, a wire cutter, and masking tape.
Most of these are probably available at your place, so you won’t have to go looking.
2. Remove the cooking pot and turning the rice cooker upside-down. You can easily remove the cooking pot from the main appliance.
3. Remove the screws on the back of your rice cooker.
Inspect the screw head thoroughly and select the proper extension for your screwdriver before you start to twist it around. Remove the screws using your screwdriver and keep them in a tray.
4. Remove the metallic plate or the plastic cover, depending upon your own model.
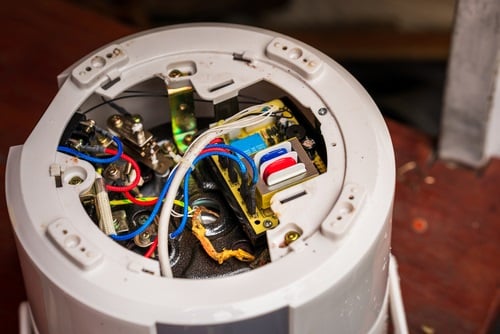
Removing all of the screws allows you to easily remove the back metallic/plastic cover from the rice cooker’s body, revealing the internal components.
5. To advance further and access the LED light compartment, you will have to remove the wires getting in the way.
To reconnect the wires a lot easier once you are done, use the highlighters to color two connecting wire junctions with the same color. Repeat the coloring process after unscrewing every junction.
If you mess up the coloring of two junctions and reconnect the wires in the wrong order, it will either shut off your rice cooker or cause a short circuit.
You may also want to make a video of the entire process to know which wire was removed from which source.
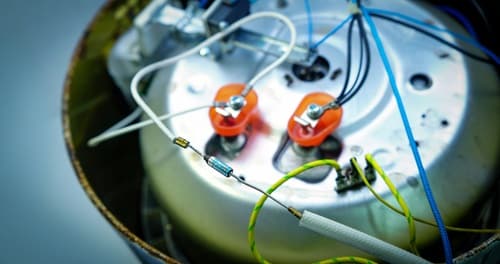
6. Disconnect the hot plate latch. This is the latch that connects the rice cooker heating plate with the electrical circuit. Use the needle-nose plier to disconnect it.
Take extra care to avoid damaging the connection as it’s quite delicate. If you somehow damage it, the rice cooker will stop cooking because the heating coil will generate no heat.
7. After removing the wires and the heating plate, you will notice that the rice cooker is just a plastic shell. As a result, accessing the LED bulb will become a lot easier.
8. Disconnect the LED bulb by cutting its connectors with the wire cutter.
9. Take a new LED and connect it with the wires. Use a soldering iron for a better result. If you don’t have a soldering iron, use tape.
10. Then, you have to carry out the whole process in reverse to reassemble the cooker.
Put back the LED in place and slowly work your way backward to ensure that your Aroma Rice Cooker is put back together. Before you decide to plug in a new LED, however, you must check the LED first.
Final Thoughts
As you can see, the process of removing and installing a new LED is quite tedious.
Do you really want to go through all of the trouble only to find that you just replaced one faulty LED with another? Check your new LED before you put it in place in your rice cooker.
Then, when you have connected everything, activate the rice cooker and see if it works fine. Remember, while the problem is likely to have been caused by a faulty LED, there are other variables in play as well.
For starters, an issue with the wires that connect the LED in place could be a problem. If that’s the variable, then you will have to replace the wires.
As you can imagine, there’s quite a bit of complex circuitry involved inside the appliance.
Tinkering with these delicate wires and tiny electrical components is a bad idea and could cause permanent damage to your rice cooker.
[amazon box=”B007TNXYYA”]
While the Aroma Rice Cooker is not as expensive as other appliances around the kitchen, you must understand that it requires a skilled hand to repair.
If changing the LED doesn’t do the trick, you have two options: continue using it as it is or take it to a skilled repair technician to fix it.
Most people don’t really bother about the light because they know that the appliance is working.
But, if you like everything prim and proper, it would be a wise move to take it to an appliance repair technician and get it fixed from there.

They may charge a bit extra, but at least you will have the peace of mind that your appliance will be properly repaired.
Aroma Rice Cookers are, in general, quite resilient appliances and are going to last you a long while if you know how to take care of them.
Just don’t leave the appliances plugged in all the time, as that’s likely to cause the LED to short out over time.
These are just a few things you should know about replacing the LED on your Aroma Rice Cooker.