Tri Tip Smoking Time Calculator
Estimate tri-tip smoke time from raw weight, thickness, pit temperature, target doneness, reverse sear choice, rest time, carryover heat, cooked yield, and servings.
🥩 Tri-Tip Presets
Choose a real cook profile, then fine tune the thickness, doneness, sear, and serving plan for your roast.
⚖ Smoking Details
Tri-tip smoking plan
Your smoke time, pull temperature, sear window, rest, yield, and servings will appear here.
Cook Inputs
Yield And Serving Math
Cooking Schedule
📊 Quick Cook Readout
🔥 Smoker Temperature Comparison
Best smoke ring and gentle edge-to-center gradient; allow extra time for thick roasts.
Good default for medium rare tri-tip with enough time for smoke and a clean reverse sear.
Shortens the cook and firms the surface, useful when dinner timing matters.
Works for thin roasts, but monitor closely because the tapered tail can overcook quickly.
📘 Tri-Tip Timing Reference
| Raw Roast | Typical Thickness | 225°F Pit | 250°F Pit | 275°F Pit |
|---|---|---|---|---|
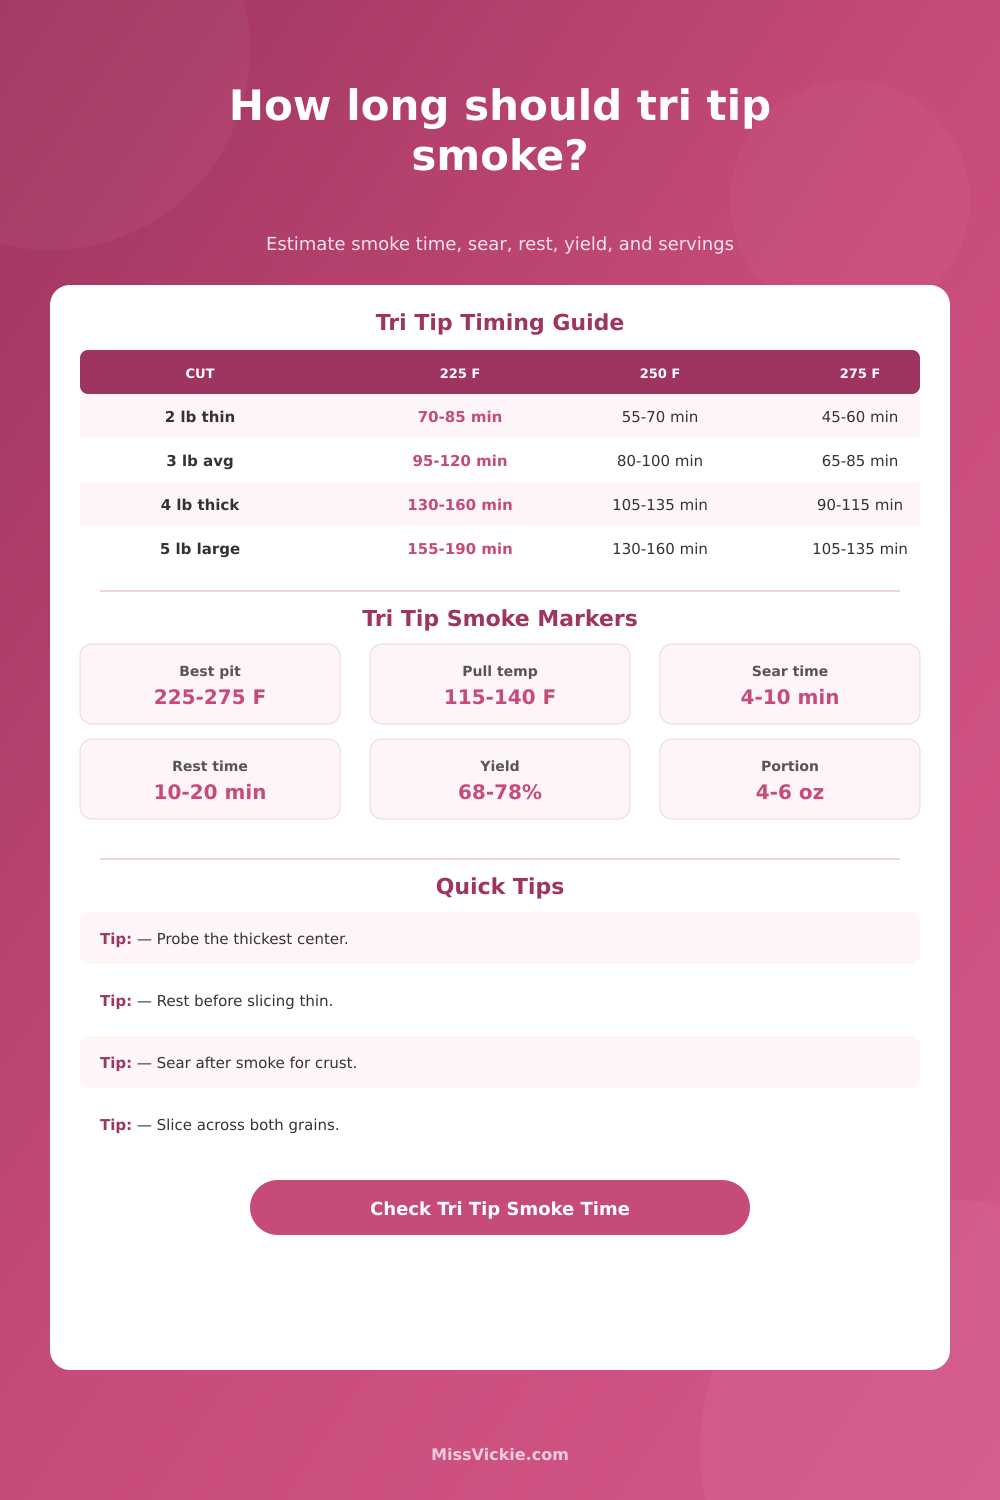
| 2 lb thin tri-tip | 1.5 to 1.75 in | 70 to 85 min | 55 to 70 min | 45 to 60 min |
| 3 lb average tri-tip | 1.75 to 2.25 in | 95 to 120 min | 80 to 100 min | 65 to 85 min |
| 4 lb thick tri-tip | 2.25 to 2.75 in | 130 to 160 min | 105 to 135 min | 90 to 115 min |
| 5 lb large or two small roasts | 2.25 to 3 in | 155 to 190 min | 130 to 160 min | 105 to 135 min |
Tri-tip cooks more by thickness than by weight. Use the lower end for flat roasts and the upper end for thick, compact roasts.
🌡 Doneness, Pull Temp, And Carryover
| Target Doneness | Finished Center | Typical Pull With Sear | Texture Note | Best Serving |
|---|---|---|---|---|
| Rare | 125°F | 112 to 118°F | Very red, soft center | Thin slices or sandwiches |
| Medium rare | 130°F | 118 to 124°F | Rosy, juicy center | Classic tri-tip plates |
| Medium | 140°F | 128 to 134°F | Pink center, firmer bite | Family dinners |
| Medium well | 150°F | 138 to 144°F | Mostly cooked through | Guests who prefer less pink |
🍴 Yield And Servings Table
| Raw Weight | Cooked Yield Range | 4 oz Sandwiches | 6 oz Plates | 8 oz Hearty Plates |
|---|---|---|---|---|
| 2 lb | 1.35 to 1.55 lb | 5 to 6 | 3 to 4 | 2 to 3 |
| 3 lb | 2.05 to 2.35 lb | 8 to 9 | 5 to 6 | 4 |
| 4 lb | 2.75 to 3.1 lb | 11 to 12 | 7 to 8 | 5 to 6 |
| 5 lb | 3.4 to 3.9 lb | 14 to 15 | 9 to 10 | 6 to 7 |
🍳 Reverse Sear Method Table
| Sear Method | Added Time | Internal Rise | Crust Result | Timing Advice |
|---|---|---|---|---|
| No sear | 0 min | 0 to 2°F | Soft smoked bark | Smoke closer to final target |
| Hot grill | 6 to 8 min | 4 to 6°F | Classic charred edges | Pull several degrees early |
| Cast iron | 5 to 7 min | 3 to 5°F | Deep browned crust | Dry surface before searing |
| Broiler | 4 to 6 min | 3 to 4°F | Fast top browning | Rotate once for even color |
💡 Tri-Tip Calculation Tips
The tri-tip comes from bottom sirloin and is a triangular-shaped cut that tapers off toward one end into a smaller triangle. Because of its shape it’s difficult to cook evenly; the thickest portion stay hot whereas the thinner tail end will overcook if left too long. Trying to cook outside to the right level while keeping the inside correct usually results in unevenly cooked meat, leaving the roast either overdone or medium rare.
It’s best to have a game plan before lighting the fire, your dinner depends upon it (so don’t guess). After you input your details into the calculator above, it do the math for you. There’s no need to convert or to calculate coefficients. You just input your information.
How to Cook Tri-Tip Perfectly
When we home cooks think about cooking time, we tend to overemphasize weight. While weight does play a role in yield, thickness determines the amount of time heat has to travel to reach the center. For example, a three-pound roast might weigh the same as another roast that has been pressed into a thick, dense block of beef. However, the flat-cut will take much less time to cook because there is a shorter distance between its outer layer and it’s center. That’s why the tool requests the measurement of your thickest point, not simply the number on the scale… And not the other way around.
Everything else is paced based off your pit temperature. If you set smoker to run two hundred twenty-five degrees, you’ll get a slow build with a nice gentle gradient and a deep smoke ring. But that also means it will take longerer. To speed things along, crank it up to two hundred seventy-five degrees (or even higher) which firms up the surface quicker. That’s helpful when you’re feeding people who is hungry and waiting.
There is no one correct temperature here. It comes down to timing, and how important a quick cook versus good color is to you. The chart on the page spells this out so you can see what tradeoffs exist ahead of time before locking in a temp. How you like it is up to you. How done it gets isn’t.
You have to think about carryover cooking, when you remove a steak or roast from the heat, its internal temperature continue to climb as the residual energy moves inward and starts heating the cooler inner sections. That’s why the outside is significantly hotter than the middle. To ensure you don’t overdo it: Plan on how much your food will rise. Pull it early if you’re aiming for 130 degrees in the center. Don’t wait for thermometer to hit your target temperature before pulling it. By the time you cut it open, the temperature will likely have passed that mark turning a juicy piece of meat into boot leather.
With the reverse sear approach, the order is flipped. First, smoke low and slow to get the meat near done while not burning outside. Next, use high heat to create the crust. That increases total time by a few minutes and bumps up the inside temp a few degrees as well. Without the sear, your plan shifts dramatically. Smoke directly to target temp then let it rest right away. Neither’s wrong. But both require different amounts of time to reach the right pulling temperature and to rest before you cut into it.
You cannot skimp on resting with this cut. Tri-tip has long muscle fibers that tightens up under heat. You’ll notice all of those juices running down into your cutting board if you try slicing it while it’s still hot, rather than retaining them within the meat. Allowing it to rest for 15-20 minutes lets the proteins relax, reabsorbing the moisture back in. It feels like such a waste of time, but it truly makes eating better. Resting is accounted for in the tool’s output calculations (so you’ll know exactly how many people you’re able to feed).
That’s when it gets won or lost, the slicing. Because of its anatomy, a tri-tip has grain running in two directions. Find the transition and make your cuts perpendicular to the grain on each section. Regardless of how perfectly you smoked it, if you cut with the fibers every bite will be chewy. Here’s another reason thin slices are important. Chunky pieces remain tough; paper-thin strips becomes tender in an instant.
It takes the worry out of smoking too. Stop standing beside your smoker worrying about whether your meat has reached temperature. You’ve got a timeline. You know when to begin, when to remove it, and when to serve. That’s what gives you the opportunity to sit back, relax and just enjoy the smell of the smoke without worrying about time.
Once you get the hang of its oddities, there isn’t much that can go wrong with this cut and boy is it flavorful. Use your thermometer, let it rest and remember to cut across the grain. Your company won’t be able to resist. You should of seen how good it looks.