Steak Doneness Time Calculator
Estimate steak cook time, pull temperature, carryover, and rest timing by cut, thickness, cooking method, target doneness, start temperature, sear intensity, and surface condition.
📌Steak Presets
Pick a common steak setup, then adjust the thickness, target doneness, sear, carryover, and rest to match your pan or grill.
⚙Doneness Inputs
Steak timing plan
Enter your steak details to estimate time, pull temperature, and rest.
Timing Breakdown
Doneness Breakdown
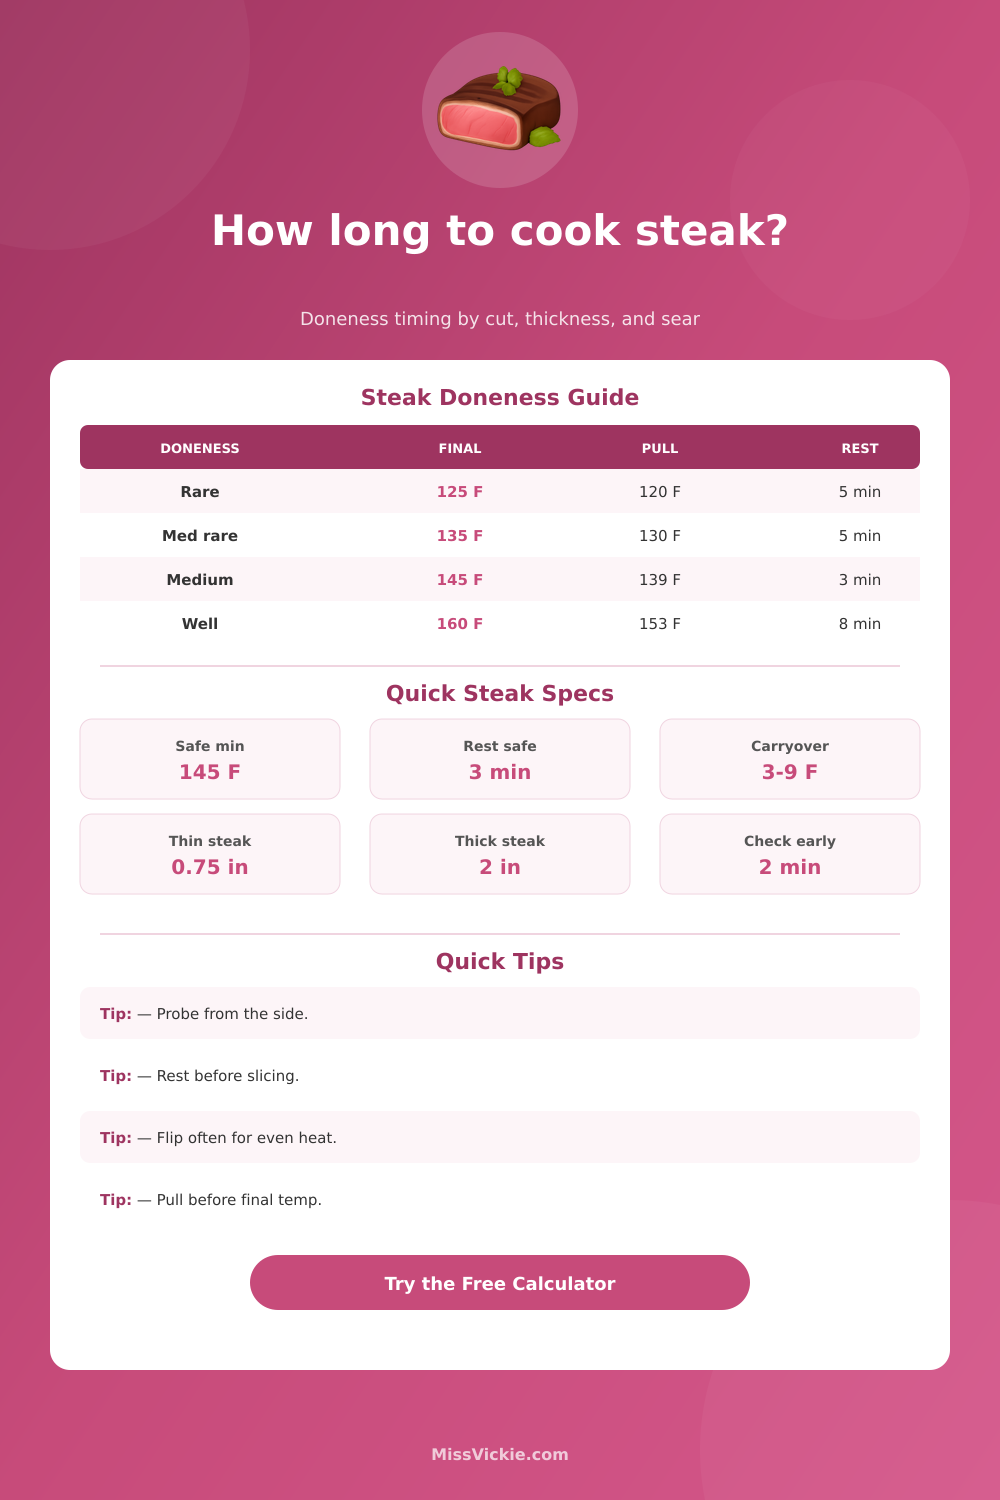
🌡Doneness Temperature Table
| Doneness | Final center temp | Typical pull range | Texture cue |
|---|---|---|---|
| Rare | 125 F / 52 C | 118-122 F | Cooler red center, soft texture. |
| Medium-rare | 130-135 F / 54-57 C | 124-130 F | Warm red center, juicy texture. |
| Medium | 140-145 F / 60-63 C | 134-140 F | Pink center, firmer bite. |
| Medium-well | 150-155 F / 66-68 C | 143-149 F | Small pink band, firm texture. |
| Well done | 160 F+ / 71 C+ | 152-156 F | Little pink, firm throughout. |
For whole beef steaks, common U.S. food safety guidance lists 145 F with a 3-minute rest. Lower personal doneness targets should be chosen with that context in mind.
⏱Thickness and Time Table
| Thickness | Fast sear method | Oven or indirect finish | Best check habit |
|---|---|---|---|
| 0.5-0.75 in | 2-5 min total | Usually not needed | Probe quickly; carryover is small. |
| 1.0 in | 6-9 min total | 8-12 min total | Check 2 minutes before the low end. |
| 1.25-1.5 in | 9-14 min total | 12-22 min total | Use pull temperature, not color alone. |
| 1.75-2.0 in | Risky direct-only | 22-38 min total | Reverse sear or oven finish works better. |
| 2.5 in+ | Not ideal | 40-75 min total | Expect high carryover after searing. |
🔥Method and Sear Table
| Method | Heat path | Carryover tendency | Doneness note |
|---|---|---|---|
| Cast iron pan sear | High surface heat from both sides. | Moderate to high | Flip often for a smaller gray band. |
| Covered grill | Direct heat plus lid heat. | Moderate | Move thick steaks indirect after crust forms. |
| Pan plus oven finish | Crust first, center finishes gently. | High on thick cuts | Pull lower when oven heat is above 425 F. |
| Reverse sear | Gentle center cook, sear last. | Low to moderate | Best for thick steaks and exact doneness. |
| Broiler | Top-down radiant heat. | Moderate | Rotate if the top crust darkens early. |
| Air fryer | Strong airflow around the steak. | Moderate | Thin steaks can overshoot quickly. |
🔬Cut and Carryover Table
| Cut | Calculator bias | Carryover cue | Slice or serve note |
|---|---|---|---|
| Ribeye | Allows more sear time for fat rendering. | Higher because fat and thickness hold heat. | Rest well so rendered fat settles. |
| New York strip | Baseline timing for steakhouse cuts. | Moderate carryover. | Slice across the strip muscle. |
| Filet mignon | Shorter browning window, gentle center. | Moderate on thick filets. | Avoid overcooking lean edges. |
| Flank or skirt | Fast timing and lower carryover. | Low because pieces are thin. | Slice thinly across the grain. |
| Porterhouse | Bone and dual muscles add unevenness. | High near the bone. | Probe both strip and tenderloin sides. |
| Tomahawk | Thick-cut lag and high rest heat. | Very high after a hard sear. | Pull earlier and rest longer. |
📊Steak Doneness Comparison Grid
Fastest finish, lowest carryover need, and most sensitive to uneven pan heat.
Common steakhouse target with a warm center and enough sear time for crust.
Matches the common whole-steak safe minimum when paired with a 3-minute rest.
Needs a lower, steadier heat path so the outside does not dry before the center finishes.
🧾Quick Doneness Reference
💡Two Steak Timing Tips
A steak dinner isn’t determined by how much salt you add… Although you should of add plenty. It’s also not decided on by whether you have a good crust. What determines your steak? How long the meat has been in the center cooking. And most home cooks is off by seconds because they guessed at amount of time their steak takes.
Ribeye? It depends on your cut. Thick. Porterhouse? Thick. Filet mignon? Not so much. Enter the cut and thickness into the calculator above and it figure out the math for you. No longer do you have to guess whether to put your meat on grill for five minutes or fifteen. Get comfortabley with the numbers behind the numbers and become a steady cook instead of just a good one.
How to Cook the Perfect Steak
There’s one other variable that people overlook most: Thickness. Yes, all steaks is cut from the same animal, but a two-inch-thick tomahawk differs greatly from a half-inch skirt steak. When cooking a thin steak, the temp doesn’t change much once you remove it from the heat (negligible carryover), and it cook very fast. On the contrary, when cooking thick steaks, the outer inch or two retains tons of heat while the inner portion remain cold. Cooking them as you would thin pieces, high heat till thermometer = X, is going to result in burnt outsides long before the interior have warmed up. Thickness is the first thing you look at with the tool because it determines how long it take for heat to move from the crust to the center.
There’s also one other silent variable that influences the outcome: Carryover cooking. When you take the meat off the pan, its own leftover heat keeps it cooking. This shifts any remaining hot spots toward the cool center, adding another three to nine degrees (depending on which method or cut). Failure to consider this ensure overcooked meat. To compensate for carryover, the calculator recommends a lower pull temperature then the actual desired finished temp. For instance, if you desire a medium-rare steak, you’d want to pull it at 130-degrees; then it’ll reach the perfect 135 when it rests, thanks to carryover. If you let it rest until it reaches 135 on the grill, by the time it’s done, it’ll be all the way to 140 or more and therefore a medium steak. The difference between uniform pink versus warm-red is huge in terms of mouthfeel.
How long do you let it rest? And how do you cook a steak? Time is only part of the method. Direct, high-heat methods like a cast iron pan sear get the surface really hot but take longer for the interior to come up. Gentler methods, like the reverse sear, bring the interior up to temp first then crisp the outside at the finish. This results in a different spread of doneness across the steak. Pulling them earlier than listed in the direct heat reference table above is necessary, where gentler methods can be pulled later.
Flipping patterns matters too: Frequent flips even the temperature band more quickly (there’s less overcooked gray near the surface). Another move: Stand the steak on edge to render the fat cap for flavor without cooking the lean meat.
Take a little time out. Resting is not negotiable if you want something that tastes good. If you slice immediately, those beautiful juices won’t stay in the fibers. When you let it sit for five to ten minutes, the muscle fiber relax again and soak up some moisture. This finishes the carryover process as well.
This tool calculates the yield to give you an approximate idea of how much you’ll have left after cooking (useful if you’re planning on having people over). If you want to get a rough idea of what’s going to happen with shrinkage, weigh your steak before you cook it.
The best friend you have for this process is a thermometer. Don’t rely on visual cues; they will all tell different stories based off the seasoning and cut. The true test comes when you probe it from the side towards the center, the thickest part. Use the plan provided by the calculator but confirm with your senses. Think of the estimated time not as an alarm clock (that the steak will be done at the exact moment it goes off) but more like a starting point to begin testing early. Respect the heat and trust the process. Once cooked let the meat rest. This simple routine beat fancy equipment every time.