Sourdough Bread Proofing Time Calculator
Estimate sourdough bulk fermentation, final proof, and cold retard timing from dough temperature, room temperature, starter percentage, flour type, hydration, rise target, loaf size, salt, and proofing stage.
Pick a real bread schedule, then adjust the dough temperature, room temperature, starter percentage, hydration, flour, target rise, loaf size, salt, and cold retard.
Your Sourdough Proofing Window
Use these times as a guide, then confirm with dough volume, bubbles, strength, and jiggle.
Fermentation Breakdown
Timing Details
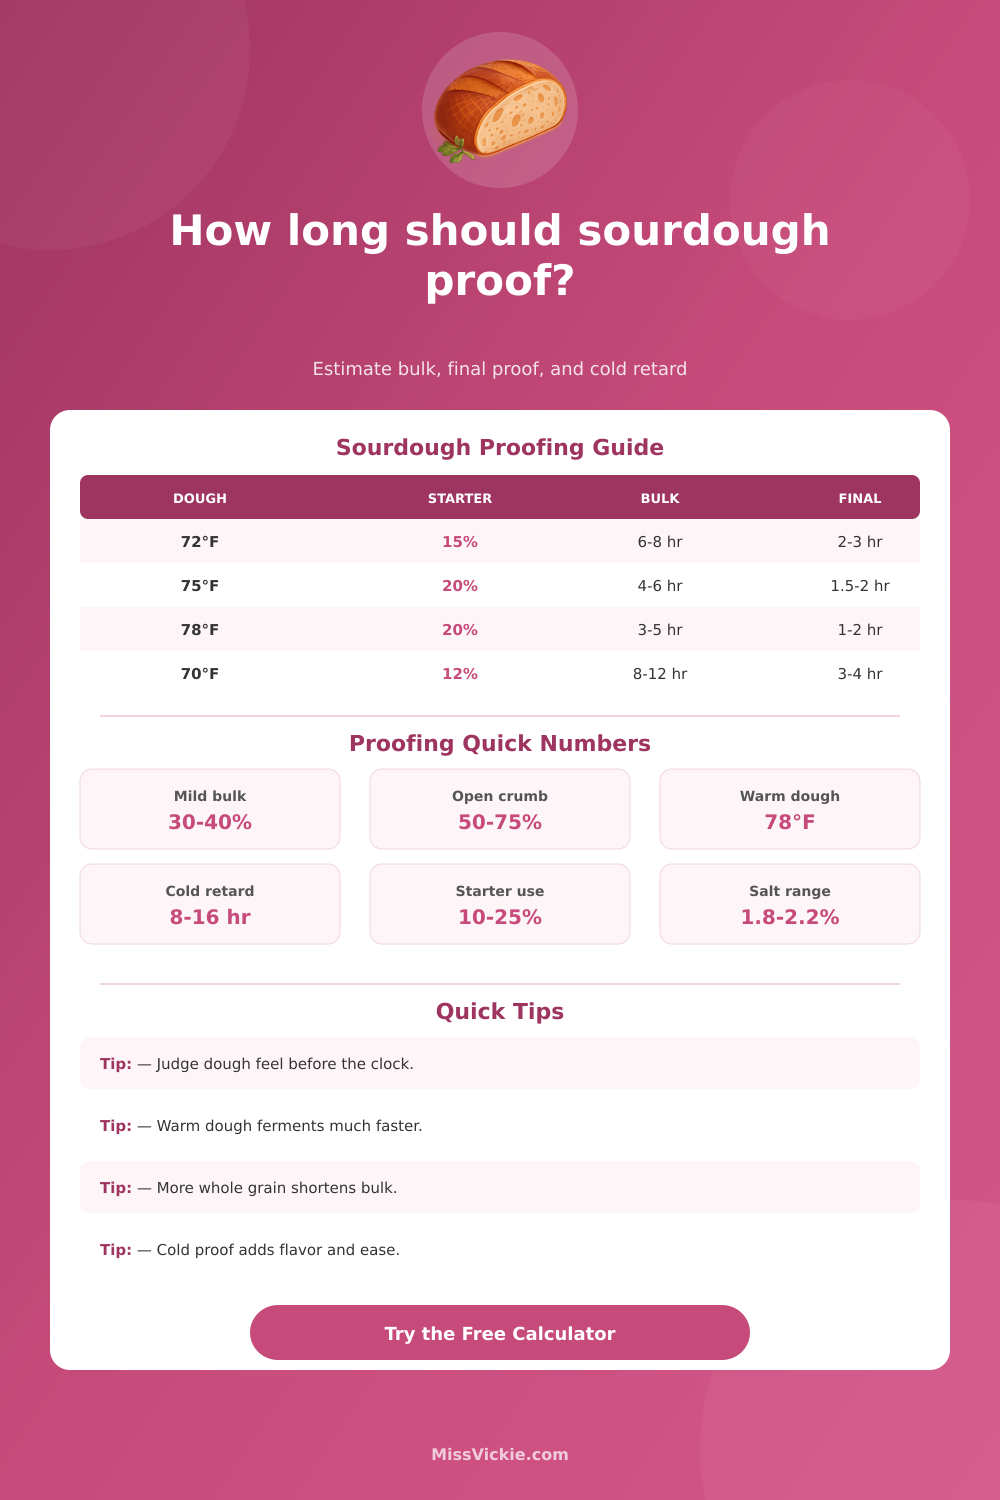
| Dough Temp | Typical Bulk | Best Use | Dough Clues |
|---|---|---|---|
| 68°F / 20°C | 8 to 12 hr | Cool, mild loaf | Slow bubbles, gentle rise |
| 72°F / 22°C | 6 to 8 hr | Balanced home schedule | Domed top, visible bubbles |
| 75°F / 24°C | 4.5 to 6 hr | Classic country loaf | Elastic, aerated, jiggly |
| 78°F / 26°C | 3.5 to 5 hr | Open crumb, warm dough | Fast rise, active edges |
| 82°F / 28°C | 2.5 to 4 hr | Fast same-day bread | Watch for slack dough |
These times assume a mature starter, about 20% starter, moderate salt, and a bulk rise target near 40% to 60%.
| Dough Style | Starter % | Hydration | Bulk Rise Target |
|---|---|---|---|
| White country loaf | 15% to 22% | 68% to 78% | 40% to 60% |
| Whole wheat blend | 12% to 20% | 78% to 88% | 30% to 50% |
| Rye or spelt blend | 10% to 18% | 75% to 90% | 25% to 45% |
| Pizza or focaccia | 10% to 20% | 70% to 85% | 50% to 90% |
| Enriched dough | 18% to 30% | 58% to 68% | 60% to 90% |
| Fridge Time | Fermentation Effect | Flavor Result | Bake Readiness |
|---|---|---|---|
| 0 to 2 hr | Almost none | Mildest flavor | Use warm proof time |
| 4 to 8 hr | Light slow proof | Noticeably tangy | Often needs final check |
| 8 to 16 hr | Moderate proof | Balanced acidity | Common bake window |
| 16 to 24 hr | Strong slow proof | More sour, crisp crust | Watch overproofing |
| 24 to 48 hr | Very slow proof | Deep flavor | Best for strong dough |
Look for rise, bubbles, smoother texture, and dough strength before shaping.
Short rest lets gluten loosen, making the final shape tighter and cleaner.
Proof after shaping until the dough slowly springs back from a gentle poke.
Chilled proofing slows yeast while acidity and aroma continue developing.
| Signal | Underproofed | Ready | Overproofed |
|---|---|---|---|
| Bulk volume | Little rise | Target reached | Too puffy |
| Surface | Dense, tight | Domed, bubbles | Slack, fragile |
| Poke test | Springs fast | Slow rebound | Dent stays |
| Bake result | Tight crumb | Even spring | Flat loaf |
Most sourdough failures occur on countertop, not the oven: You mix up ingredients based off your instincts, throw it into fridge, and pull out a collapsed loaf. Why? You guessed at time instead of calculating it.
There are 3 factors to sourdough fermentation… Mechanics, biology, and temperature, and it’s a chemical reaction. Guessing the time mean ignoring these variables; they’re what really matter. There is tools available to estimate final proofing, bulk fermentation, and even cold retard times. These tools rely on flour type, starter strength, and dough temperature, not vague guessing.
How to Calculate Sourdough Time
But the real kicker: Home bakers don’t pay attention to the actualy temperature of their dough. You’re a human being; your body knows what’s hot and cold, what’s comfortabley. Not yeast. Yeast doesn’t give a crap about what you feel. A seventy-degree kitchen isn’t the same as a seventy-five degree one. And if you mixed up your dough after letting your starter sit on counter for several hours, that’s even more pronounced. When your dough begin at a cooler temp, it ferments much slower then.
That’s where calculator comes in. After you plug in the numbers, it calculates rest for you. The tool saves you from guesswork that usually leads to overproofed loaves. It takes into account how fast your dough warm up or cools down compared to its surroundings. In other words, it provides you with a realistic time frame instead of an idealized one.
Starter percentage is an overlooked element of many recipes. Many recipes assumes a generic amount without considering activity level. Most don’t take into account your activity level. With regular feedings and a mature starter, a twenty percent hydration starter will peak as expected. But a weak starter take longer, since there are fewer microbe compared to the overall mass of flour. Here, adjusting the input for strength is essential.
Using a young starter or one that was skipped a feed result in a biological engine running at less than full throttle. To compensate, the tool adjust the estimated bulk time accordingly. That way, you won’t shape something that isn’t sufficiently gassed up to retain air during baking. Small tweak in the set-up, big difference in the baked result.
Then there are hydration and flour type. Bran particles in whole wheat flours actualy slice right through gluten strands. That weaken the structure quicker than white bread flour. Whole grain dough can’t be proofed for so long before the structure fail at holding air. The higher hydration means you have more stretchable dough. Meaning, yeast moves around liquid structure easier and therefore ferments faster. Yeast activity is also slowed down by salt. If you add even a half a percent more salt, it’ll slow it down a bit.
They all works together constantly. You cannot treat them independently because they affect each other every hour during the process. Scheduling flexibility and flavor control lead to cold retardation. To slow fermentation significantly, put shaped dough in fridge. This lets the acid develop slowly for up to 16 hours, which results in deep sour flavors you would of not get by warming to proof. How long should it be in there? Check out graph on the page which connects various fridge times to certain flavor profiles.
(It’s not all about convenience. It’s also about controlling the level of acid so the crust can crisp up correctly. You must also ensure the bread doesn’t become a dense brick. Even with some digital help, we still must read the dough. There is no machine that can know how jiggly it feel when it’s fully risen. No machine can detect the slight rise from a dome on its surface.
We use the calculated time as our starting point, but pay attention to what you’re seeing. Is it smooth? Elastic? Are there any bubbles running up sides? How does it react when you gently poke at it. Does it spring back quickly or slowly? Does it retain a dent? These are all visual clues, and while each batch of biology will differ slightly, trust yourself, rely as much on your eyes as you do on the inputs.
That’s how you learn sourdough: not by nailing down the precise minute, but learning to anticipate the ebb and flow of the fermentation process. And so when life happens, you can tweak accordingly.