🦆 MissVickie duck calculator
Roast Duck Cooking Time and Temperature Calculator
Balance breast and leg doneness, duck-fat rendering, score depth, and a crisp-skin finish so the bird lands juicy inside and glassy outside.
Each preset loads a real duck scenario, including bird style, score depth, drying window, and the finish that makes the skin crackle.
The model starts with weight, then adjusts for breed fatness, score depth, air-dry hours, cavity fill, and the crisping method you choose.
The calculator converts everything internally, then balances the breast and leg targets against fat rendering, score depth, and crisp-skin finish time.
These cards compare the most common duck roast paths, so you can see how fat, skin, and finish method change the clock.
Breast and leg pull on different tracks.
Shorter cook with a stronger skin finish.
Needs more heat to soften connective tissue.
Already rendered, so skin crackle is the goal.
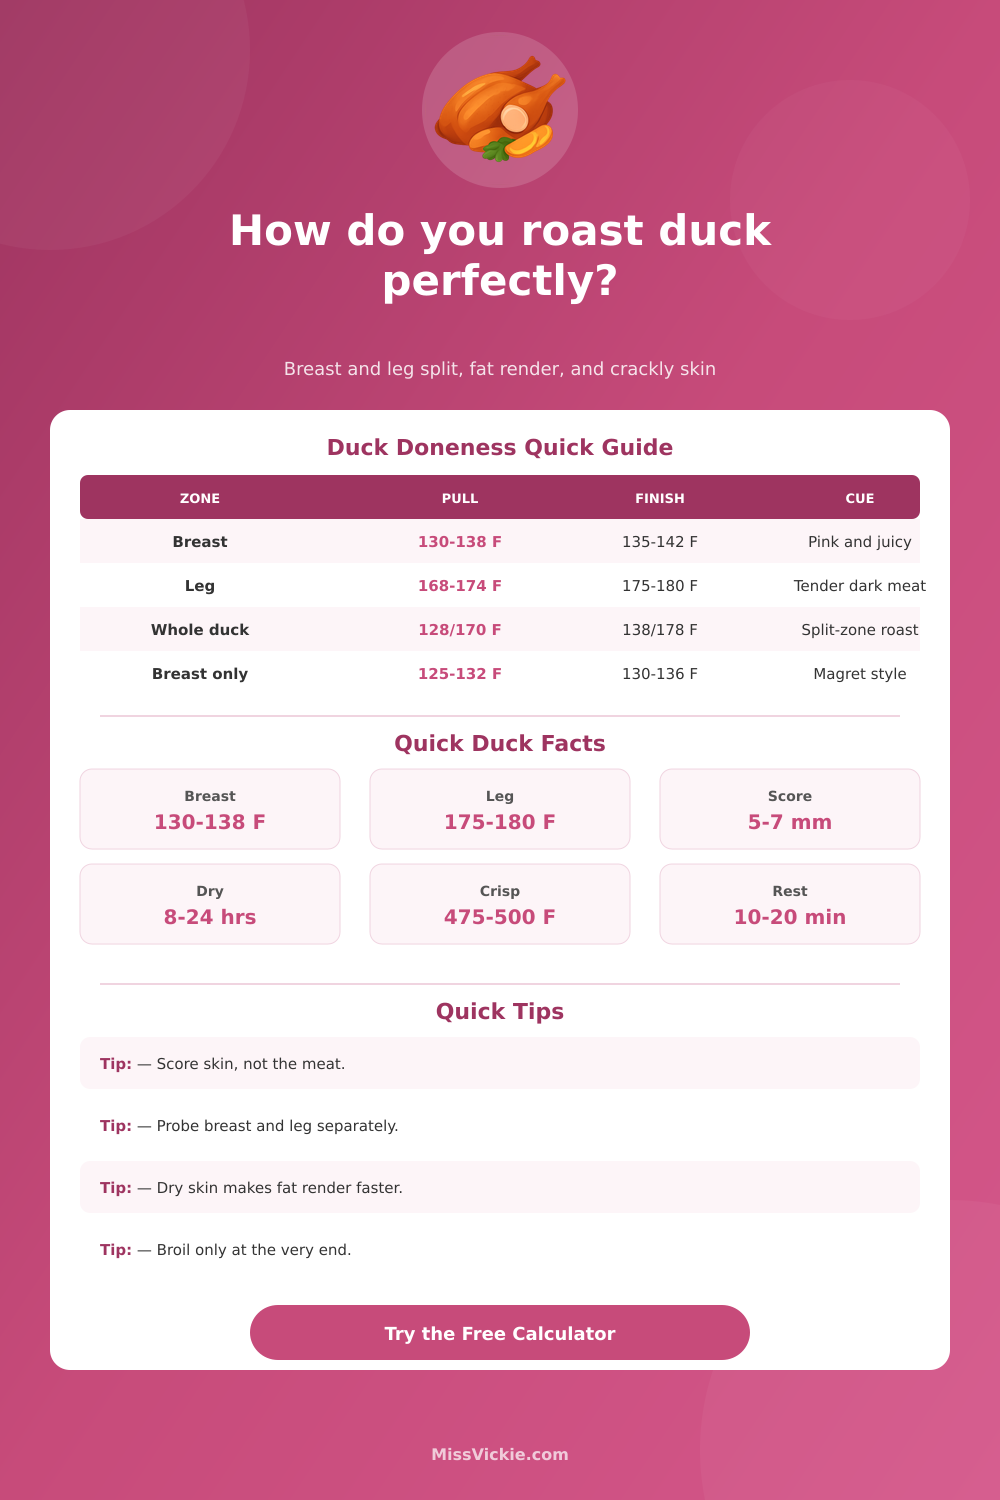
| Zone | Pull | Finish | Meaning |
|---|---|---|---|
| Breast | 130-138 F | 135-142 F | Pink and juicy |
| Leg | 168-174 F | 175-180 F | Dark meat softens |
| Whole duck | 128/170 F | 138/178 F | Split finish zones |
| Duck breast | 125-132 F | 130-136 F | Magret style |
| Fat stage | Temp | Cue | Result |
|---|---|---|---|
| Soft skin | 120-130 F | Beads appear | Fat starts to move |
| Active render | 135-145 F | Fat runs | Good mid-roast zone |
| Gold render | 150-160 F | Skin glows | Ready for a crisp finish |
| Lacquer set | 165-175 F | Skin crackles | Best end point |
| Score depth | Depth | Effect | Best use |
|---|---|---|---|
| Shallow | 1-2 mm | Slower render | Leaner birds |
| Standard | 3-4 mm | Balanced | Most whole ducks |
| Deep | 5-6 mm | Faster render | Fatty roasts |
| Extra deep | 7-8 mm | Fastest crisp | Watch dryness |
| Finish | Temp | Time | Best for |
|---|---|---|---|
| Oven blast | 475 F | 6-10 min | Whole duck |
| Broiler | 500 F | 2-5 min | Quick skin set |
| Cast iron | 450 F | 4-7 min | Duck breast |
| Air crisp | 430 F | 8-12 min | Small duck pieces |
The best duck finish uses good airflow, a probe, and a tray that keeps the rendered fat away from the skin while it crisps.
Roasting a whole duck is an technical process due to teh fact that a whole duck contains a large amount of subcutaneous fat. The subcutaneous fat must be allowed to melt and evaporate during the roasting process; otherwise, the skin wont become crispy. Additionally, duck meat contain two different types of meat.
The duck breast muscles contain lean meat while the duck legs contains dark meat. The dark meat in the legs require higher temperatures to break down the proteins more better compared to the duck breast. Thus, if a duck is roasted using the same method as a chicken, the duck skin will become rubbery and the duck meat will become dry.
How to Roast a Duck So the Skin Is Crispy and the Meat Is Juicy
The cook must score the skin of the duck prior to roasting. Scoring the skin allow the subcutaneous fat to escape from under the skin. If the duck skin isnt scored, the fat will act as an insulator to the meat, preventing the meat from cook.
Additionally, the fat can render more efficient if it can escape from the body of the duck. Air drying the duck is a necessary step in the duck roasting process. Air drying the duck remove moisture from the skin of the duck.
The duck should be uncovered in a refrigerator for one to two day. If the duck skin is dry, the water within the skin will easily evaporate in the oven. The quicker the water evaporates, the faster the subcutaneous fat will render.
Additionally, dry skin will become crispy when roasted while wet skin will not. The breed of the duck can impact the methods in which the duck is to be roasted. Duck breeds that contains a high amount of subcutaneous fat, such as Moulard ducks, require longer periods of heat to render the fat as compare to lean breeds like Muscovy ducks.
Additionally, ducks that contain little subcutaneous fat, such as wild ducks, will cook faster than commercial duck breed. If a cook cooks a wild duck for the same length of time as a commercial duck, the wild duck will become dry. The internal temperature of the duck must be monitored.
Additionally, the method account for the carryover cooking of the duck. Carryover cooking is when the internal temperature of the duck continue to rise after the duck is removed from the oven. Thus, you should not wait for cooking the duck to the target temperature; the temperature will continue to rise after removal from the oven.
Additionally, the duck breast is more sensitive to temperature than the duck legs. A roasting rack should be used to roast the duck. Placing the duck on a roasting rack allow the duck to be elevated above the pan in which the duck would otherwise sit.
If the duck is placed on the baking pan, the leg of the duck will become soggy. Additionally, placing the duck on a rack allow for even circulation of hot air around the duck, which will lead to crispy skin. After the duck is roasted, the duck should be allowed to rest for fifteen to twenty minute prior to carving.
If the duck is carved while hot, the juices will leave the duck meat and the duck meat will become dry. Allowing the duck to rest permit for the meat to relax and for the juices to redistribute within the duck meat. Additionally, the carryover cooking that occurs while the duck is resting will reach its peak during this resting period, which allow the duck breast to reach its target temperature.
Roasting a duck involve the management of moisture and fat in the duck. Air drying the duck removes moisture from the duck and scoring the skin prior to roasting the duck removes fat from under the duck skin. Additionally, the cook monitors the internal temperatures of both the duck legs and breast to ensure that the duck meat does not become dry.
Thus, if the moisture and fat within the duck are managed correctly, the duck skin will become crispy and the duck meat will become juicy.