Ribs Oven Cooking Time Calculator
Estimate oven ribs by rack type, rack size, oven temperature, foil coverage, dry rub style, sauce timing, broiler finish, tenderness target, rack count, pan setup, and rest.
📌Oven rib presets
Choose a common oven rib plan, then tune the rack count, foil cover, rub, sauce, tenderness, and rest. This calculator is built around covered oven cooking and a final sauce set, not smoker stall timing.
⚙Oven rib inputs
Run the calculator for an oven rib plan.
Covered bake, uncovered set, sauce timing, broil, and rest will appear here.
Timing breakdown
Cooking targets
🍖Serving and yield quick cards
📋Oven rib timing table
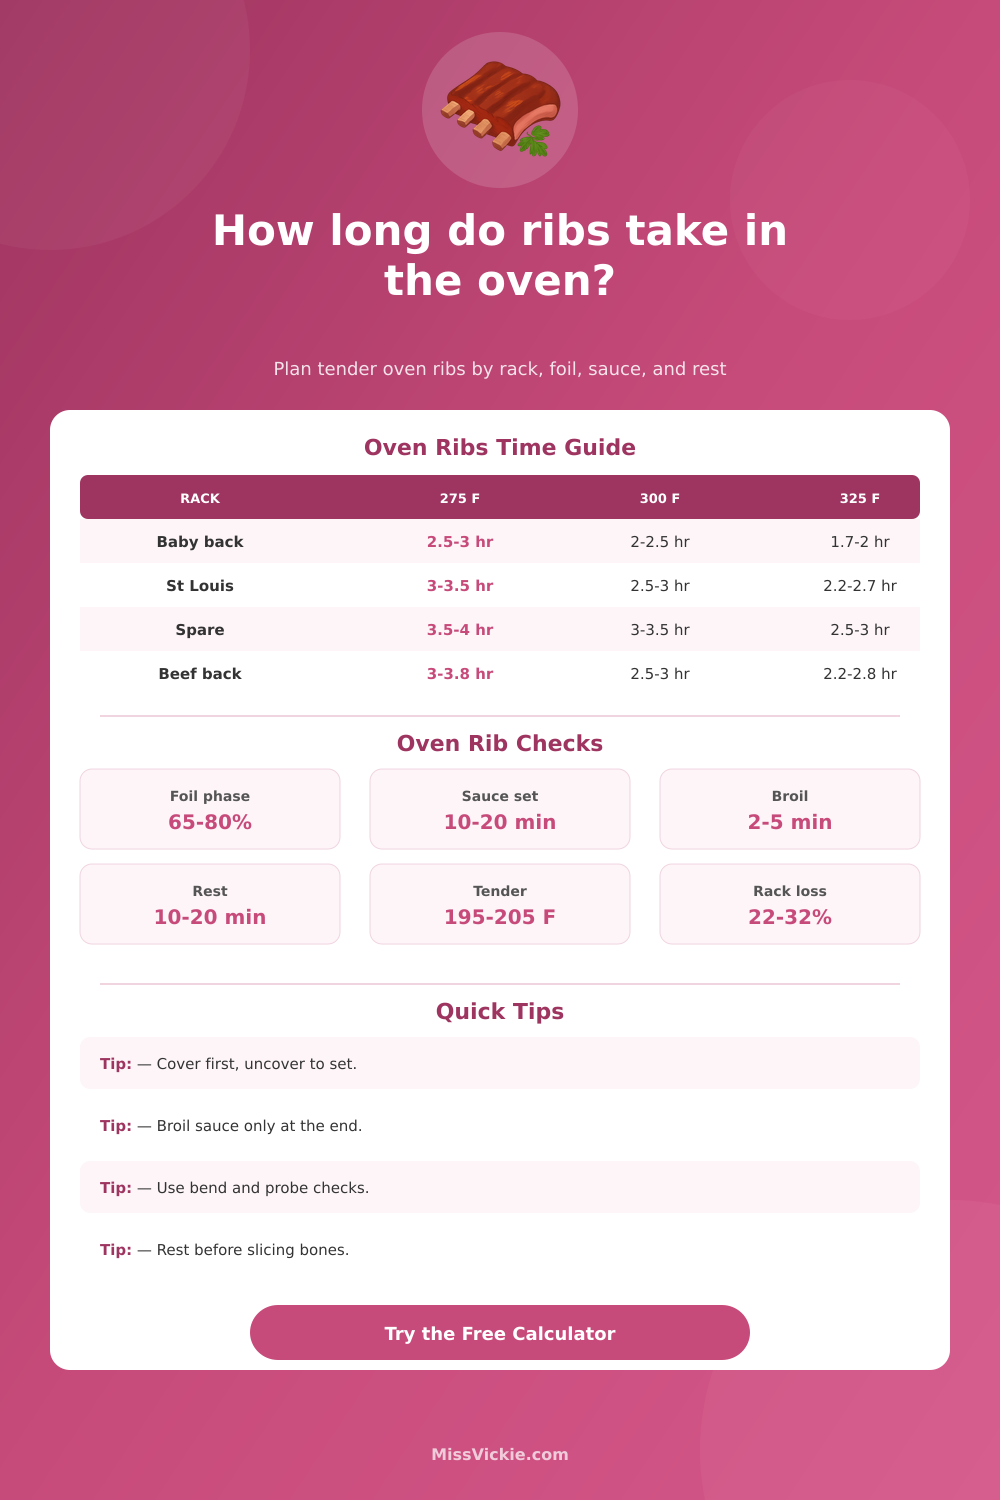
| Rack type | Typical weight | 275 F oven | 300 F oven | 325 F oven |
|---|---|---|---|---|
| Baby back pork ribs | 1.75 to 2.75 lb per rack | 2.5 to 3 hours | 2 to 2.5 hours | 1.7 to 2.2 hours |
| St Louis cut ribs | 2.5 to 3.5 lb per rack | 3 to 3.5 hours | 2.5 to 3 hours | 2.2 to 2.7 hours |
| Whole spare ribs | 3.25 to 4.5 lb per rack | 3.5 to 4.25 hours | 3 to 3.5 hours | 2.5 to 3.1 hours |
| Beef back ribs | 2.5 to 4.5 lb per rack | 3 to 3.75 hours | 2.5 to 3.25 hours | 2.2 to 2.8 hours |
| Country-style ribs | 1.5 to 3 lb per pan | 2.25 to 3 hours | 1.8 to 2.5 hours | 1.5 to 2.1 hours |
Table times assume a covered first phase and an uncovered finish. The calculator adjusts for rack count, foil seal, sauce, broiler use, pan depth, and starting temperature.
🔥Foil, sauce, and broil comparison
| Method | What it changes | Best use | Timing note |
|---|---|---|---|
| Tightly covered foil | Fastest tenderizing and moistest bite | Baby back, St Louis, fall-off-bone ribs | Use most of the cook covered, then uncover to dry the surface. |
| Foil boat | Protects juices while keeping top bark exposed | Dry rub ribs with a little chew | Adds time compared with a sealed packet. |
| Uncovered whole time | Drier surface, firmer bark, slower collagen softening | Peppery rubs and sauceless ribs | Needs lower heat or careful basting. |
| Sauce in last 20 minutes | Sets glaze without burning sugar | Classic sticky oven ribs | Brush thinly and keep the oven moderate. |
| Broil finish | Blisters sauce and caramelizes edges | Glazed ribs served right away | Watch constantly; sugar can burn quickly. |
🧂Rub and tenderness table
| Choice | Calculator effect | Kitchen cue | Watch point |
|---|---|---|---|
| Heavy sugar rub | Shortens broil and raises burn alert | Glossy mahogany edges | Keep sauce and broil late. |
| Peppery low-sugar rub | Allows longer uncovered drying | Set crust with clean spice aroma | Do not dry out lean baby backs. |
| Overnight dry brine | Improves seasoning and slightly firms texture | Surface looks tacky before baking | Reduce added salty sauce. |
| Clean bite tender | Balanced bend with bones still attached | Rack bends and surface cracks lightly | Pull before meat collapses. |
| Fall-off-the-bone | Adds covered time and rest protection | Bones twist with little resistance | Slice gently after resting. |
📊Oven ribs comparison grid
Lean, curved, and tender sooner. Best for weeknight oven ribs with a covered packet and short sauce set.
Meatier and flatter than baby backs. Handles sticky sauce and a final broil very well.
More cartilage and fat need a longer covered bake. Great for low oven heat and soft tenderness.
Cook by tenderness more than color. They can need extra time even when the surface looks done.
✨Oven rib tips
There is a certain point when ribs will be done, that is to say, tender, which you can check using thermometer and by seeing if they bends slightly when lifted. While staring at the oven, how do you know whether ribs require additional time, or perhaps less? Maintaining both temperature and moisture are critical factors in determining tough versus tender rib meat; timing by itself doesn’t tell the whole story. If the connective tissue hasn’t broken down, no amount of well-rubbed flavor will escape the meat.
So I made a calculator that takes these variables (rack type, oven temp, covering style) and spits out a time table. It distills a very complicated set of variables down to an easy-to-follow schedule. The thing is: most folks does this all at once, which isn’t actualy the best way to cook ribs.
How to Cook Ribs Perfectly
Ribs are cooked in three different stages. Stage 1 is tenderizing the meat. You use low temperatures plus moist conditions to break down collagen. Stage 2 is drying the surface. This allow the sauce to adhere to the meat. Stage 3 is finishing the ribs. Here’s where the sauce really caramelizes, and we crank up the heat.
Skip stage 1 and the ribs gets tough. Skip stage 2 and the sauce slides right off. The foil also changes way the ribs cook; it holds in steam so the food is cooked in a sort of mini pressure cooker where the heat energy get pushed right into the fibers of meat. But if you leave them wrapped to long, then they end up with a pale, boiled texture different than that appealing roasted bark.
By using this tool, you can adjust your time depending on whether you use loose tented foil or tight foil or even no foil at all. If you don’t have any foil, the ribs will develop color quicker but will require more time to get those hard bits of cartilage soft. Also, beef ribs require more time (they’re denser) while baby backs (which are leaner) cooks up quicker.
The key: Pick your temperature and go from there. If you’re patient, use 275 degrees Fahrenheit to give yourself a bit more wiggle room. Use 325 degrees Fahrenheit to shorten overall cooking time, but be prepared to risk overcooking the outside before the center is done.
The calculator asks whether you’ll be using multiple racks in your oven. Each time you open the oven door to crowd in extra food, the interior temp drop. If several racks are releasing moisture at the same time, that moisture will trap steam, which can affect the rate of drying on the surface later on.
If you rush things, you’ll ruin it. When ribs are still hot, cutting them will cause their juices to flow all over your cutting board, not back into the meat. Letting the ribs rest 15-20 minutes relaxes the protein and lets those juices soak back in. It also gives sauce time to settle. If you let the glazed ribs cool a bit, they will look more attractive because the sugar will solidify instead of dripping.
Weight and bone structure alter baseline cooking times, as shown in the table on this page. Country style ribs are loin meat rather than back ribs, so they does not take as long to cook, though they do require attention. A thermometer is useful, but remember that tenderness matter more than temperature. About 195 degrees Fahrenheit on a meat thermometer is what you’re aiming for with pork ribs, when all the collagen will have dissolved.
Bendy, yes? That’s good! You can slide a probe around without much trouble. Yep. Done. There’s no substitute for finger checking; math isn’t going to do it for you. The calculator puts you near getting the timing correct… But your taste buds tells you whether or not it’s finished.
Respect the heat, trust the process and let ‘er bend before you slice. Dinner becomes less stressful and something you can turn into a tradition.