Reverse Sear Steak Calculator
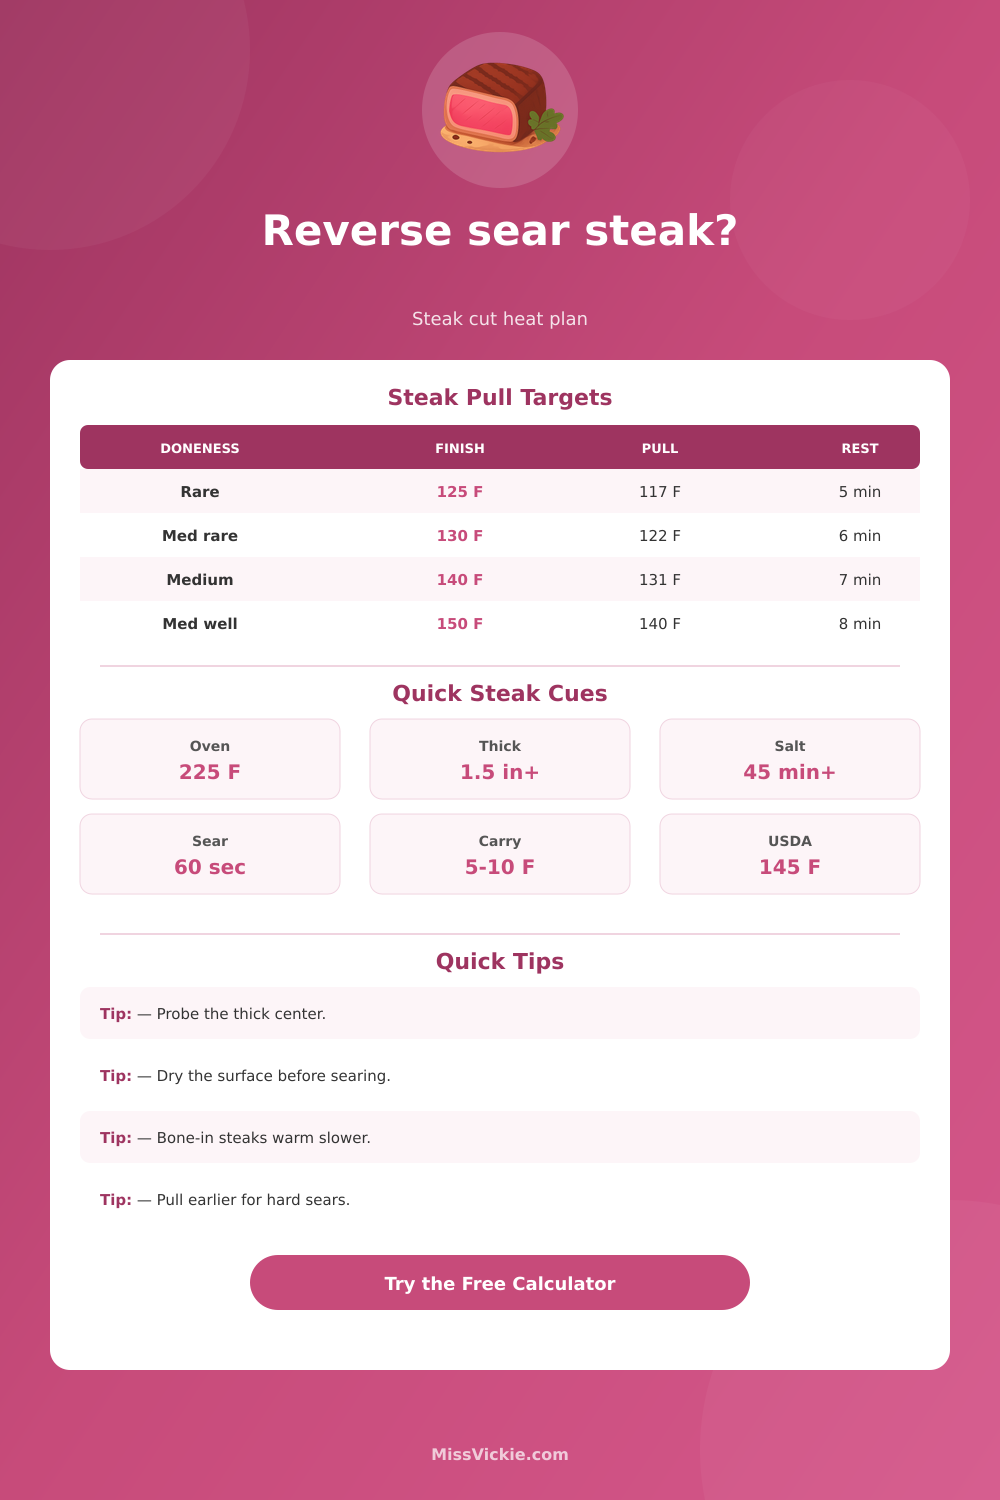
Estimate the low oven time, pull temperature, sear window, carryover, rest, and salting schedule for thick steak using cut, thickness, bone, marbling, starting temperature, and doneness.
🔥Steak reverse sear presets
Pick a common steak setup, then adjust the cut, thickness, bone-in status, marbling, salting time, oven temperature, and sear surface to match your actual steak.
⚖Units
🥩Steak cut, size, bone, and marbling
🌡Starting temp, oven temp, doneness, and salting
🍳Pull temp, sear surface, carryover, and rest
Your steak reverse sear plan
Steak timing breakdown
Use a food thermometer and choose your own steak doneness risk tolerance.
📏Steak thickness and oven timing reference
| Thickness | Best use | 225°F oven cue | Reverse sear note |
|---|---|---|---|
| 1.0 in | Fast weeknight steaks | Check very early | Reverse sear can work, but the sear may overcook the center quickly. |
| 1.25 in | Strip, sirloin, ribeye | Often 25 to 40 min | Use a quick sear and a lower carryover estimate. |
| 1.5 in | Ideal thick steak | Often 35 to 55 min | Good balance of even center and crust control. |
| 2.0 in | Filet, porterhouse, ribeye | Often 50 to 80 min | Probe from the side and pull before the target to allow carryover. |
| 2.5 in+ | Tomahawk or steakhouse cut | Often 70 to 110 min | Bone and thickness dominate timing; verify in several spots. |
🧂Salting and surface prep reference
Season right before cooking or wait longer; this window can draw surface moisture.
Salt has time to dissolve and move inward while the surface starts to dry again.
Dry brining seasons more evenly and helps the steak brown faster in the sear.
About 1 percent salt by steak weight is a common dry-brine starting point.
🔥Sear surface guide
| Sear surface | Typical time | Carryover effect | Best steak match |
|---|---|---|---|
| Cast iron skillet | 45 to 75 sec per side | Moderate to high | Ribeye, strip, filet, sirloin, Denver. |
| Carbon steel pan | 40 to 70 sec per side | Moderate | Strip, filet, flat iron, thin picanha steaks. |
| Heavy stainless pan | 50 to 80 sec per side | Moderate | Lean cuts when you want fond for a pan sauce. |
| Hot grill grates | 60 to 95 sec per side | Lower center rise | Bone-in ribeye, porterhouse, tomahawk. |
| Plancha or flat top | 50 to 85 sec per side | Moderate | Picanha, sirloin, ribeye, steakhouse batches. |
| Broiler finish | 90 to 150 sec per side | Gentler rise | Very thick steaks when pan space is limited. |
📚Cut-specific reverse sear notes
| Cut | Typical thickness | Pull strategy | Sear focus |
|---|---|---|---|
| Ribeye | 1.25 to 2 in | Pull earlier when heavily marbled because fat holds heat. | Render the fat edge and brown both faces hard. |
| New York strip | 1.25 to 1.75 in | Moderate carryover is usually enough. | Start fat-side down briefly if the edge is thick. |
| Filet mignon | 1.75 to 2.5 in | Thickness matters more than weight. | Quick, even browning protects the tender center. |
| Porterhouse | 1.5 to 2.5 in | Probe the strip side and tenderloin side separately. | Move the tenderloin away from the hottest zone. |
| Tomahawk | 2 to 3 in | Expect a longer low-heat phase and extra carryover. | Sear faces, then roll the fat cap and edges. |
| Picanha steak | 1.25 to 2 in | Fat cap slows heating and boosts carryover. | Render fat cap carefully before searing faces. |
💡Steak calculation notes
Probe placement changes everything. Insert from the side into the thickest center, away from bone, large fat pockets, and the pan-facing edge.
Pull temp is not the final temp. The calculator subtracts carryover and sear rise from your target so the steak can climb during browning and rest.
It’s based on a simple premise: Cook the steak slowly from the inside-out first, then finish it quick on a blazing-hot surface for a fast, final sear called “reverse searing.” Because the exterior stays intact while the interior has time to cook through to perfection without browning or turning gray, it’s an ideal technique for thick steak. It also allows you to control the process of continued cooking, when your steak keep cooking slightly longer even off the heat.
In truth, most thick-steak-challenged home cooks aren’t battling taste; they’re battling mismatched timing. A 2-inch thick steak is different than a 1.5-inch one. It take longer for heat to reach middle of a 2-inch steak than a 1.5-inch one. Marbling and bone also has an impact. Fat will hold onto heat longer after it’s seared, but bone will slow down the warming process around the joint.
How to Cook Thick Steak Perfectly
Enter the starting temperature, cut thickness, and cut type into the calculator above; it will do the math for you so you know exactly when to start pulling meat out. It’s true what you’ve heard: Starting temp is more important than you think; a refrigerator-cold steak takes longer than one that’s been sitting out for thirty minutes. It will start to show up during the low-heat phase, when even a slightly cool center might add ten or fifteen minutes. A lot of cooks don’t realize how much tempering their steaks help the total timing, not just the flavor.
There are two kinds of salting. One is fast, which is a quick sprinkle just before cooking. The other is slow, where a longer dry brine draws out some moisture and lets it back in as a drier outer layer that browns more quickly. Because those timing decisions affect how aggressively you’ll want to sear later, the calculator requests your salting window.
That’s when it gets to the real tradeoffs of cast iron, which sears very well on top of itself, forming a quick, deep crust, but also conducts more heat through the item. Hard searing requires pulling the food sooner to improve the texture. Grill grates conduct heat different. They typically imparts less carryover. Gentler searing provides a bigger margin of error, but it risks leaving the outside less crisp. These are the nuances this tool helps you quantify, without having to remember all the variables.
After searing, let it rest until internal heat stabilizes. Which retains the juices as you cut into it. This could take anywhere from just a few minutes for most steaks to several more on a warm platter. It depends on how hot the outside got and how thick steak is.
Why are there safety references? Because there’s still room for personal preference in kitchen of the home cook. Depending on your sense of comfort with a little extra margin (or not), decide which end of the typical whole-beef reference point is right for you. Remember: There’s no substitute for a thermometer to be sure it’s done.
Separating the two tasks in the cook is what makes the method shine, and the low-heat approach cooks from within while the sear takes care of the outside. Once you understand how size, thickness, and starting temperature affect the timing, the whole thing becomes less of a matter of luck and more something that could of been repeated.