
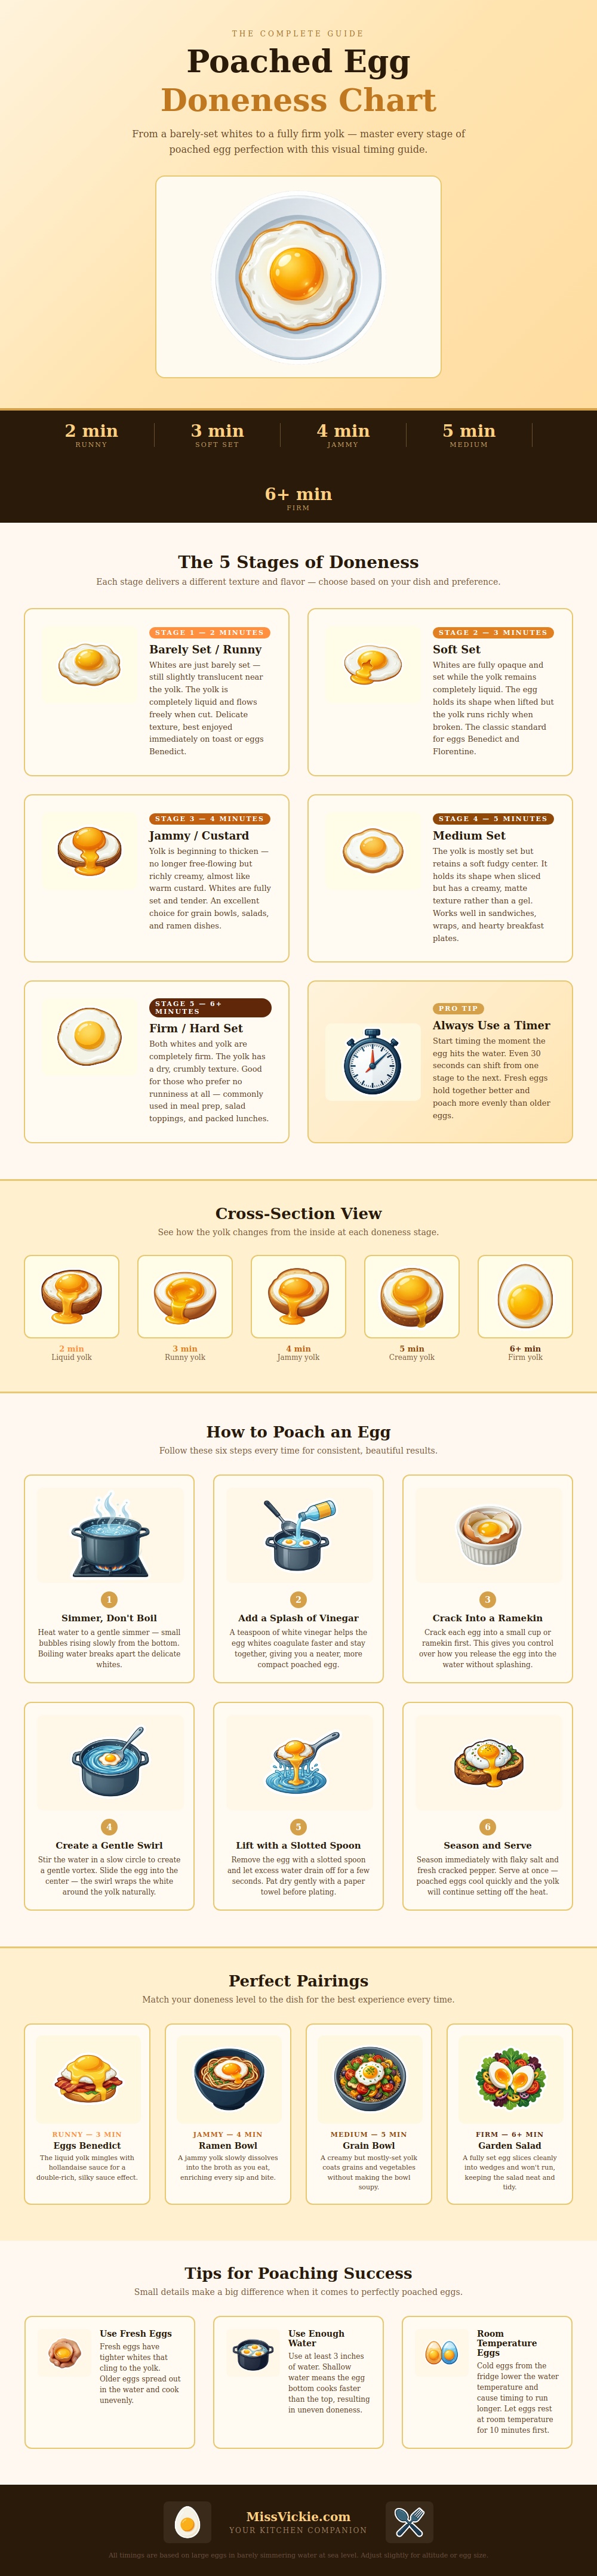
To poach an egg, crack it into small ramekin first and then slide it into a pot of simmering water and let it cook until it has set. Too soon, and you’ll be left with no shape; too late, and it will be rubbery. It can be as little as thirty seconds either way.
That’s what makes it tricky, but that’s also why visual references (like the chart above) work. In this case, they help turn a process that varies from time to time into one you can reliably repeat. Heat isn’t everything: poaching also depends on structure. To trap yolk inside, the whites needs to firm up fast enough to form a barrier around it.
How Long to Poach an Egg
After two minutes, the whites are just starting to solidify but still look slightly translucent next to the yolk. Serve immediately… No later; because this is a delicate stage that doesn’t hold up well during busy breakfast hours. For best results, enjoy at your convenience, giving runny yolk time to combine with sauce or toast.
We consider three minutes to be normal, as most classic recipes define it. When we scoop out an egg using a slotted spoon, it come away intact. When we cut into the top, the whites are solid but not rubbery and entirely opaque, yet the yolk is still runny inside a firm shell of cooked white. It is heavy enough to support an English muffin and works well for eggs benedict; this make it the standard consistency. With a soft white exterior and gooey center, it has a full mouth feel but isn’t sloppy.
Four minutes later, the yolk turn into a thick custard. It is no longer free-flowing, but has reached a jammy consistency. This is the right stage of a thickened yolk. It ensures your shirt stay stain-free while maintaining some of the richness. It is perfect for pouring over top of grain bowl or even ramen where you want the yolk to dissolve slowly in your hot broth. It adds more flavor without making the dish soupy, and the yolk makes everything richer.
At five minutes, the yolk is mostly set but still soft and fudgy in the middle. Slices well and keeps its shape, so perfect for wraps or sandwiches. Structure matter here, nobody wants to eat a sandwich that spills out on their first bite.
At six minutes and up, the eggs are fully firm. Yolk is dry and pale yellow. Neat and tidy, this texture is great for salads or meal prepping. No slipping slice of egg off your greens!
There’s a technique to this timing game too. It’s not a rolling boil but more like a gentle simmer in a deep pot of water. If the water’s too violent, it will tear the egg apart while it is still setting. The addition of vinegar also make the proteins coagulate more quickly, resulting in a neat-looking egg.
Crack the egg into small ramekin beforehand so that you can slip it gently into the water. Hurling the egg down from above will cause it to break up and splash. Making a whirlpool in the water helps white naturaly wrap around the yolk.
Another factor is that freshness matters. The whites of older eggs will be thinner and spread out in the water, resulting in a ragged edge. The protein structure of fresh eggs are tighter and holds them together well. Poachers who let eggs warm up a bit (ten minutes at room temperature) before they drop into the water say it reduces uneven cooking due to cold shock. If you can manage all the variables, then the timer work better.
Learning to make poached eggs is learning what happens when you cook protein with heat for varying periods of time. Once it changes from liquid to soft and then to solid, we stop guessing. That’s when it becomes a decision. Have an idea of what you’d like it to be like on your plate before starting out. Make it on purpose and suddenly a casual breakfast becomes a fulfilling meal.
Do you want it to burst onto the plate runny? Or do you prefer a firmer slice? It all comes down to managing the amount of time and heat involved.