Poached Chicken Breast Time Calculator
Estimate gentle poaching time for boneless chicken breasts from thickness, weight, piece count, starting temperature, water or stock temperature, simmer or off-heat method, pot crowding, target internal temperature, rest time, and slicing or shredding use.
🍗Poached chicken presets
Choose a common poaching setup, then adjust the actual breast thickness, liquid heat, pot fit, final temperature, rest, and serving use.
⚖Units
📏Chicken breast size and starting temperature
🍲Poaching liquid, method, pot crowding, and use
Poaching estimate
Use a thermometer to confirm doneness.
Poaching breakdown
🌡Safe temperature and texture reference
Use the thickest center of the largest breast.
Gentle poaching keeps the outside from tightening.
Resting helps juices settle before slicing.
Cool leftovers promptly after cooking.
📋Thickness timing table
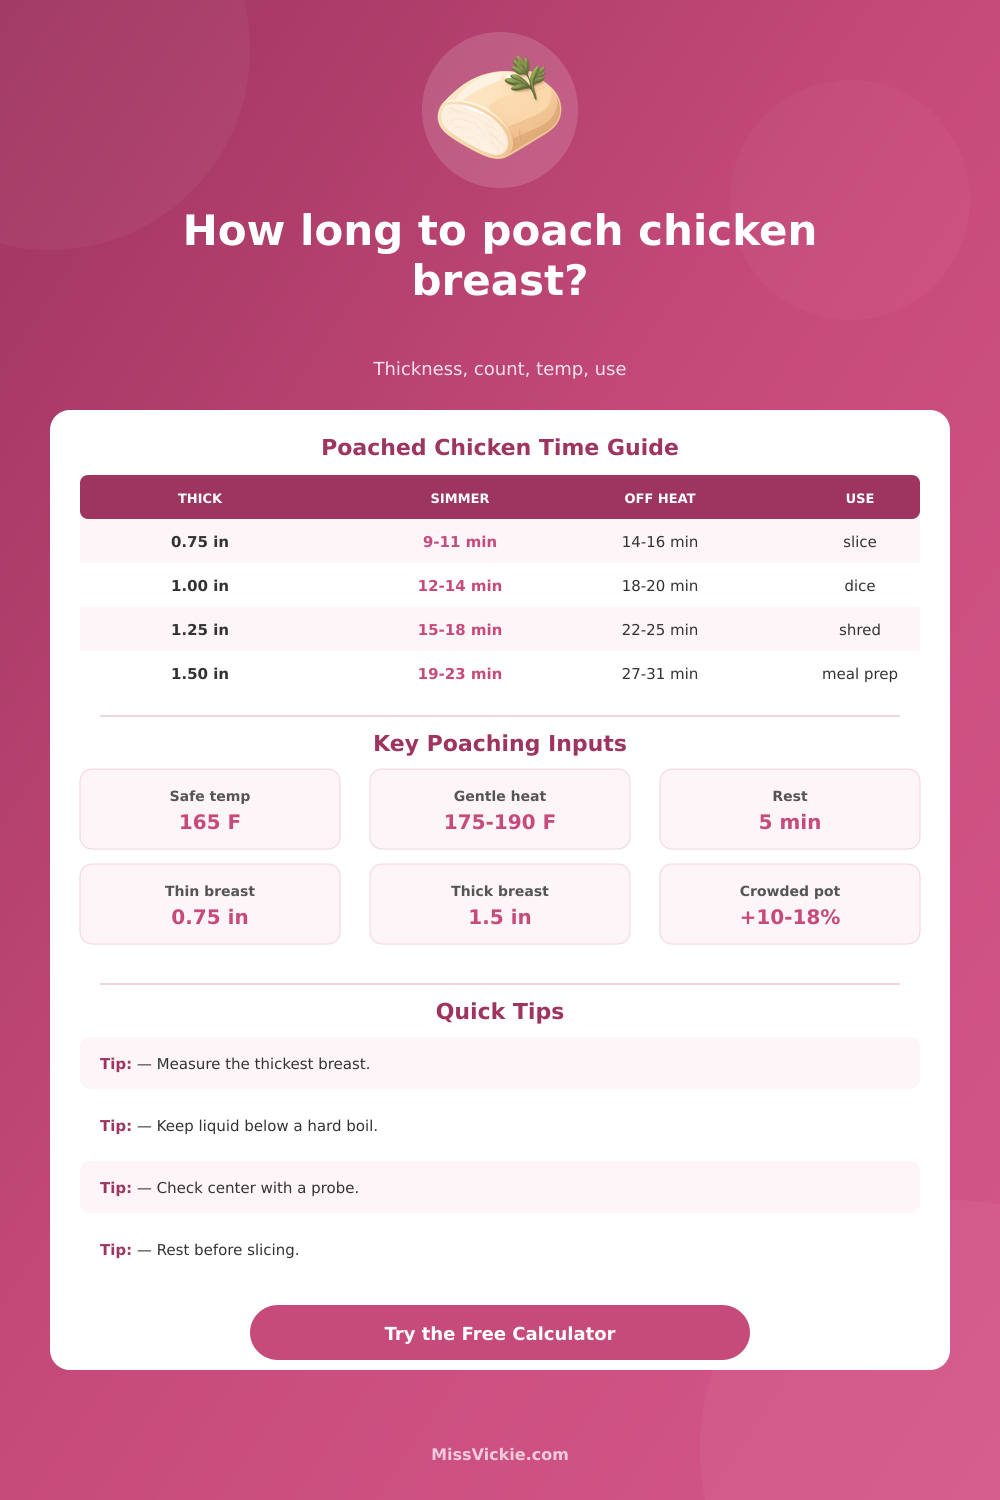
| Breast thickness | Typical weight | Gentle simmer estimate | Off-heat covered estimate | Best use |
|---|---|---|---|---|
| 0.5 to 0.75 inch thin cutlet | 3 to 5 oz each | 7 to 11 minutes | 12 to 16 minutes | Slicing, quick salads, rice bowls |
| 0.9 to 1.1 inch standard breast | 6 to 8 oz each | 12 to 15 minutes | 18 to 21 minutes | Dicing, sandwiches, dinner plates |
| 1.2 to 1.4 inch large breast | 9 to 11 oz each | 16 to 20 minutes | 23 to 28 minutes | Meal prep, larger slices, shredding |
| 1.5 to 1.8 inch very thick breast | 12 to 16 oz each | 21 to 28 minutes | 29 to 36 minutes | Shredding, casseroles, soup meat |
🔥Method adjustment table
| Poaching setup | Liquid behavior | Timing effect | Texture effect | What to watch |
|---|---|---|---|---|
| Gentle simmer | Small bubbles around edges | Baseline timing | Tender if not boiled hard | Keep liquid under a rolling boil. |
| Bare simmer | Occasional lazy bubbles | Add about 8 percent | Very tender outside | Check that the center keeps warming. |
| Boil then off heat | Covered residual heat | Add about 35 percent | Moist and even when covered | Use a heavy pot and keep lid closed. |
| Rapid simmer | Active bubbling | Shortens time slightly | Outside can turn stringy | Lower the heat if bubbles are strong. |
🍴Serving use guide
| Final use | Suggested finish | Rest or chill | Texture note | Handling note |
|---|---|---|---|---|
| Sliced dinner breast | Pull at target temperature | Rest 5 minutes | Juicy slices need a short rest. | Slice across the grain. |
| Diced salad chicken | Cook through, avoid boiling | Cool before dicing | Clean cubes come from chilled meat. | Refrigerate promptly after cooling. |
| Shredded chicken | Use a longer gentle finish | Rest 8 to 10 minutes | Warm meat shreds more easily. | Reserve a little poaching liquid. |
| Meal prep | Cook to safe center temp | Cool in shallow containers | Slightly firmer texture reheats well. | Chill within the food-safe window. |
💡Poaching calculation tips
Measure thickness, not just weight. A 7-ounce breast that is flat may finish before a 7-ounce breast with a tall thick end, so enter the thickest center measurement.
Use the thermometer as the final call. The calculator estimates timing, but chicken breast safety and texture depend on the thickest center actually reaching the target internal temperature.
Keep the poach gentle. A hard boil can make lean breast meat tighten before the center is ready, especially with thin edges and a thick middle.
Plan the finish around the use. Slice rested breasts while warm, shred while warm with a splash of poaching liquid, or chill before dicing for salads.
To prevent dryness caused by higher heat-cooking methods, you simply poach your chicken breasts to retain their juicy tenderness. Timing here become an issue. Thickness matter for texture. The temperature from fridge also plays a role. Even how long a prior batch took can affect it more then you’d think.
Think about which factors matter: thickness is more important than weight, as the thicker piece will take longer no matter weight; it’s all about getting that heat into the middle! Also starting temp does matter, refrigerated chicken will require additional time versus room-temperature (having been left out on the counter for a while). Liquid temperature also plays a role in how evenly things cook, and you want to determine how long to boil and then whether to leave the heat on gently simmering or shut the flame off completely. If there is too many pieces in your pot, it’ll take longer to cook (because pieces can’t be bathed in consistent heat!).
How to Poach Chicken Perfectly
What do you intend to do with the cooked meat? This will dictate how it turn out in the end. A brief rest will help slices stick together better, whereas a longer finish tend to make shredded chicken easier to tear apart.
When you input those values into calculator, it tweaks them based off those factors. So if you’re planning on using liquid heat or are starting at different temp, have a certain count, etc., etc., that’s reflected in the estimate (not some sort of average). The reference tables shows you what to expect and when. They show how the method, thickness, and use relate to common time ranges so you can decide whether to check early or plan on resting longer.
Don’t look at the liquid. Look at the meat: You often boil the water too hard; while it may appear dramatic the outside tightens long before the middle is safe, particularly with unevenly cut pieces. Instead of counting minutes, use a thermometer (checking the center of the largest or thickest breast) and ensure the liquid bubbles just shy of a full-on rolling boil which is more the safe bet.
Are you not looking at the clock but still thinking that all your pieces are done at once? That’s another common misstep. Even a single layer of them will be different than one another.
Don’t forget: Resting poached meat after cooking help juices settle and also makes for easier slicing. In fact, just letting the meat sit quietly on the cutting board a few more minutes can mean the difference between a nice clean slice versus something raggedly hacked. If you are making a salad or other dish requiring diced meat or similar, chilling chicken first will allow it to hold together more niceley when you go to dice or chop.
Most of all, don’t treat poaching like a race against time; think of it as an exercise in controlling the rate of heat transfer. When you know which factors alter the result, you have something that’s repeatable, not a sequence of guesswork. You should of used this method before.