Pizza Baking Time and Temperature Calculator
Estimate pizza bake time from style, dough weight, diameter, hydration, oven max temperature, launch temperature, baking surface, topping load, parbake status, and crust color target.
🍕Pizza bake presets
Choose a pizza style to load realistic starting values, then fine-tune the dough ball, oven, surface, toppings, parbake, and crust color.
⚖Units
🥣Dough style, size, and hydration
🔥Oven, surface, toppings, parbake, and color
Pizza bake estimate
Pizza baking breakdown
--
📊Style heat targets
Fast blistering with very light toppings.
Hot steel or stone for a foldable slice.
Gives thick dough time to set and fry.
Lets cheese settle before slicing.
📋Pizza style reference table
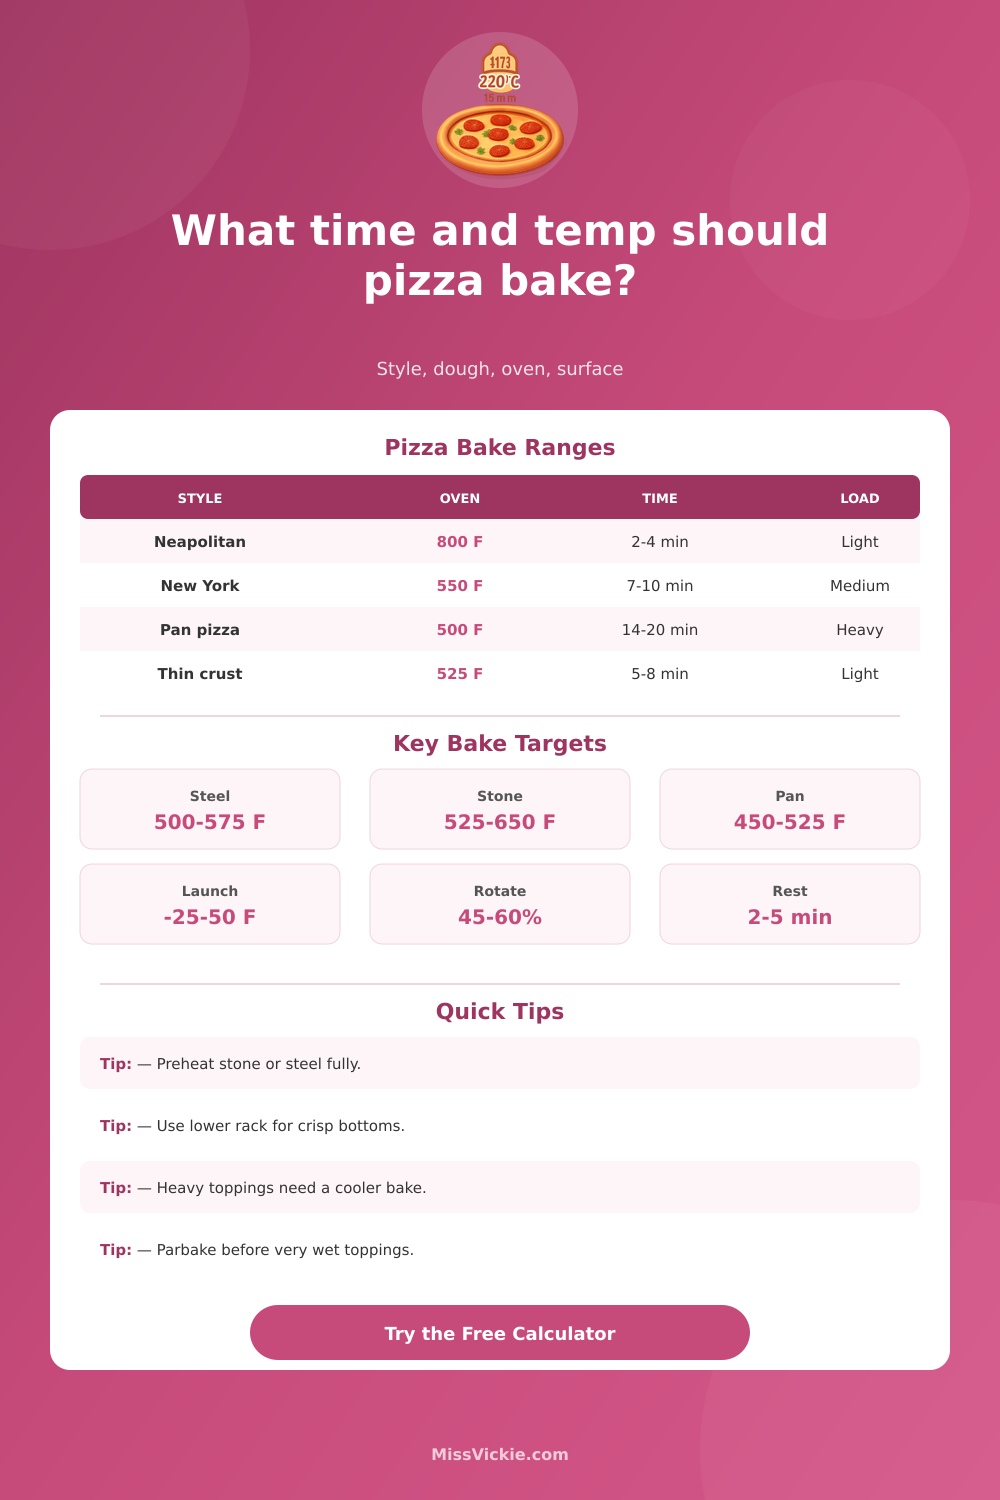
| Pizza style | Typical launch temperature | Common bake window | Dough thickness clue | Best surface |
|---|---|---|---|---|
| Neapolitan | 700 to 900°F | 90 seconds to 4 minutes | Light center, puffy rim | Deck, stone, or outdoor oven floor |
| New York style | 500 to 575°F | 6 to 10 minutes | Moderate dough ball for diameter | Baking steel or thick stone |
| Thin crust | 500 to 575°F | 5 to 8 minutes | Low dough per square inch | Steel, stone, or screen |
| Pan pizza | 450 to 525°F | 12 to 20 minutes | Thick dough with oil in pan | Cast iron or dark metal pan |
| Detroit style | 450 to 525°F | 13 to 22 minutes | Deep pan with cheese edge | Dark rectangular pan |
| Grandma or sheet pan | 450 to 500°F | 12 to 18 minutes | Moderate sheet-pan thickness | Oiled sheet pan |
| Frozen pizza | 400 to 475°F | 10 to 18 minutes | Already set or parbaked shell | Rack, screen, or preheated pan |
🧱Surface and topping adjustment table
| Factor | Faster bake signal | Slower bake signal | Temperature move | Timing move |
|---|---|---|---|---|
| Baking steel | Bottom colors early | Top stays pale | Lower launch 15 to 25°F if needed | Rotate around halfway |
| Baking stone | Even rim color | Soft underside | Preheat longer or move lower | Add 1 to 2 minutes |
| Pan or cast iron | Edges fry and pull away | Center doughy | Use moderate heat | Add covered or lower-rack time |
| Heavy toppings | Cheese browns before crust | Center looks wet | Reduce heat 15 to 35°F | Add 2 to 5 minutes |
| Parbaked shell | Top needs only melting | Frozen center | Use label heat or slightly hotter | Shorten raw-dough estimate |
| Dark crust target | Rim freckles evenly | Bottom burns first | Move higher or finish with broiler | Add a final 30 to 90 seconds |
💡Pizza timing notes
Launch temperature: If the bottom burns before the cheese melts, lower the surface temperature or move the pizza higher for more top heat.
Dough loading: A heavy dough ball on a small diameter pizza behaves like pan pizza and needs more time at a gentler temperature.
Hydration: Wet dough and wet toppings both need evaporation time, so the fastest bake is not always the best bake.
Parbake: For very wet toppings, parbake until the top skin sets, then add sauce, cheese, and toppings for the final bake.
There’s no “one size fits all” when it comes to baking pizza: The right temp/length of time combo depends on your oven, ingredients (dough weight/hydration; toppings), and what you’re making the pie on. Adjust any of these variables and rest will adapt to match. That’s why a basic chart won’t work for everyone.
Is the crust pale? Not enough energy got through before it was cooked too much. Is there a crisp crust? That is good. If the bottom burned but the toppings didn’t, then the energy got through fast enough, but without burning the toppings first. It took longer (maybe a couple more minutes) with a stone because steel conducts heat better; try lowering your launch temp by 5-10 seconds to see if that gets you the same amount of color at top while keeping it below the cheese. Did you use heavy/wet toppings? That moisture takes some time to cook off (until it’s gone), the rest will be slower. And if you’re still gummy in the middle then maybe it also needed a little less launch temp. Using cold dough from the fridge make it take longer for heat to reach center. This may also leave you with a paler rim different than you planned for.
How to Adjust Your Pizza Baking Time
These things start making sense as soon as you think about them as tradeoffs. Not hard-and-fast rules. By entering in the variables (oven max, launch temp, doughball diameter, hydration, topping load, surface choice, parbake status, and desired crust color), the calculator spits out an estimate for how long to bake, where to rotate midway through, how much rest time it needs before cutting, and which side is more likely to be done earlier than the other. Those results are good to have… But only if you take them as a jumping-off place instead of gospel.
Your own oven may run hotter or cooler than its dial settings suggest, maybe because the stone never hits temperature you entered, or for some other reason. So your actual bake time will vary. But having the math taken care of frees you up to pay attention to the pizza itself, not do the math on the fly during baking.
The problem is that if you’re treating one variable as static while everything else shifts around, you’re going to make common errors. For example: You use the same launch temp (to cook a veggie-loaded vs. A plain-light-cheese) and ask why the crust never darkens. Or you drop a steel in an already-hotter-than-normal oven, but don’t adjust time accordingly, and wind up with a charred underside and still-raw top.
So those reference tables on the page illustrate a range of typical timings for each style, to help you orient yourself as to what your set-up “should” look like compared to the norm. They are not commandments; they just help you get a general feel for whether you’re pushing your oven to do the extraordinary, or doing something fairly ordinary.
Learning what to look out for at home will improve your skills over time. Did the bottom color up before the cheese melted? Perhaps it was launched with too high a temperature, or needs a shorter stint on the steel, or that it needs to be placed on a higher rack. Was the rim still blonde when the cheese browned? Maybe the dough wasn’t warm enough, or perhaps the water content was too great for the available heat, or maybe there just wasn’t enough heat on the surface. Adjust based off the early cues from the previous pie and soon, you’ll be turning out good ones consistently.
After a few tries, your method wouldn’t of felt so haphazard; now you’re thinking about moisture and heat transfer, instead of absolute times. Your eyes and your oven do the rest. Use the calculator as a starting point; your brain fills in the gaps.