
Whirlpool refrigerators are simply the best! They’re highly efficient and come with enhanced features giving you the perfect appliance for fulfilling all your refrigerating needs.
However, similar to any other fridge brand, Whirlpool refrigerators have their fair share of issues to contend with but they’re not something to get too stressed about!
Needing to replace the light bulb is a common issue and knowing how to remove the shield makes life less complicated for you. Keep reading to find out more!
How to Remove Light Shield in Whirlpool Refrigerator?
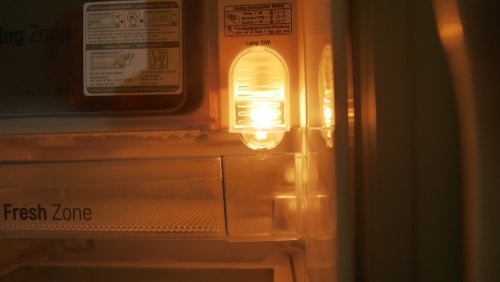
The light in your Whirlpool refrigerator is a vital feature. It helps you to find food stored inside the fridge as well as find a place to stash your favorite beverage or other products that need to stay cool.

When your refrigerator’s light suddenly stops working, you want to replace it as soon as possible. But, how do you remove the light shield in a Whirlpool refrigerator?
We share four simple steps to removing the light shield so you can inspect the fitting and repair it without calling in a technician to do the job.
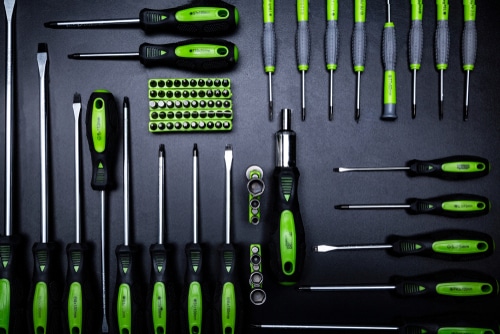
- Use the Right Tools
Before doing any maintenance or repair job on your Whirlpool refrigerator, you want to make sure you have the right tools on hand.
This makes the job at hand easier to handle without leaving you frustrated because you can’t carry out the necessary repairs! Having the right screwdriver is essential for removing the light shield.
Using a Whirlpool screwdriver specifically designed to handle this type of task is a must-have if you want to avoid any hassles when removing the light shield. Screwdrivers with magnetic tips simplify the process of removing the screws holding the light shield.
- Remove the Screws
Once you have the right tools on hand, you can start by removing the housing screws. Using a screwdriver, remove the screws by turning them counterclockwise. If you try to force them out by turning them in the opposite direction, you’ll damage the screws and the light shield.
Take off the screws carefully and set them aside somewhere safe so you can find them later when replacing the light cover in your Whirlpool refrigerator. Putting them into a container or dish ensures they don’t fall onto the ground and disappear.
- Unlock the Light Cover
The next step is to unlock the light cover by releasing the latches holding it in place. The light shield has plastic locks designed to keep the fitting in place and prevent it from shifting even when the screws have been removed.
Take care when unlocking the latches by using gentle force on the edges of the light shield before pulling it away from the fitting. Place the light cover somewhere safe as you’ll need it later when you’ve done the repair job.
With the light shield safely removed, you can now access the light bulb for inspection. Replace the damaged light bulb or adjust it if it’s not sitting properly in its socket.
- Place the Light Shield Back On
Once you’re done with the repair job, it’s time to place the light shield back on. Make sure you do this properly to prevent it from being damaged during the placement process.
Align the cover with the plastic locks and apply slight pressure to securely attach the shield on the fitting in the Whirlpool refrigerator. With all the locks in place, you can now replace the screws.
Using the screwdriver and turning the screws clockwise, ensure each one fits back snugly. However, use gentle movements and make sure you don’t screw them too tight as you risk damaging the cover.
More Tips You Need to Know When Removing Light Shield in Whirlpool Refrigerator
Here are more tips to guarantee the task is risk-free while keeping your Whirlpool refrigerator in good nick!
- Unplug the Refrigerator
Before removing the light shield in your Whirlpool refrigerator, unplug the appliance from the power source. This is a vital step when performing any electrical work and removing the light cover does mean exposing wires in the fitting.
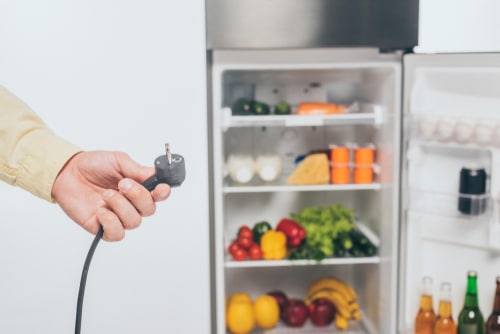
If you’re not able to unplug the refrigerator from the wall socket, flip the breaker switch. This will stop any power from reaching your fridge when during repair or maintenance work.
- Source the Right Light Bulb
The most common reason for a light not working in your Whirlpool refrigerator is a blown bulb. This means you’ll need to replace it with a new bulb. Once the light shield has been safely removed, you can locate the bulb. Unscrew it from its socket and discard it safely.
Before replacing it with a new light bulb, check the manufacturer’s guidelines for the right specifications. Installing the wrong bulb will lead to more problems! The new light bulb should be the same size, shape, and wattage as the damaged one.
- Inspect the Damaged Light Bulb
Most times, a light bulb stops working because it’s run its full lifespan. However, sometimes there are other reasons for it blowing, and inspecting the damaged bulb before tossing it will give you clues if something else is wrong.
If the bulb is the old incandescent type, you can tell by seeing if the filament has burned out. This filament is located in the center of the bulb.

Make sure you replace it with a LED light bulb that is safe to use in refrigerators. If the bulb has a yellowed appearance, this could be an indication of a faulty power source in the light socket.
- Order the Correct Replacement Parts
If the light shield is damaged, you’ll need to order a new replacement part. There are many different types of Whirlpool refrigerators and not all replacement parts are the same. Ordering from Whirlpool ensures you get the right fit and genuine parts for your model.
Refer to your manufacturer’s guidelines if you’re not sure what model fridge you have. All specifications are detailed in this document.
- Test the Light
Before testing that the light is working, plug the fridge back into the wall power source and switch it on. Pressing the fridge door’s latch is a good way to test if the light is working properly.
With a new bulb and a correctly fitted light shield, your Whirlpool refrigerator’s light should be shining brightly once more! If it’s still not working, you may need to call in a professional electrician to check that something else isn’t wrong with your Whirlpool fridge lighting.
Final Thoughts
Fixing a faulty light in your Whirlpool refrigerator is often a straightforward process. It does entail removing the light shield to access the bulb which is often the reason your fridge’s lighting has suddenly stopped working.
Removing the light cover is a simple process if you follow the four steps we’ve shared in this article. Our other tips will ensure you get the job done safely.
Unplugging the fridge before removing the light shield is essential as well as having the right replacement bulb or cover (if it’s broken).
Having the right tools makes the job a breeze if you’re doing the job yourself. In no time at all, your Whirlpool refrigerator’s light will be fully operational again every time you open your fridge!