Goose Cooking Time Calculator
Estimate whole roast goose timing from bird weight, cavity choice, pricked skin, oven temperature phases, starting temperature, fat rendering, breast and thigh targets, basting, rest time, and servings.
🍽Whole goose presets
Choose the closest roasting plan, then adjust the inputs. Each preset changes goose weight, cavity style, skin prep, oven profile, start temperature, fat rendering, basting, rest, and serving yield.
📝Goose roasting inputs
Your whole goose roasting plan
The estimate combines goose weight, cavity load, skin prep, oven phases, starting temperature, fat rendering, target temperatures, basting interruptions, rest time, and serving yield.
📌Whole goose rules of thumb
🔥Roasting phase reference
| Roasting profile | Phase 1 | Phase 2 | Best use |
|---|---|---|---|
| Classic whole goose | 425°F for 20 minutes | 325°F until 165°F breast and safe thigh | Balanced skin, fat rendering, and predictable timing. |
| Extra crisp skin | 450°F for 15 minutes | 350°F with fat drained often | Smaller birds, thoroughly pricked skin, and dry-skin roasting. |
| Gentle roast | 400°F for 20 minutes | 300°F for a slower finish | Larger geese that need more rendering without rushing the breast. |
| Convection roast | 400°F convection for 15 minutes | 325°F convection with close thermometer checks | Even browning when the oven fan runs reliably. |
| Low and slow render | 300°F for most of the roast | 425°F at the end to crisp skin | Fat-heavy birds when rendering matters more than speed. |
| Spatchcock goose | 425°F steady roast | No stuffed cavity; monitor breast early | Flatter bird, faster cook, and more exposed skin. |
Check the breast, the innermost thigh, and any stuffing. Avoid bone and fat pockets because they can give misleading readings during a whole goose roast.
Goose releases a lot of fat. Use a rack, drain the pan carefully, and keep hot fat away from the heating element to reduce smoke and splatter.
🌡Temperature and safety reference
| Checkpoint | Target | Why it matters | Calculator use |
|---|---|---|---|
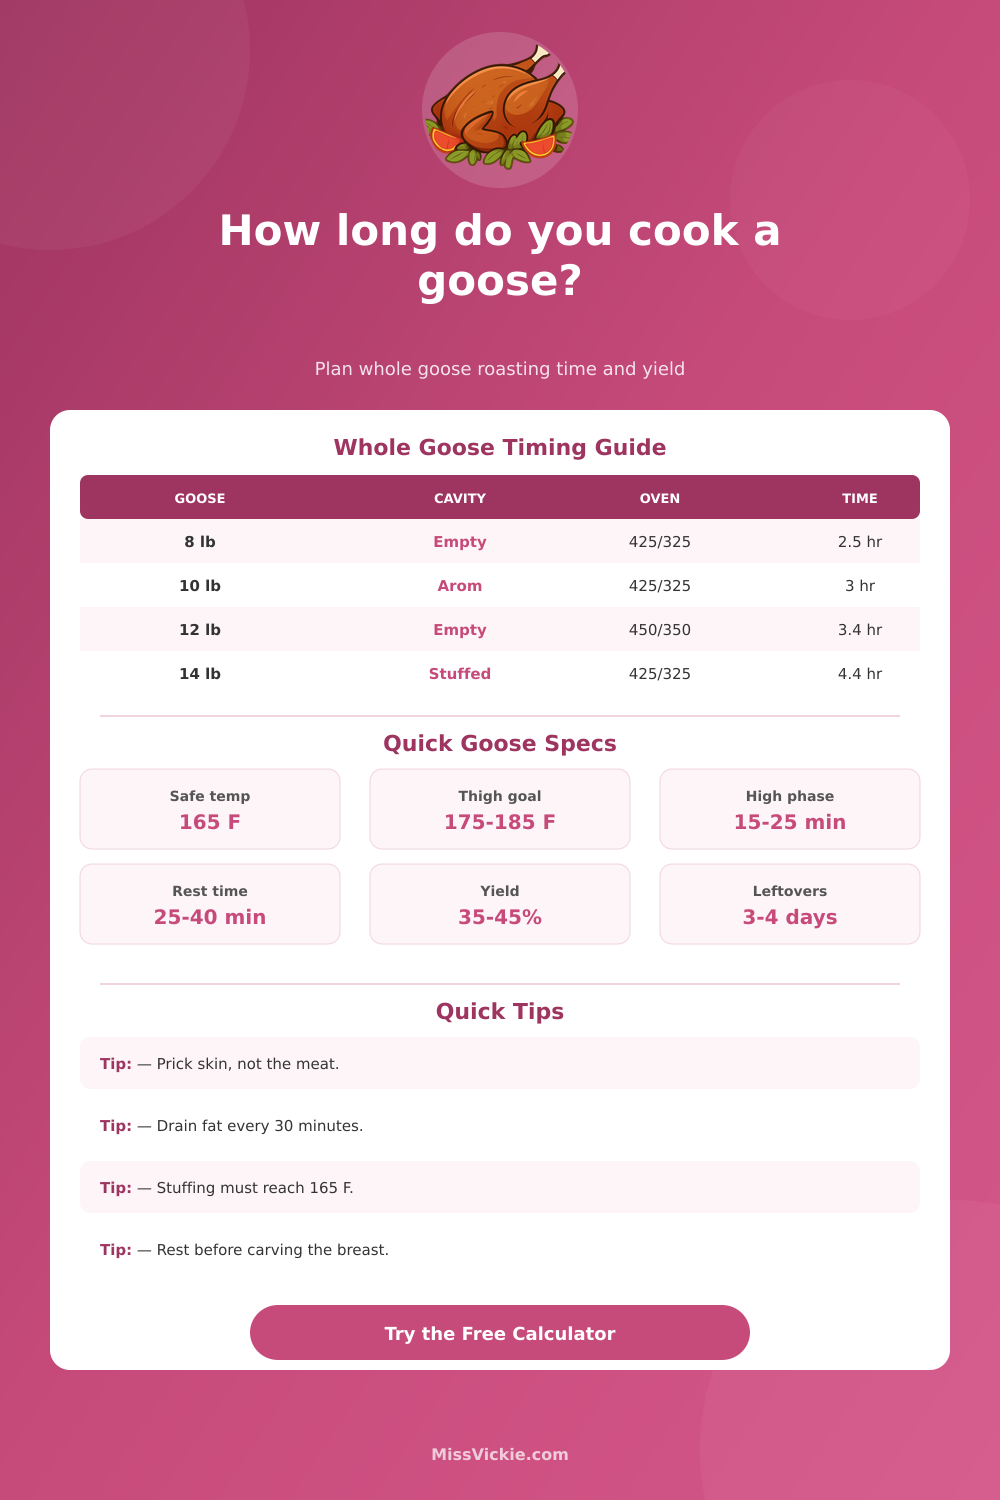
| Whole poultry safety | 165°F / 74°C | USDA and FSIS list 165°F as the safe minimum internal temperature for poultry. | The breast card never recommends below 165°F. |
| Stuffing inside goose | 165°F / 74°C | Stuffing must be checked in the center because it absorbs poultry juices. | Stuffed presets add extra oven time and a warning row. |
| Thigh texture | 175-185°F | Dark meat often eats better above the minimum after collagen and fat soften. | The thigh target adjusts the estimated finish window. |
| Resting bird | 25-40 min | Resting gives juices time to settle and makes carving cleaner. | Rest time is added after oven time for the serve window. |
| Cooked leftovers | 3-4 days | USDA leftover guidance keeps cooked poultry refrigerated for a short window. | The planner notes carving yield for dinner and leftovers. |
⚖Weight, cavity, and yield table
| Goose weight | Unstuffed oven estimate | Stuffed oven estimate | Typical carved servings |
|---|---|---|---|
| 8 lb / 3.6 kg | 2 hr 20 min to 2 hr 45 min | 2 hr 55 min to 3 hr 20 min | 4 to 5 dinner servings |
| 10 lb / 4.5 kg | 2 hr 55 min to 3 hr 20 min | 3 hr 35 min to 4 hr | 5 to 7 dinner servings |
| 12 lb / 5.4 kg | 3 hr 25 min to 3 hr 55 min | 4 hr 10 min to 4 hr 45 min | 7 to 9 dinner servings |
| 14 lb / 6.4 kg | 3 hr 55 min to 4 hr 30 min | 4 hr 45 min to 5 hr 25 min | 8 to 10 dinner servings |
| 16 lb / 7.3 kg | 4 hr 25 min to 5 hr 5 min | 5 hr 20 min to 6 hr 5 min | 10 to 12 dinner servings |
🍴Serving and carving comparison
Use when there are several sides, another protein, or people will take smaller portions.
A practical carved meat portion for whole roast goose with potatoes, vegetables, and sauce.
Better for generous servings when goose is the centerpiece and guests expect seconds.
Adds carved meat margin for next-day slices, hash, fried rice, soup, or sandwiches.
🧈Goose fat and basting reference
| Skin and fat setup | Timing effect | Fat handling | Best note |
|---|---|---|---|
| Thoroughly pricked skin | Baseline timing | Drain every 30 minutes | Most reliable for crisp skin and less pan smoke. |
| Lightly pricked skin | Add 4% oven time | Drain every 25 to 30 minutes | Useful if you are cautious about piercing meat. |
| Scored skin | Slightly faster browning | Watch exposed cuts for dark edges | Keep scoring shallow so meat does not dry out. |
| Not pricked | Add 8% oven time | Expect more trapped fat | Skin can stay soft unless the finish is extended. |
| Glazed finish | Add 5 to 10 minutes | Brush after most fat has rendered | Sugary glazes darken quickly at high heat. |
💡Two practical goose tips
A goose is not something that should be roasted carelessly: There’s all this fat under its skin; there’s nothing worse than having it dry out and at the same time having the skin go soft. The weight is important, sure, but what kind of stuffing are you putting in? This takes some of those variables into account to calculate for you how long to cook. This gives you a plan based off your actual bird rather than just guessing.
If it’s stuffed, that generally determines your next step. If there is no stuffing, then you have a free-flowing heat environment and everything will cook faster. Dense stuffing insulates the cavity, meaning the center of the bird take longer to cook. So now you’re really roasting two things simultaneously.
How to Cook Goose Perfectly
How long do you roast for? Roast long enough to reach a safe temperature in the middle, but not long enough to burn the outer skin. It’s a balancing act between safe and tasty.
Because this is a dish of goose fat, there must be somewhere for the steam to escape or else the skin will steam and that’s no good. Prick the skin all over to allow the fat to escape (but don’t cut into the flesh). If you’re too gentle, the skin remains too soft from all the trapped fat; prick too aggressively and you lose precious juices. Also, without the juice inside to protect it, white meat goes tough. How much time you need depend on how well you prepare: The calculator factors this in.
A lot of home cooks gets confused about what temperature to use. To ensure an extra-crispy skin, you start out cooking at a higher heat. Then you cook it low so the breast doesn’t dry out by the time the thigh is cooked through. So maybe you select a profile that kicks off with 425 degrees but lowers to 325 degrees? That’s how restaurants do it. And it works. The skin gets its color early and then the remainder of the cook concentrate on getting to doneness (not browning).
Total cooking time will depend on the starting temperature of your bird as well. If you have a goose that’s been in the fridge, it’ll take longer to come up to temperature than if it’s sitting out at room temperature. By including the starting temp, the calculator adjust to match. This comes into play when you’re trying to time other dishes and drinks with your main course.
But first, roast! Then let it rest. Once the goose comes out of the oven, the juices are rushing toward the center of the meat. If carved right away, they’ll flow right off the carving board. Give it a rest (twenty-five to forty minutes) and the fluids has time to redistribute. By including this resting period into the plan with your tool, you’re able to estimate actual mealtime (not just a cool-down period). It’s not just about cooling; it ensures juicy, not dry, meat.
Every step is also designed with safety in mind. For example, while the ideal internal temperature for a breast is about 165 degrees Fahrenheit, dark meat tend to take longer, more like 175 or 180 degrees. That’s because collagen takes longer to break down. Cook it all together and you’ll end up with dry breasts and tough legs. So, the calculator will split out the goals based on cooking times for each part.
One thing I learned: Goose fat has many uses, so set aside any extra for future meals. Rendered gently, it can be used to fry bread or potatoes. By draining the pan every half-hour, you prevent smoke and keep the skin of the goose dry. Use this as a sort of template to organize your timing throughout the long roast, what would of been a haphazard affair becomes a clear choreography.
The trick is to respect the goose. It’s big; it’s fatty; it requires time. Timing makes all the difference between an elegant dinner and a greasy meal. Use the calculator as a guide; use your thermometer as the last word. Pull the goose out when the thighs and breasts are done; let it stand.
Actually, you should of checked the meat earlier to be safe. The skin gets its color early and then the remainder of the cook concentrates on getting to doneness (not browning).