Fudge Set Time Calculator
Estimate how long fudge needs to firm before scoring, clean cutting, boxing, or serving based on pan size, fudge depth, recipe style, cooked sugar temperature, room or fridge temperature, humidity, mix-ins, and slice goal.
🍫 Fudge Setting Presets
Choose a fudge batch, then adjust the pan, finished depth, recipe style, sugar stage, cooling route, air temperature, humidity, mix-ins, and cut goal.
🍳 Setting Inputs
Fudge setting plan
Your set time will appear here after calculation.
Batch Breakdown
Cooling Breakdown
Formula Stack
- Base minutes use fudge style and slab depth.
- Temperature, humidity, and mix-ins adjust the base.
- Cooling route converts part of the wait into chill time.
📊 Fudge Setting Snapshot
📘 Fudge Timing Tables
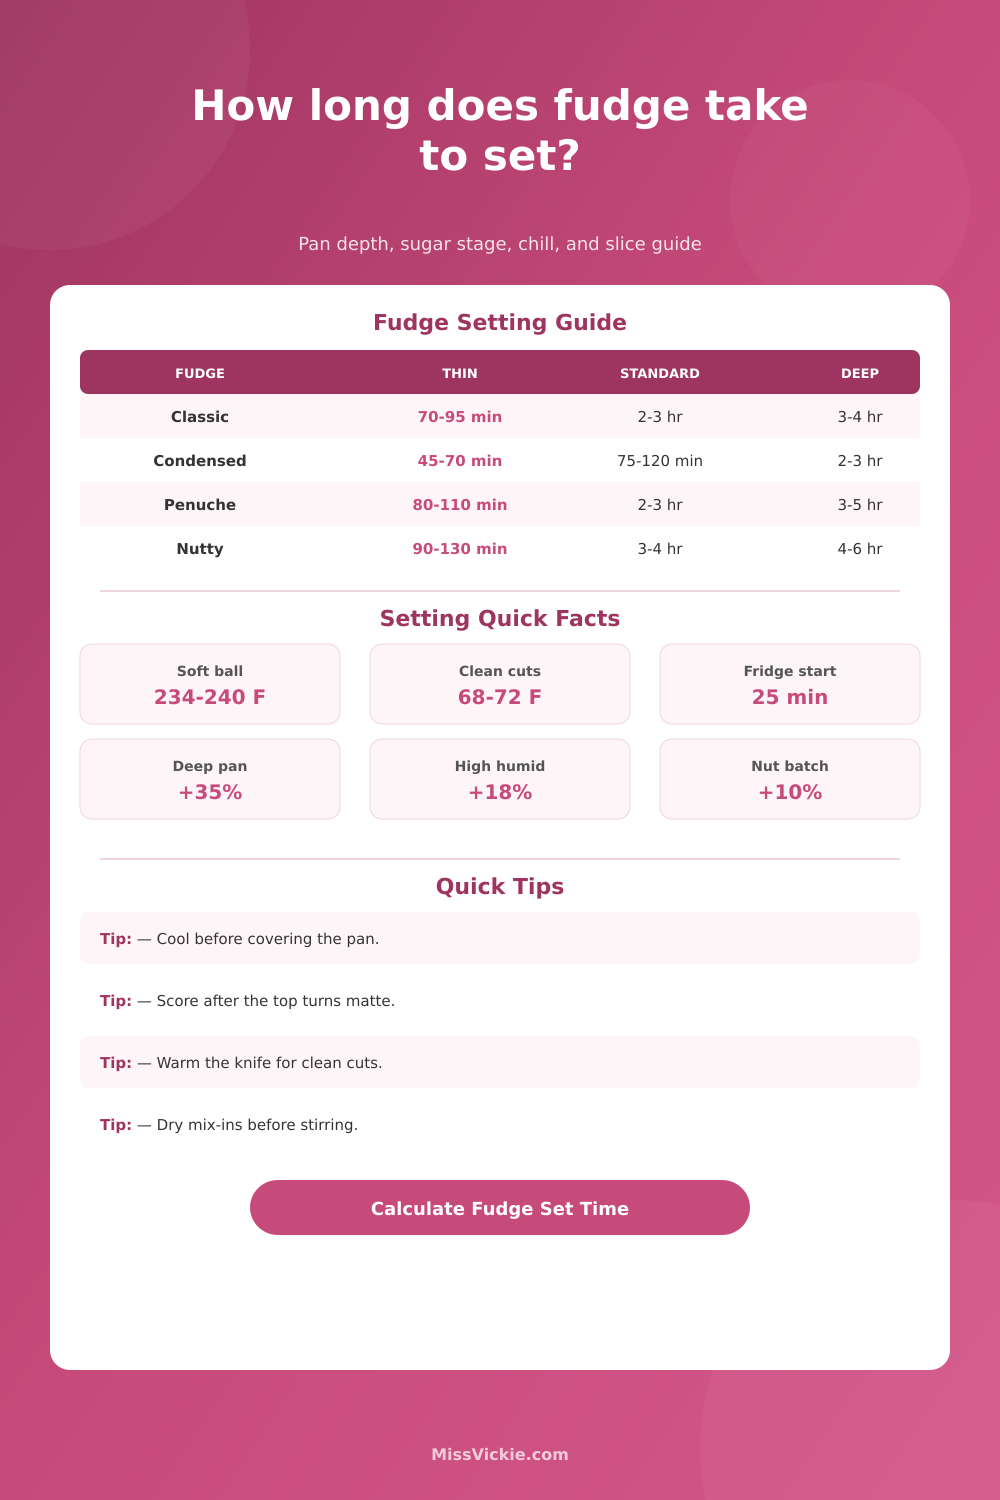
| Fudge Type | Typical Set Behavior | Clean Cut Range | Watch Point |
|---|---|---|---|
| Classic cooked chocolate | Needs crystal rest after beating | 2 to 3 hours | Do not cover while warm. |
| Condensed milk fudge | Chocolate and dairy firm quickly | 75 to 120 minutes | Can turn dense if over-chilled. |
| Marshmallow cream fudge | Stable but slightly soft | 90 to 150 minutes | Score when top turns matte. |
| Peanut butter fudge | Fat-rich and fast firming | 60 to 110 minutes | Cut before it gets brittle. |
| Penuche | Brown sugar holds warmth | 2 to 4 hours | Humidity matters more. |
| Thickness | Common Pan | Counter Set | Fridge Finish |
|---|---|---|---|
| Thin, 0.5 to 0.75 in | Half sheet or 9 x 13 | 45 to 90 minutes | 35 to 65 minutes |
| Standard, 0.9 to 1.15 in | 8 x 8 or 9 x 9 | 2 to 3 hours | 75 to 130 minutes |
| Deep, 1.25 to 1.6 in | Loaf or deep square | 3 to 5 hours | 2 to 3 hours |
| Extra deep, 1.75 in plus | Small gift slab | 4 to 7 hours | 3 to 5 hours |
| Cooked Temperature | Sugar Stage | Setting Effect | Cut Result |
|---|---|---|---|
| 228 to 232°F | Low soft ball | Slower and softer | Best with fridge finish. |
| 234 to 240°F | Soft ball | Balanced classic set | Clean squares after full rest. |
| 241 to 244°F | Firm soft ball | Faster firming | Can turn crumbly if beaten hard. |
| 245°F plus | Too firm for many recipes | Fast but dry | Cut early and watch grain. |
| Condition | Adjustment | Best Cooling Move | Why It Matters |
|---|---|---|---|
| Dry kitchen | About 5% faster | Counter rest works well | Surface firms without tackiness. |
| Humid kitchen | Add 12 to 18% | Use fridge after rest | Moist air slows surface set. |
| Nuts or cookies | Add 6 to 12% | Wait for center firmness | Chunks drag through the knife. |
| Ganache or caramel | Add 15 to 25% | Chill before final cuts | Soft swirls smear if warm. |
Setting estimates assume the fudge was cooked and beaten according to the recipe. If the syrup was undercooked, chilling can firm it temporarily but may not create a true classic fudge texture.
⚖ Cooling Route Comparison
Slow cooling supports a creamy bite and avoids sudden condensation on the top.
A rest on the counter followed by fridge time firms butterfat and chocolate.
A short freezer finish helps a sticky slab, but use it briefly to avoid damp edges.
Boxed fudge needs a cool center so pieces hold shape during handling.
💡 Fudge Setting Tips
The truth is: most people screw up their fudge not on the stove but on the countertop. You do everything right; you boil your sugar properly, you whip the cooked mixture so it gets nice and thick, you spoon it into a pan…then what? Then you wait. Waiting is where patience comes in.
Cut too soon and you have melted gooey fudge sticking to the knife. Wait too long and you have brittle brick fudge falling apart at the slice. Minutes can make difference between good fudge and bad fudge. It’s not just about getting the sugar to crystalize inside the pan; it’s also about getting the heat out.
How to Cool and Cut Fudge Correctly
How thick is it? How does that affect cooling time? Thicker materials retains their heat. Thinner material spreads more warmth over a larger surface area and cools quickly. Is it a deep batch? Deep batches insulates warmth from the center outward, and although they may feel cold on the surface, the middle remain warm.
The calculator factors all of this in by prompting you for final depth and pan size. Depending off whether you’re preparing a tight-packed box or a thin slab, those dimensions result in a corresponding cooling curve, which then tweaks estimation accordingly. It’s one thing to know intuitively that mass retains heat; it’s another to have math performed for you.
Sugar attracts water and humidity is an issue when making fudge. If you make fudge in a humid kitchen, the surface will remain tacky for longer. That means waiting until it’s not tacky anymore before cutting. It will take more time if air is humid. A humid kitchen also affects the tool. Covering a warm pan with something traps steam, which will mess up your texture. Let it cool so steam can escape first. Don’t cover it while still warm. Expect delays on humid days.
When does fudge firm? That depends on kind of fudge you’re making. Fudge made from scratch (or, “classic”) firms up through controlled crystallization as it cooks slowly. This means it will take some time to set. Condensed milk fudges is higher in dairy solids and water. Even though they might appear firm earlier, pay close attention as they can go gummy if not watched closely enough.
Mix-ins will disrupt evenness of cooling. This includes swirled-in ingredients like peanut butter or marshmallows, or add-ons such as nuts. How mix-ins change the timeline: It’s not just about temperature; it’s also about composition. See the reference tables.
There’s one workaround that accelerates things: temperature control. If you let the fudge cool slowly, you’ll get nice, smooth crystals in your final product. For maximum texture, leave your fudge out at room temperature. But if you’re in a hurry, throw it into fridge to solidify more quickly. Just be sure to let it sit on the countertop beforehand; otherwise, the refrigerator will mess with the texture. The calculator accounts for fridge-aided versus straight-to-counter paths.
And remember: Slow down, especially if your kitchen is warm.
Then there’s how to cut. For clean lines, heat your knife in hot water and wipe off the blade between every cut. Don’t push the knife through the fudge. When it’s firm enough, let the knife edge go to work. Once you know how to recognize when to draw guide lines and when to cut them for good, you’ll create squares that look just like professionals’. That sounds like a small thing, but it makes a difference.
Timing is everything; so is chemistry. If you know what to expect from the environment then you know whether to be happy or sad, regardless of whether the measurements was correct. Cut the corners off your guessing game by using the calculator as a way to tie your hopes and dreams to reality.
Note the humidity. Check the depth. Observe the rest time. Be patient. The rewards will come in form of clean cutting squares that melt just right.