
The trick to getting the right balance between juicy meat and crispy skin are mastering how heat moves. It’s a methodical process that will feel like you’re playing with fire (after all, you’re putting a raw bird in hot oil!), but technique isn’t really about guessing, it’s more of a science experiment. You need to master three variables: time, bird weight, and oil temperature. Get those variables right and you’ll have a juicier, tastier chicken different than anything you’ve had at a restaurant.
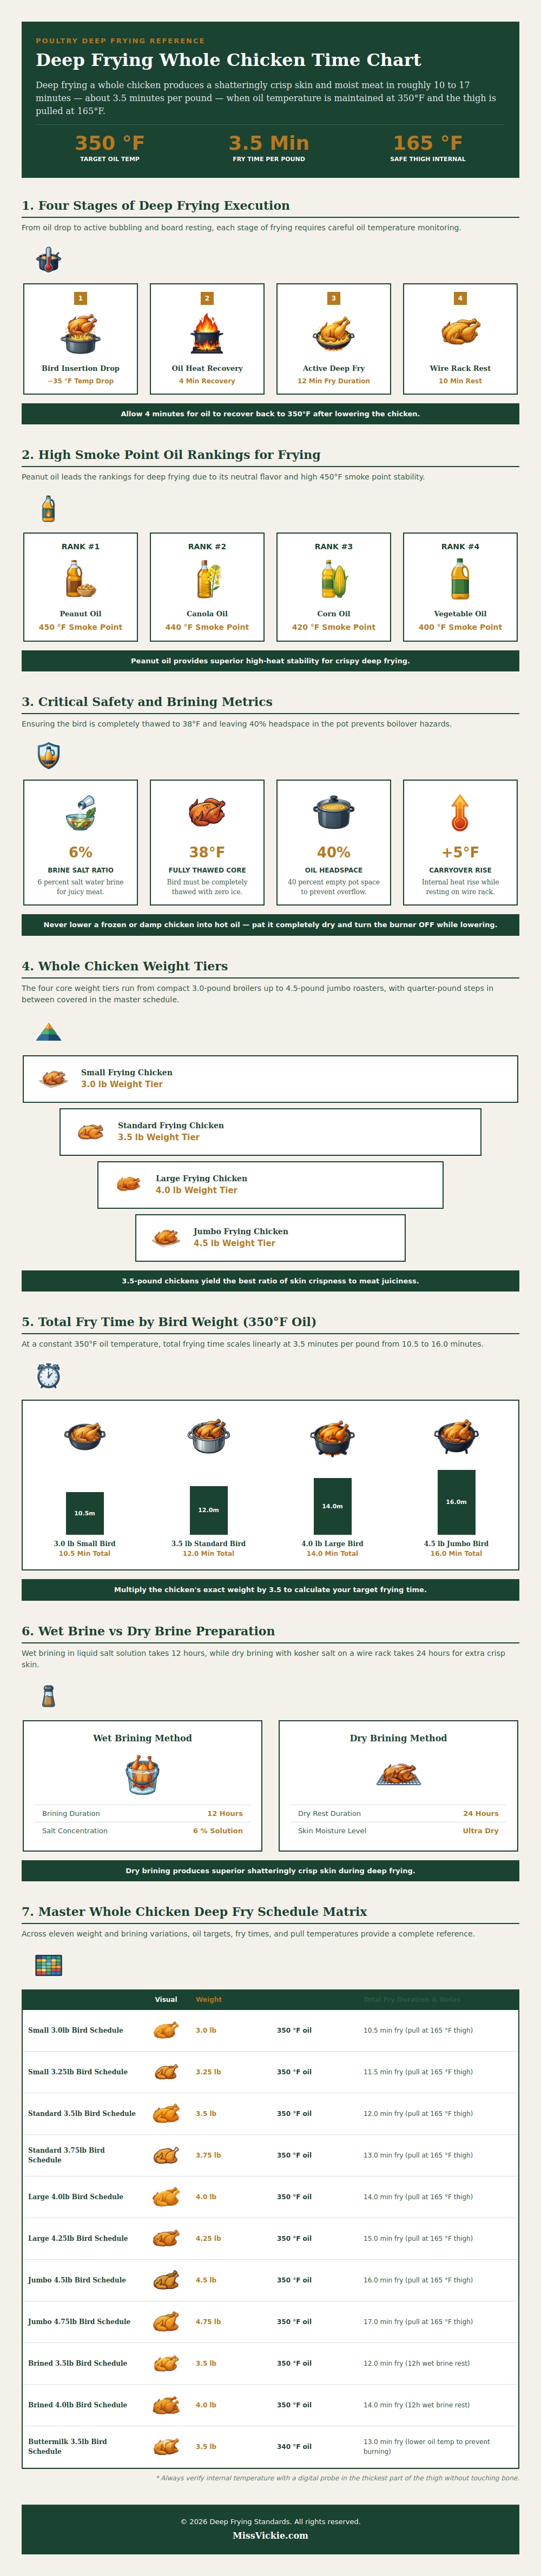
It also means frying time goes up almost exactly with weight. Three and a half minutes per pound is sort of rule of thumb; if your oil temperature stay around 350 degrees, you’ll have something in about ten and a half for a three-pounder, and closer to sixteen for a four-and-a-half pounder.
How to Fry Perfect Chicken
Again, consistency: Let it get too cold and the bird soak up grease rather than getting crispy. Let it get too hot and the exterior burns while interior remains raw. Finding that middle ground is how you avoid starting a house on fire. The actual effort is keeping the temp. As soon as you drop chicken into the pot, the oil temp will plummet; by roughly thirty-five degrees. That’s physics, not a malfunction. Before any real cooking occur, you must allow the oil time to get back up to target zone. In my experience it typicaly takes several minutes (four minutes being average) for heat to regain itself. Many people begin timing from the instant they drop bird in, which makes for inconsistent results. There are two phases of cooking; one isn’t merely a matter of counting minutes. Only once the oil recovers its strength does active frying begun.
What you fry in matters just as much as how long you cook it. The frying medium isn’t optional. For deep-frying, peanut oil is the best choice. Its neutral flavor, unlike some other oils, combines with a high smoke point to make it perfect for intense heat without breaking down or tasting like metal. Corn and canola oils is decent runners-up, but their thermal limits are somewhat lower. Wrong oil = bad tastes (think bitter), and also bad (smoke). This is the base of entire dish’s flavor.
It’s all about preparation and ensuring the quality. Brining is not something you can rush. To fry moist, meat should be soaked in a 12-hour wet-brine in a six percent salt solution. For extra-crispy results, dry brine using kosher salt on skin for at least 24 hours. The salt pulls moisture from the bird for an ultra-dry exterior that will crisp up beautifuly. Water is enemy of crispiness, so dry brining is usually best if you want max crunch. Remember: Thoroughly pat bird dry and make sure it’s fully defrosted before cooking. Putting a cold/frozen/damp chicken in the oil will result in boilover; and burns.
You should of keep yourself safe by leaving plenty of headspace in your pot; when ready to lower the bird, turn the burner down. After frying, let the chicken rest for roughly ten minutes on a wire rack before serving. Why? The juices will set and the heat will spread evenly throughout. Resting will also cause internal temp of the chicken to increase a couple of degrees (the sweet spot is pulling it out when thigh reaches 165 degrees).
Your most important ingredient is patience. If you slice into that rested chicken, it should be juicy and skin should crackle. Respect the process; it’ll pay off.