Deep Fry Pork Chops Time Calculator
Estimate deep-fried pork chop timing from chop thickness, bone-in or boneless cut, breading style, oil temperature, starting temperature, crowding, rest time, carryover, chop count, and coating color.
Choose a real pork chop scenario, then fine tune the inputs. This calculator targets 145°F after resting, not just a brown coating.
Your Pork Chop Fry Plan
Adjust inputs to calculate the frying window.
Timing Breakdown
Doneness And Batch Plan
| Chop Type | Typical Thickness | Best Oil Range | Starting Check | Pork-Specific Note |
|---|---|---|---|---|
| Thin breakfast chop | 3/8 to 1/2 in | 355 to 365°F | 2.5 to 3 minutes | Fast browning; thermometer response matters. |
| Boneless center-cut | 5/8 to 1 in | 345 to 360°F | 4.5 to 6 minutes | Even shape, but easy to overshoot if thin. |
| Bone-in rib chop | 3/4 to 1 1/4 in | 340 to 355°F | 6 to 8 minutes | Measure away from bone for accurate doneness. |
| Double-cut chop | 1 1/2 to 2 in | 330 to 345°F | 10 to 12 minutes | May need a lower oil finish to avoid dark crust. |
| Coating | Timing Effect | Color Cue | Best Use | Watch For |
|---|---|---|---|---|
| Naked or seasoned | Shortest | Browned edges | Quick boneless chops | Dry surface before frying. |
| Seasoned flour | Slightly longer | Even golden shell | Classic skillet-style deep fry | Loose flour darkens in old oil. |
| Buttermilk flour | Longer | Craggy golden crust | Southern pork chops | Crust can darken before thick chops finish. |
| Panko or coarse crumb | Longest | Fragile crisp crumbs | Cutlets and thin chops | Keep oil a little lower to protect crumbs. |
| Crowding Level | Likely Oil Drop | Recovery Pattern | Timing Adjustment | Best Move |
|---|---|---|---|---|
| Open basket | 8 to 12°F | Fast recovery | Minimal | Keep a single layer with space. |
| Normal single layer | 15 to 22°F | Moderate recovery | Add a little time | Wait for oil to rebound between batches. |
| Tight single layer | 25 to 35°F | Slow recovery | Add meaningful time | Split into smaller batches if crust looks greasy. |
| Overloaded | 40 to 55°F | Very slow recovery | Unreliable | Reduce batch size before chasing the timer. |
| Pull Strategy | Pull Temperature | Rest Time | Expected Finish | Why It Matters |
|---|---|---|---|---|
| Thin boneless | 141 to 143°F | 3 minutes | 145°F | Little mass means modest carryover. |
| Average breaded chop | 139 to 141°F | 5 minutes | 145°F | Crust and hot surface continue heating the center. |
| Bone-in thick chop | 137 to 140°F | 6 to 8 minutes | 145°F | Bone and thickness hold more heat near the center. |
| Higher final target | Target minus carryover | 5 to 8 minutes | 150°F+ | Use only when a firmer chop is preferred. |
Best at slightly hotter oil with a fast thermometer check.
Needs lower oil patience so the crust does not outrun the center.
Insulates the meat and browns richly, especially in a crowded pot.
Oil drop makes the timer less reliable than the internal temperature.
Food safety note: the USDA safe minimum internal temperature for whole pork cuts is 145°F followed by a rest. Use a reliable instant-read thermometer for final doneness.
Cooking pork chops in hot oil until a nice crust forms but not overcooking the inside are an art. Get it right and you have tender golden chunks of meat. Get it wrong and… well, I’m sure its delicious, but who wants a dried-out chop? So how do we master this?
The recipe is on top; it take into account the type of oil, the thickness, and the bone composition to calculate what you need to do without having to guess at timing while listening to the sizzle. It aims for 145 degrees F after rest, safe enough but still moist and juicy.
How to Cook Perfect Pork Chops
Why do most people fail? Because home cooks tend to lump all their chops together and assume they’re all the same piece of protein. They aren’t. A thin boneless center cut behave entirely different than a thick bone-in rib chop. Bone also serve as an insulator slowing heat transfer to meat immediately surrounding it. That means the meat right beside the bone will fall behind in the race to temperature. If you don’t account for this delay, you’ll pull the chop too soon. Or, you’ll fry it longer just to get the middle up to temperature by the time the outside gets tough.
The calculator takes all this into consideration (and so does your choice of coating), automatically factoring in the negative effect of having some meat wrapped around bone. A simple salt-and-pepper-coated naked chop will cook quicker than one draped in a Panko crust or buttermilk batter. First, the coating insulates the meat from the oil while also slowing browning by trapping steam. Depending on how heavy the breading is, the device automatically increases the cook time so that inside gets to temp before the exterior burns.
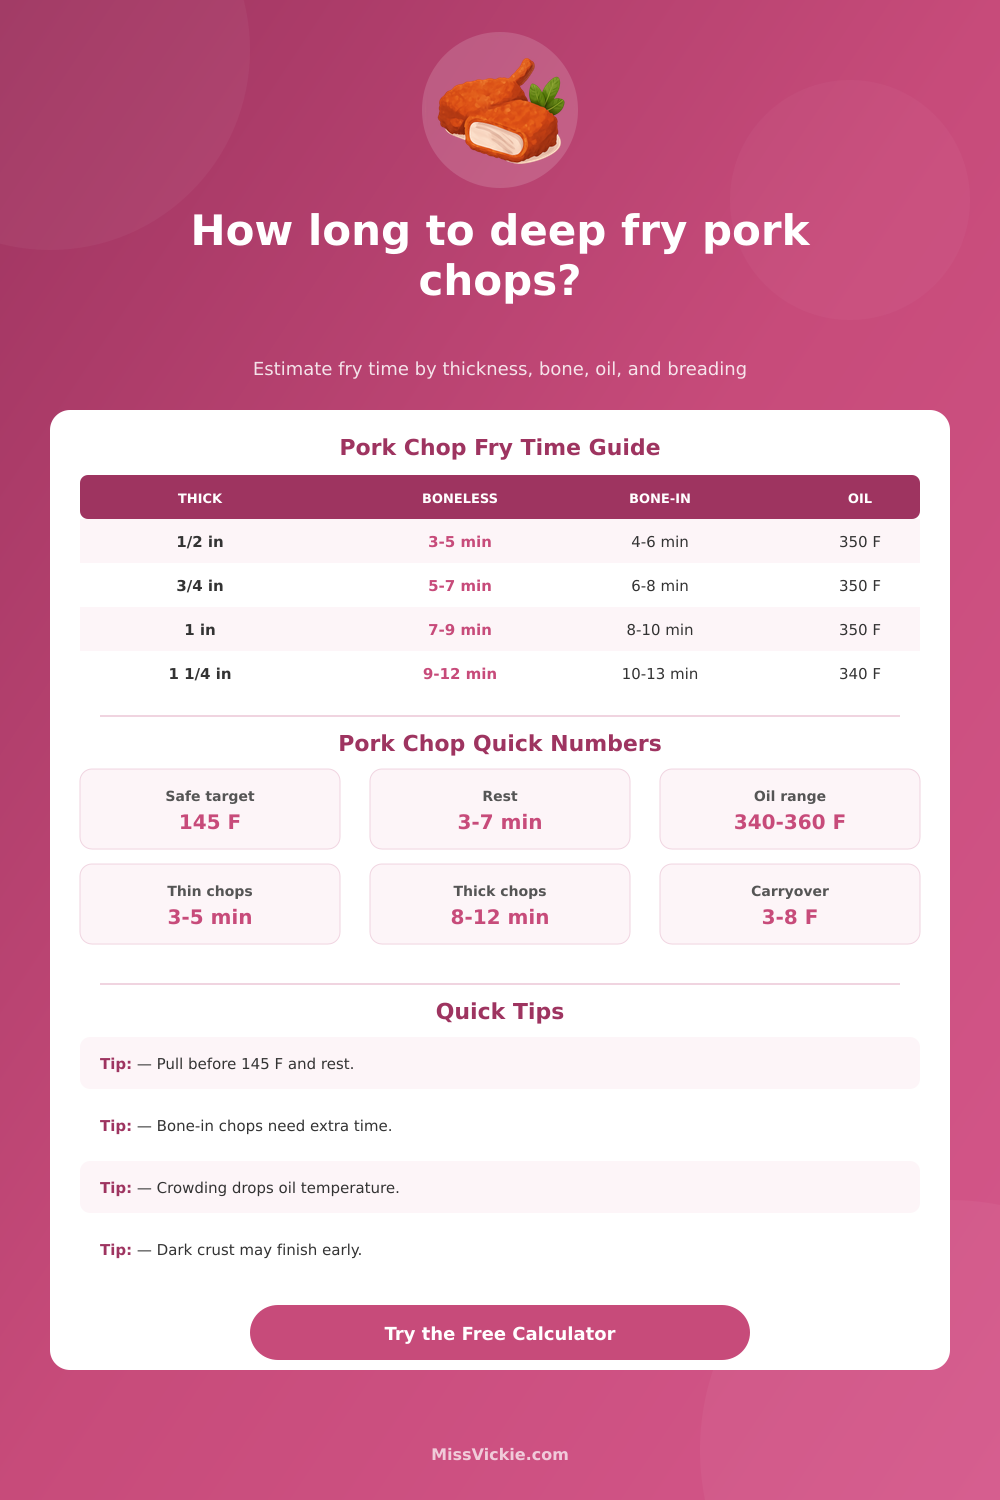
That’s why most folks screw up frying pork (or anything else). They base their decision on when it looks done rather than monitoring thermometer or timer. A dark brown crispy crust can happen long before the middle have cooked through, particularly if there’s eggwash in binding or seasonings containing sugar. The chart on page spells all this out nicely.
It also demonstrates that a busy fryer will significantly increase cook time. Frying also requires the right balance of surface area in contact with the oil. Too few chops will cool the pan, dropping its effective frying range and slowing your already-slow frying down to an even-greasier-soak. The starting temp is actualy more important than most people think. Because cold pork steals more thermal energy from the oil, it takes longer for meat to heat through. To offset that variable, let the chops rest on counter for about 20 minutes prior to frying. The tool specifically requests your chop’s initial temperature to factor in this thermal jumpstart.
Also keep in mind carryover cooking. Once meat is off the heat source, it will continue to rise in temperature. By resting for five minutes, you’ll see that residual heat gradualy spreads out across the chop and brings the inside temp up another few degrees. If you pull at 145 degrees when you’re trying for something lean like center loin, you may end up with a final temp around 150-155 which can be on the dry side. To account for this rise, the calculator tells you to aim for a slight bit lower then your desired finished temp.
The last piece is oil control. Breaded chops should of fried at a relatively constant temperature (typically 340 to 360 degrees Fahrenheit). Too hot and the outside burns while the inside take longer to cook; too cold and the oil soaks into the batter and makes the chop soggy. It calculates how many batches and how crowded you’ll get and can estimate what the impact on the oil temp will be. You are frying six thick chops. You’re going to see the oil temperature drop significantly and will have to fry for longer.
Deep frying is all about patience, never try to hurry heat through the middle of your food. This sacrifices crispiness on the outside. Power doesn’t equal patience when it comes to deep frying. It takes the guesswork out of the equation. You will no longer wonder, “Is it safe after three minutes? Is five too long?” Instead you’re working within a scientifically determined window. And thanks to your instant-read thermometer, you can be confident that food is done when it’s done.
Then just step back and let the rest time take over. What you end up with is a chop that’s tender in the middle (but not raw), yet crisp around the edges. That perfect combination of tenderness and crunch is well-worth the added time investment required for the deep-fryer vs. You can pan-sear or grill it. Respect the science of how heat works instead of fighting against it.