Deep Fry Chicken Tenders Time Calculator
Estimate chicken tender frying time by tenderloin or sliced breast, length, thickness, breading thickness, oil temperature, starting temperature, batch crowding, buttermilk marinade, sauce service, drain rest, crispness, and a 165°F finish.
Choose a common tender setup, then fine-tune the actual strip size, coating, oil recovery, and service plan. This calculator is for boneless chicken tenders, tenderloins, and sliced breast strips, not bone-in chicken.
Tender fry plan
Enter tender details to estimate time, batches, drain rest, and service timing.
Timing Breakdown
Cooking Notes
Food safety note: the calculator estimates timing, but chicken tenders are done only when the thickest piece reaches 165°F on an instant-read thermometer.
| Tender Style | Typical Size | Oil Temperature | Estimated Oil Time | Best Use |
|---|---|---|---|---|
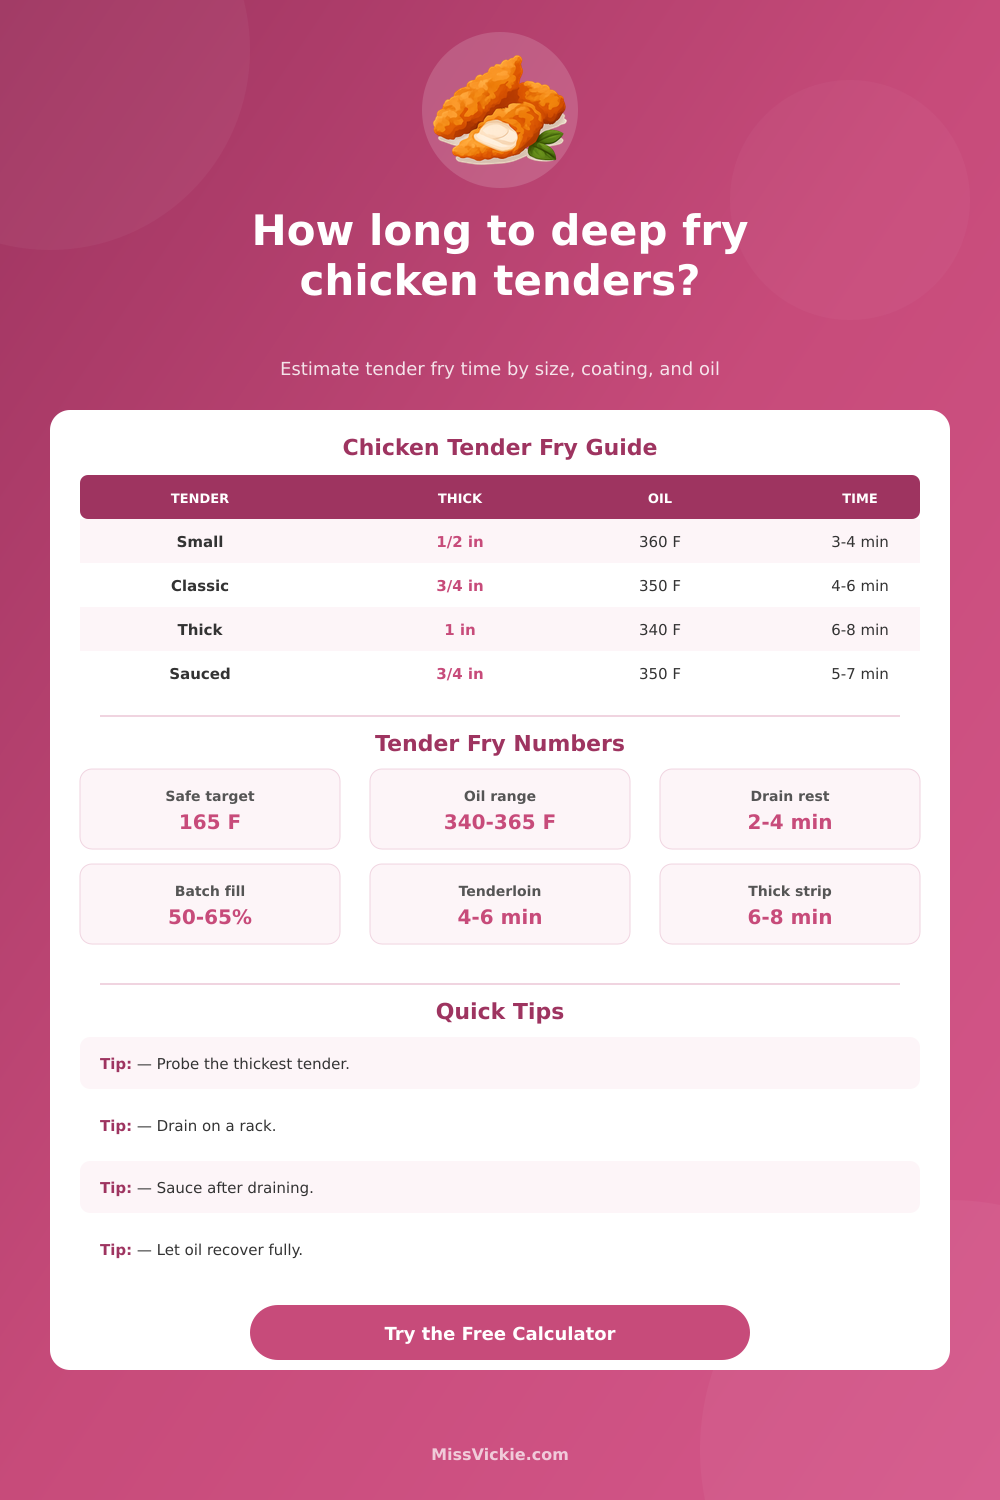
| Natural tenderloin | 1.5-2.5 oz, 1/2-3/4 in thick | 350-360°F | 4-6 minutes | Classic baskets, sandwiches, kid plates |
| Thin breast strip | 1-2 oz, under 1/2 in thick | 360-365°F | 3-4 minutes | Fast service, light breading, crisp edges |
| Even sliced breast strip | 2-3 oz, 3/4-1 in thick | 340-350°F | 5-7 minutes | Juicy platter strips and meal prep |
| Jumbo tenderloin | 3-4 oz, 1 in thick | 335-345°F | 6-8 minutes | Lower oil temperature to avoid dark crust |
| Panko or crumbed strip | 1.5-3 oz, even thickness | 350-360°F | 4-6 minutes | Crunchy crust with sauce on the side |
| Wet batter tender | 2-3 oz, coated heavily | 340-350°F | 5-7 minutes | Thicker coating, slower browning control |
| Surface Choice | Timing Effect | Crispness Effect | Handling Note |
|---|---|---|---|
| Light flour dusting | Adds little time | Thin crisp shell | Shake off excess flour before frying. |
| Buttermilk flour crust | Adds about 30-60 seconds | Classic craggy crunch | Drain marinade well before dredging. |
| Double-dredged coating | Adds about 1 minute | Thickest crunch | Rest breaded tenders 5-10 minutes before frying. |
| Wet marinade surface | Can add 1-2 minutes | May steam the crust | Pat or rack-drain before breading. |
| Sauce on the side | No extra fry time | Keeps crust crisp | Best for meal prep or party trays. |
| Heavy sauce toss | No safety time added | Softens quickly | Toss after draining and serve immediately. |
| Cut Style | Length Cue | Thickest Point | Time Direction | Probe Note |
|---|---|---|---|---|
| Natural tenderloin | 4-5 in, tapered | 1/2-3/4 in | Baseline 4-6 minutes | Probe the plump center, not the thin tail. |
| Even sliced breast | 4-5 in, straight | 3/4-1 in | Add 30-90 seconds | Check the square end where the strip is thickest. |
| Tapered sliced breast | 5-6 in, narrow ends | 1/2-3/4 in | Watch fast browning | Thin ends may finish before the center reaches 165°F. |
| Short nugget-style strip | 2-3 in, blocky | 1/2-5/8 in | Usually 3-5 minutes | Use a smaller probe angle so the tip stays centered. |
| Jumbo tenderloin | 5-6 in, heavy | 7/8-1 in | Lower oil and extend | Give the crust time to color without racing the outside. |
| Control Point | Best Range | Timing Effect | Tender-Specific Cue |
|---|---|---|---|
| Oil for thin strips | 360-365°F | Shortens the fry window | Best for light flour or panko on 1/2 in pieces. |
| Oil for thick or wet crust | 340-350°F | Prevents dark breading | Use for buttermilk, batter, or 1 in breast strips. |
| Buttermilk marinade drain | 5-10 minutes | Reduces steam pockets | Let excess drip before flour so the crust sets cleanly. |
| Breaded tender rest | 5-10 minutes | Helps coating cling | Especially useful for double-dredged tenders. |
| Rack drain after frying | 2-4 minutes | Finishes carryover | Keep tenders on a rack, not paper towels, for crisp bottoms. |
| Sauce on the side | Serve within 10 minutes | Protects crunch | Best choice for trays, meal prep, and mixed appetites. |
| Light or heavy toss | Serve within 3-5 minutes | Softens the crust | Toss only after draining so sauce does not trap oil. |
Use small batches, keep oil deep enough, and expect slower recovery.
A steady home setup for tenderloins when oil is kept near 350°F.
Basket shape matters; leave space so coating does not weld together.
Hold finished tenders on a rack in a warm oven, unsauced if possible.
Deep frying is such a straightforward act of courage: Set your timer. Toss some chicken in a vat of hot oil. When you can’t stand the smell any longer, remove it and hope it doesn’t turn into charcoal.
This method seems intuitive until you get those tenders with blackened exteriors and raw interiors, or pale batter concealing rubbery, uncooked flesh. But why does one bite result in a glorious, golden sliver of chicken and another in a sorry meal? More often than not, it’s about physics. How do you maintain an even oil temp and ensure the coating crisps up without burning? You also has to deal with differing thicknesses of material and control the rate at which heat travels across it. But you don’t need to guess. There’s a calculator. It does all the complicated heat-transfer math for you.
The Science of Deep Frying Chicken
First, it asks for exact dimensions of your piece of chicken, such as how thick it is at its thickest part. That’s the most important measurement, since cook-time isn’t based on length or weight, it’s based on how far away the center of the food is from the outer surface. For instance, a short, thick stack of sliced breast will cook different than a long, narrow chunk of tenderloin, even though they may be the same weight. Based off that thickness, the tool calculates what the rough base fry-time should of been.
Then it factors in the style of breading you’re using. A light dusting of flour allows the oil to go right to work on the meat; a heavy buttermilk coating creates an insulating layer between the oil and the meat, slowing down the heat transfer. A thicker coating mean longer frying. If you don’t drop your oil temp just a bit, you run the risk of burning the exterior before the interior has reached temperature.
There’s one other variable which kills more batches than an inferior recipe: crowding. Dropping too many tender into the pan simultaneously will cause the oil temp to plummet. To make up for this, the calculator allows you to choose your batch density. Filling the fryer basket all the way to top causes the oil to spend less time keeping itself warm and more time heating the chicken, so it adds a large amount of time to its estimate. This leads to soggy, greasy breading that absorbs fat rather than crisps up. It is better to run multiple small batches with a full recovery period in between each. The calculator include this recovery time in the total time so you know when dinner will actualy be ready.
Don’t skip over the initial fry temperature of the chicken. Cooking frozen or cold tenders will shock the oil and make them cook for different amounts of time. Bringing the meat to room temperature (for at least 20 minutes) ensures consistent heat throughout.
For draining, use a wire rack instead of paper towels. The steam becomes trapped between the chicken and the paper towel, making the tender underside immediately go soggy and lose the crispiness that took you hours to achieve.
Tossing them in sauce? Do so just before serving. Sauce makes things less crunchy. Moisture goes through the crust like a hot knife through butter. This means the tool can change your sauced tender timing, but the physical reality remains.
Take one last look for safety. No calculator can replace an instant-read thermometer; there’s just no substitute. Just poke the fattest chunk of anything you’re making and double-check for doneness (165 degrees F is your target). Temperature doesn’t lie, timelines are guidelines only.
With practice, you’ll learn to take into account all those factors: thickness, how dense the coating is, and how much oil has recovered. You will get a handle on them, turning fear-of-frying into mastery-by-numbers. Shatter-and-steam remains the objective at all times. Give the oil some love, respect the variables, and it will pay you back in perfection each time.