Cornstarch for Oobleck Calculator
Plan sensory-play oobleck with cornstarch, water, texture target, classroom group count, color drops, add-ins, tray portions, and a cleanup-friendly spill allowance.
🥣 Oobleck Presets
Choose a classroom or home-play starting point, then adjust the texture, group count, station size, cup density, color, add-ins, and extra allowance.
⚖ Batch Details
Classic classroom oobleck batch
Cornstarch and water amounts update as you change the sensory-play setup.
Batch Breakdown
Mixing Sequence
📏 Sensory Play Quick Grid
📊 Texture Reference Tables
| Texture Goal | Cornstarch to Water by Volume | Water per 2 Cups Cornstarch | Best Sensory Use | Adjustment Cue |
|---|---|---|---|---|
| Firm scoop | 2.35:1 | 0.85 cup | Scooping, squeezing, impact tests | Add teaspoons of water if crumbly |
| Classic oobleck | 2:1 | 1 cup | Hand pressure and slow-flow play | Add starch if it splashes like water |
| Soft hand tray | 1.8:1 | 1.1 cups | Younger groups and easy stirring | Rest before deciding it is too thin |
| Flowy demo | 1.6:1 | 1.25 cups | Pour ramps, cups, and funnels | Keep extra starch near the station |
| Starter mix | 2.15:1 | 0.93 cup | Students adjust at the table | Let groups add water gradually |
| Planning Case | Finished Oobleck | Approx Cornstarch | Approx Water | Typical Group Use |
|---|---|---|---|---|
| Single bowl | 2 cups / 475 ml | 1.75 cups / 217 g | 0.88 cup / 207 ml | One child or quick demo |
| Table group | 1.5 cups / 355 ml | 1.33 cups / 165 g | 0.67 cup / 158 ml | Two to four students |
| Shallow tray | 2 cups / 475 ml | 1.75 cups / 217 g | 0.88 cup / 207 ml | Shared sensory bin |
| Four stations | 8 cups / 1.9 L | 7.1 cups / 880 g | 3.55 cups / 840 ml | Small classroom rotation |
| Whole class | 15 cups / 3.5 L | 13.3 cups / 1.65 kg | 6.65 cups / 1.57 L | Ten table groups |
| Add-In or Color | Calculator Estimate | When to Add | Texture Effect | Cleanup Note |
|---|---|---|---|---|
| No color | 0 drops | None | Most predictable texture | Plain mixture is easiest to rinse |
| Light tint | 1 drop per water cup | Stir into water first | Almost no texture change | Use trays for pale surfaces |
| Medium color | 2 drops per water cup | Stir into water first | May need a pinch more starch | Check table coverings first |
| Bold color | 3 drops per water cup | Stir into water first | May loosen slightly | Use smocks and wipeable mats |
| Fine shimmer | 1/2 tsp per cup finished | Fold in after mixing | Slightly smoother surface | Contain in bins for easier cleanup |
| Foam beads | 1 tbsp per cup finished | Fold in gently | Breaks up flow strands | Keep away from drains |
🧪 Classroom Planning Cards
Good for short, contained hand exploration at a table.
Enough for two students to squeeze and pour in turns.
Works for three or four students with tools and spoons.
Fits a shallow tray for ramp, cup, or motion tests.
💡 Oobleck Handling Notes
Oobleck behavior changes with cornstarch brand, water temperature, cup packing, table tools, resting time, and how vigorously it is squeezed or stirred. Treat the calculator as a planning baseline and fine-tune at the bowl.
It’s not a failure of physics but a failure of planning when oobleck frequent ends up being a watery soup. Maybe you did add water and stir it in until it appeared just right, but then when kids begin to squeeze it… SPLAT!
Oobleck is actualy a changing system, it’s not a set recipe. Knowing this make all the difference between a gooey mess and a fun sensory station. Enter your desired texture and number of participants into the calculator, and let it do math for you. That way, you can focus on having fun while arithmetic is handled for you.
How to Make Perfect Oobleck
The system’s one core variable are the water/cornstarch ratio. The default two-to-one (by volume) is a solid starting point for that classic squeeze-and-flow texture that most people want. However, because volume isn’t a great measure of weight for powdered substances like cornstarch, what looks like a cup can have different mass depending on if it was fluffed up or settled when you scooped it from the bag in your kitchen tub. That change the gravity packing of the powder and hence its density. In other words, you’ll have to add more volume to get the same amount of mass as when it was fluffed up compared to when it is settled. Forgetting about that means your runs will be runny. You thought you put in two cups? No. It’s really half the required mass.
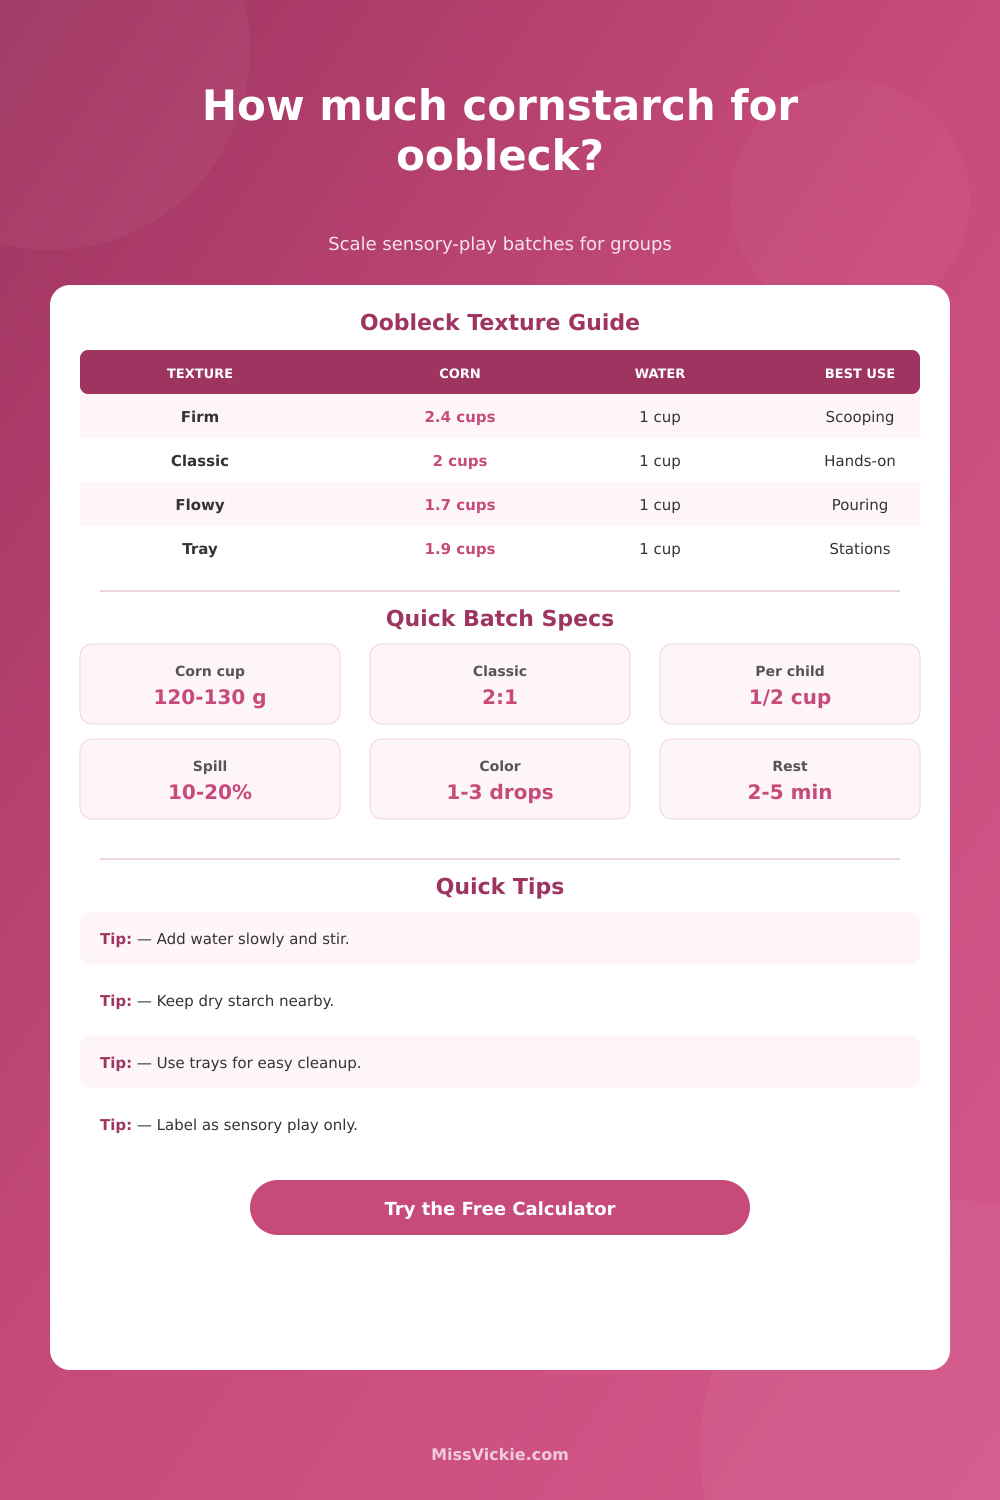
Finally, changing what kind of texture you want change the ingredient ratios. If your goal is a firm mixture to demonstrate impact testing or make scoops, add some starch. If you’re making a ramp so kids can pour something over edge, use a little more water. The chart on the page makes this clear, explaining that tiny adjustments to the ratios changes the physical properties of the non-Newtonian fluid dramatically. A firm batch feel solid until you apply force, while a flowy batch stays liquid until you pinch it. Depending on your goal, choose accordingly: Pouring needs to be fluid, while scooping needs resistance. There’s no optimizing for both.
Another important input into the recipe is group size. The calculator adjust all the ingredients according to how many student or stations there will be. For example, only a little bit of mixture is required for one student to do bowl play. A full class lab involves a lot of volume, so amounts scale to match. It then includes a spill allowance, not as a penalty but as a reasonable buffer. Kids will inevitably spill some of the mixture or add too much water. They might also get it sticky in their hand and stick it to tray. Adding an extra ten to twenty percent starch allow for that runny batch to be thickened with some extra dry starch. If no buffer is added, you’re stuck mixing up a second batch when first is drying out.
The mixture itself changes based off color and additives. To get the color right, you mix it in with the water first (using water-based color) then add it to the starch. This ensures even distribution without lumps in the color. To add texture, try adding glitter or foam beads. However, too much will mess up the flow of the ooze. The whole point of this tool is for it to feel weird. The key is keeping that weirdness going by not adding to much.
The last trick of all is to let it rest. After mixing your ingredients together, allow some rest time for those starch particles to fully hydrate. It may be that a mixture you thought was too thin will simply thicken with a little patience; a too thick one may soften a bit as well. Adjusting afterwards is always better than while first stirring in case you get carried away. Waiting to see the actual texture let you use less water all around.
That’s the beauty of planning for oobleck. How do you manage variables? You control the volume, the density, the ratio and the buffer, while the physics control the remainder. With the tool handling the scaling, all you’re left with is what is consistent and reliable. Flow where needed, hold together when wanted. It goes from a messy science experiment to something controlled and enjoyable. The panic fades, the squeezing begins, and with your buffer and tray planning, the daunting cleanup becomes easier too. Plan, then play.