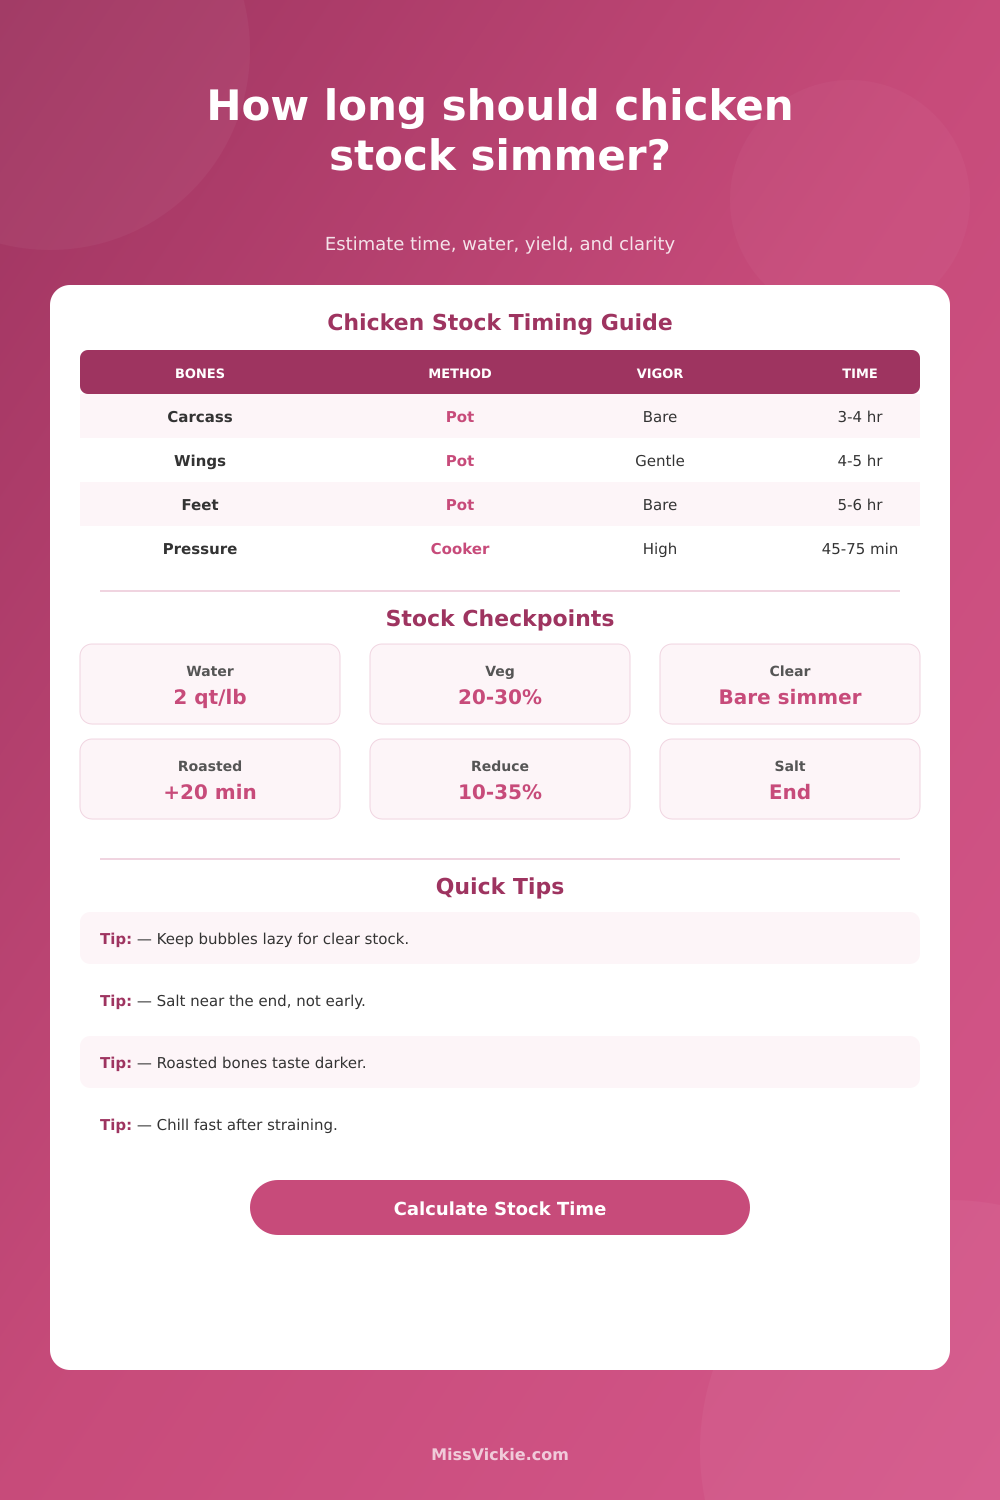
Chicken Stock Simmer Time Calculator
Estimate chicken stock simmer time, water ratio, vegetable load, evaporation, final yield, clarity, body, and salt timing from the bones, pot method, and simmer style you plan to use.
🍲Chicken Stock Presets
Choose a stock scenario, then adjust the bone weight, water ratio, vegetables, pot method, simmer vigor, roasting, clarity target, reduction, and salt timing.
⚖Stock Inputs
Chicken stock plan
Adjust the stock inputs to estimate simmer time and yield.
Stock Formula
Timing Factors
Simmer Schedule
🥣Stock Ratio Snapshot
⏱Bone Type Simmer Table
| Chicken Bones | Best Simmer Window | Water Ratio | Stock Character | Watch Point |
|---|---|---|---|---|
| Cooked carcass | 2.5-4 hours | 1.8-2.3 qt per lb | Light, fast, useful for soup | Avoid boiling; cooked scraps cloud quickly. |
| Raw backs and necks | 3.5-5 hours | 2.0-2.5 qt per lb | Clean chicken flavor with good body | Skim foam in the first 30 minutes. |
| Wings and drumettes | 4-5.5 hours | 1.8-2.2 qt per lb | Richer, more collagen than bare bones | Do not over-reduce if using for soup. |
| Chicken feet | 5-7 hours | 2.2-2.8 qt per lb | Gelatin-heavy body | Needs low heat to keep the texture clean. |
| Roasted brown bones | 4-6 hours | 2.0-2.6 qt per lb | Darker, savory, sauce-friendly | Roasted bits can turn bitter if boiled hard. |
🔥Method And Vigor Table
| Method | Typical Time | Evaporation | Clarity Effect | Best Use |
|---|---|---|---|---|
| Open stockpot | 3-6 hours | Medium to high | Clear if barely bubbling | Everyday soup stock and flexible reduction |
| Dutch oven | 3.5-6 hours | Medium | Stable gentle heat | Small batches and brown stock |
| Slow cooker low | 8-12 hours | Low | Usually clear, sometimes flat | Hands-off carcass stock |
| Pressure cooker | 45-90 minutes | Very low | Often slightly cloudy | Fast gelatin-rich stock |
| Covered oven pot | 4-7 hours | Low to medium | Even heat, low stirring | Clear stock with little attention |
🥕Vegetable, Salt, And Reduction Table
| Factor | Low Range | Balanced Range | High Range | Kitchen Effect |
|---|---|---|---|---|
| Vegetables | 0-15% bone weight | 20-30% bone weight | 35-45% bone weight | Too much carrot or onion can make stock sweet. |
| Water ratio | 1.5-1.8 qt per lb | 2.0-2.5 qt per lb | 2.8-3.5 qt per lb | More water protects coverage but dilutes body. |
| Yield reduction | 0-10% light stock | 15-30% everyday stock | 35-60% concentrate | Higher reduction intensifies salt and gelatin. |
| Salt timing | Unsalted base | Salt after straining | Early salt | Late salt keeps sauces and reductions flexible. |
| Clarity target | Rich cloudy stock | Balanced stock | Very clear stock | Clear targets need low heat and careful straining. |
🧊Cooling And Storage Yield Table
| Final Yield | Soup Portions | Freezer Portions | Reduction Note | Cooling Cue |
|---|---|---|---|---|
| 2 quarts | 4-6 bowls | 4 pint containers | Small carcass batch | Chill in a shallow pan first. |
| 4 quarts | 8-12 bowls | 8 pint containers | Weeknight stockpot batch | Divide before refrigerating. |
| 6 quarts | 12-18 bowls | 12 pint containers | Large meal-prep batch | Use an ice bath for faster cooling. |
| Concentrate | Dilute 1:1 or 1:2 | Freeze in cups or cubes | Best for sauces and rice | Label strength and salt status. |
📊Clarity Target Comparison Grid
Use raw or pale bones, skim early foam, keep bubbles lazy, and strain through cloth.
Balanced simmering gives useful body without making the stock too cloudy for soup.
Wings, feet, and a little reduction create a firmer chilled gel and deeper mouthfeel.
Higher reduction saves freezer space but should usually stay unsalted until use.
💡Chicken Stock Tips
This calculator estimates kitchen timing and yield for chicken stock planning. Cool stock quickly, refrigerate promptly, and follow safe storage practices after straining.
For most home cooks, making chicken stock is messy process. You toss the carcass of last night’s roast into big pot, cover it with water and hope for the best. That’s generally OK, but hardly ever great. There was too much carrot; now the stock tastes funny-sweet. Not enough bones, so resulting liquid is thin; agitation makes it cloudy.
Planning makes all the difference here. Making stock are about extracting things, controlling evaporation, and managing when to add salt so as not to make a briny mess. Plug in the weight of meat and clarity level, and let the calculator do the rest on this page. No more guessing at simmer times and water-to-ingredient ratios. You’ll know exactly how long to let it go, whether you’re building a light-as-air consommé base or a hearty stock for that weeknight stew.
Simple Steps to Make Great Chicken Stock
What goes in is important; it affects the final chemistry of what emerges from the pot. A pre-cooked carcass cooks faster then raw backs and necks, whose collagen hasn’t yet begun to break down. Cook them both at the same time? Your resulting stock will be thin and weak.
Your first big choice is how clear you want it. To get a crystal clear drink, maintain just enough heat to produce a few lazy bubbles that rise up through surface. Sediment and fat will emulsify in water if you agitate, which make your stock cloudy. You don’t want a rolling boil; that’s not good for clarity. This choice affects your suggested simmer time, which the tool tailors accordingly. An active simmer gets more flavor out faster then a barely simmering pot does, even though end product looks better. Many cooks don’t realize this aesthetic/speed tradeoff until they’re looking at a murkier-than-expected soup.
Bones determine body: the stock’s body comes from the bones. As those bones cook, gelatin from their connective tissue seeps out, thickening sauce and giving the finished product its rich mouthfeel. Wings and feet has plenty of connective tissue; bare carcass bones provide flavor but little structure. For example, carcass bones provide flavor but little structure. Carcasses provide flavor but little structure. A stock made from only leftover dinner bones may be full of chicken flavor but will be thin in the bowl. Professionals mix up their bone types all the time. The page’s reference table show how different bones affect the finished dish. It also explains why adding a few feet to a pot of carcass can turn a good soup base into a sauce foundation.
Don’t skimp on vegetables either; just be careful with them. The ones most likely to throw off flavor balance are onions and carrots due to their inherent sweetness, which will caramelize and brown during cooking, darkening the stock as well as giving it an overly sweet dessert taste. Try for roughly twenty to thirty percent of weight in bones to veggie and you’re in safe zone: They’ll provide plenty of fragrance without dominating the flavor profile. Aromatics can always be added; once they’ve cooked into the broth, sweetness can’t be taken out.
Another common mistake is salt timing. Sure, it’s tempting to add some now, but what happens when water evaporates? That salt will concentrate in the pot. If your stock reduces by thirty percent, your sodium level jumps with it. Your sodium doubles. Wait until after you’ve reduced and strained and you have complete control over the finished flavor. Salt makes the base flexible for later soups or sauces that may require more reduction; just be careful not to oversalt. You should of waited too.
And finally, what to do with it? Chilled, your gelatin-rich stock should be jelly-like. Refrigeration will also thicken a soup that lacks enough collagen-producing bones. However, it might also mean you didn’t let it simmer long enough. To protect yourself from bacteria, you must cool your stock quickly. Freeze it in ice-cubes, if desired, or save it for tomorrow’s risotto.
Making sure to plan for the appropriate size of your batch will help you avoid wasting anything, and having just the right amount on hand when inspiration hits. These variables change an otherwise basic pot of boiling water to a trusty go-to in home kitchen. When you get them dialed-in, it’s no longer guesswork; its food-engineering.
Next time you reach for that giant pot, consider checking your ratios first. Choosing the right bones, keeping a gentle simmer, and adding salt later will work much better then just cooking them for a longer time.