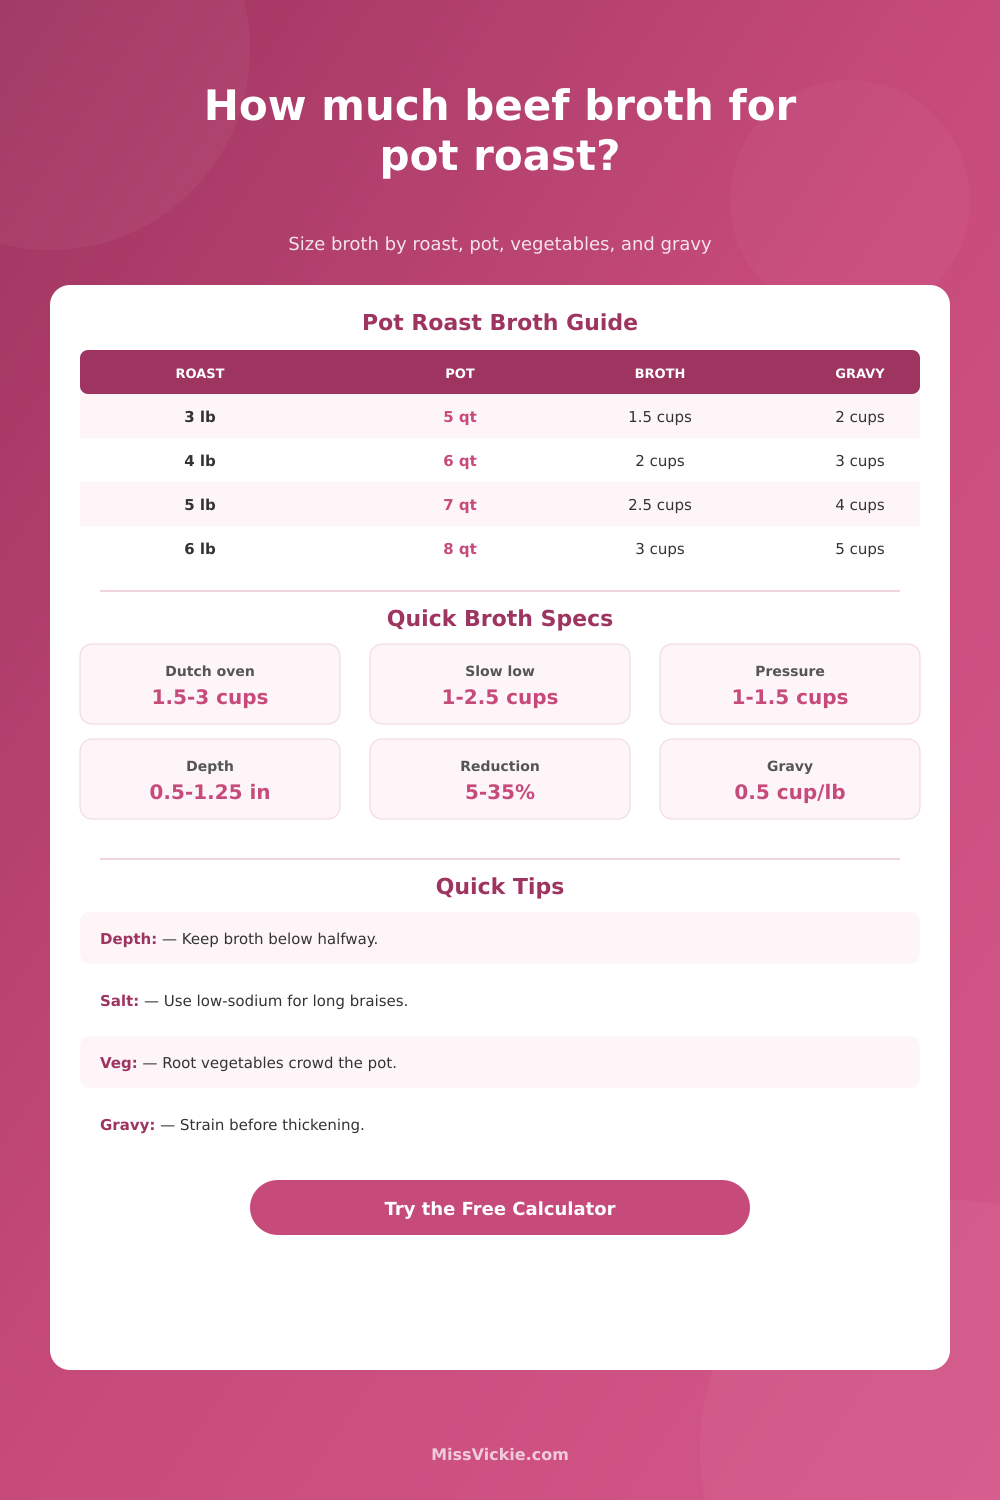
Pot roast broth, braise depth, salt, reduction, and gravy yield planner
Beef Broth for Pot Roast Calculator
Estimate how much beef broth to add to pot roast by roast weight, pot footprint, target braise depth, vegetable load, cooking method, lid fit, broth saltiness, reduction, and gravy target.
📌Pot Roast Broth Presets
Start with a common pot roast setup, then adjust the roast, pot, broth depth, vegetables, reduction, salt level, and gravy goal.
⚖Roast, Pot, Broth, And Gravy Inputs
Pot roast broth plan
Your broth, braise depth, reduction, and gravy yield will appear here.
Broth Calculation
Yield And Gravy Check
Cook notes from this setup
🥣Broth Amount Benchmarks
Good for slow cookers, pressure cookers, and juicy chuck roasts.
Enough broth for gentle bubbling without boiling the roast.
Use when potatoes, carrots, or leftovers need more sauce.
Keep liquid below halfway up the beef for a true pot roast braise.
📊Beef Broth And Yield Tables
| Roast setup | Starting broth range | Finished liquid | Best use |
|---|---|---|---|
| 3 lb chuck, 5 qt Dutch oven | 1.25 to 1.75 cups | 1.5 to 2.25 cups | Weeknight pot roast with standard gravy |
| 4 lb chuck, 6 qt Dutch oven | 1.75 to 2.5 cups | 2.25 to 3.25 cups | Family dinner with carrots and potatoes |
| 5 lb roast, slow cooker low | 1.25 to 2.25 cups | 2.25 to 3.75 cups | Hands-off tender roast with moderate reduction |
| 3 lb pressure cooker roast | 1 to 1.5 cups | 1.5 to 2.25 cups | Fast pot roast where minimum liquid matters |
| 6 lb holiday roast, 8 qt pot | 2.75 to 4 cups | 4 to 5.5 cups | Extra gravy and mashed potato service |
| Ingredient or method | Liquid effect | Salt effect | Gravy planning note |
|---|---|---|---|
| Chuck roast | Releases gelatin and juices | Usually forgiving | Often makes the richest natural gravy |
| Bottom round or rump | Less gelatin body | Needs careful seasoning | Use enough broth to make a softer sauce |
| Root vegetables | Displace broth and absorb some liquid | Soften perceived salt | Strain before reducing if making smooth gravy |
| Regular salted broth | Works for short braises | Can concentrate quickly | Reduce less and thicken gently |
| Loose lid or wide pan | Higher evaporation | Raises salt intensity | Add reserve broth in stages |
🧂Salt, Reduction, And Gravy Targets
| Gravy target | Finished liquid target | Reduction style | Thickening cue |
|---|---|---|---|
| Light pan juices | About 0.25 cup per lb roast | Little or no reduction | Spoon over beef without heavy thickening |
| Standard gravy | About 0.45 cup per lb roast | Moderate reduction | Thicken after straining and defatting |
| Generous gravy | About 0.65 cup per lb roast | Light reduction | Good for potatoes and vegetables |
| Extra leftovers | About 0.85 cup per lb roast | Minimal reduction | Save some strained broth before thickening |
| Concentrated sauce | About 0.30 cup per lb roast | Stronger reduction | Use unsalted broth or reduce carefully |
💡Pot Roast Broth Tips
These estimates are for covered moist pot roast methods. Actual liquid loss depends on pot seal, simmer strength, roast shape, vegetable water, altitude, and how long the roast cooks after becoming tender.
A three pound chuck roast in your hand makes you panic: what about water? Too much water, and you boil it. The collagen melts into the sauce, but tougher protein stretches, making the finished dish stringy and tough. Too little broth, and you risk burning the pan before beef becomes fork tender.
The calculator does the math for you. Knowing the math help you understand why those numbers are important. This means you won’t have to guess the next time you use your Dutch oven which you’re not sure is even yours anymore.
How to Use the Right Amount of Liquid
A braise and a stew is different things. One thing that makes them differant: pot roast is a braise, where liquid should only come partway up the sides of the meat (usually a quarter or a third of the way). The meat cook from the steam it traps between itself and cover on top. The liquid simmers away below.
So why does this matter? Why do we care about what shape your pot is? This is because footprint is more important then volume. A shallow, wide roasting pan need much more broth to reach a depth of an inch or two than a narrow, tall slow cooker does. But if you follow a recipe that tells you to put two cups of broth in a large pot, you’re going to be left with a soupy runny mess. Why? The larger surface area allow more moisture to evaporate. To address this, the tool gives you the option to enter either the length or width of your pot. It converts physical space into volume.
It’s true: Vegetables throw a wrench in the best-laid plans. Root vegetables are dense. Add a whole load of potatoes, carrots, and onions to your roast and immediately, the moment they enters the pot, they displace some of liquid. Now the liquid level has risen which can mean meat is covered. As those vegetable cook, they also give off water. That dilutes the braising liquid and makes its flavor weaker. When you add veggies to a roast with just the right amount of broth already, you may conclude you should of used less broth. But in fact, you must consider not only how much water the vegetables soak up but also how much space they take up. The calculator takes that into account. Be honest when entering number of carrots you’re throwing in there.
Most home cooks gets burned here: the salt concentration. The liquid reduces during the long braise. Even under a tight lid, some of it evaporates. Flavor gets carried away by steam that condenses on the lid and runs down the sides. Reduce your regular salted broth by twenty percent and you’ll be left with intensely salty liquid. It’s safer to start with low-sodium broth or unsalted stock for long cooks. That way you have room to adjust seasoning at the end; without turning gravy into a brine. Even though bouillon cubes is easy to use, they’re dangerously concentrated. Use them without tracking the reduction carefully and you could turn a gentle braise into a sodium bomb.
For this reason, the least amount of liquid you’ll need depends based off your method. Very little liquid (sometimes only a cup) is necessary for pressure cooking because it relies upon steam to create pressure. Slow cookers on high will lose far more liquid than anticipated. Low and slow will preserve nearly all the liquid. Using moderate oven temperatures in a Dutch oven falls somewhere in between. It’s also important that lid seals well. If it doesn’t, you’ll lose steam. This means you’re going to need more broth at the start so you don’t run out of liquid for gravy at the end.
Before you cook: plan your gravy. Need lots of sauce to serve over mashed potatoes? Then you’ll need to start with plenty of broth. Just want some lightly sauced pan juices? That’s different. Use this tool to help estimate what you’ll end with. What will happen to your sauce as it reduces and evaporates? This prevents an “oops” moment. This prevents the “my beef is tender but there’s no sauce” moment during dinner. Small thing, yes. Matters, though. Tender or not, a dry pot roast are a failed pot roast.
After the roast’s complete, strain the liquid so there are no chunks of carrots and onions when making the gravy. It won’t taste good and your gravy will be lumpy. Strain it. Make a nice gravy using a roux or cornstarch slurry after you’ve strained it. If you want more vegetables, add them back in later to give the gravy some texture. Make sure liquid is strained. It takes away the worry.
There’s no wondering: do I use two cups? Or three? It’s math. How much cut of meat do I have? What size pot am I using? How tender do I want my result? The chemistry and the geometry gets handled by the calculator. All that remains is the cooking.
Just warm the liquid so that it’s just barely rippling. Do not let it boil. That slight tremble keeps meat tender. And when it’s ready, you’ll have enough gravy for everyone, even the mashed potatoes. This includes the mashed potatoes.