
If you don’t have the Aquadur test strips that De’Longhi machines typically include, you can use any strip you have on hand. Any test strip that tests total hardness will work just fine. If you already own some of the API brand, then this will be sufficient. This is simple enough to do repeatedly as desired.
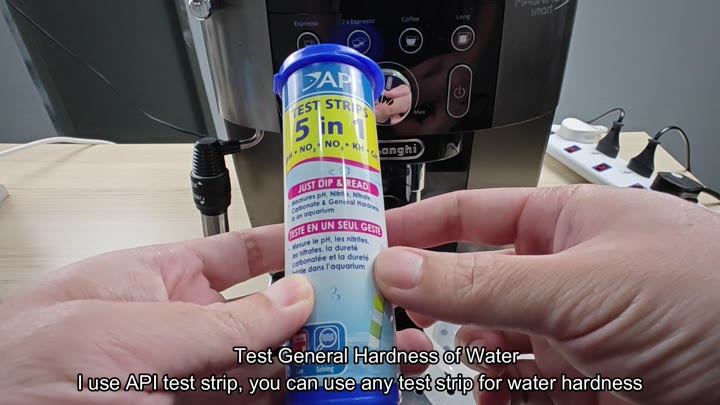
Follow the maintenance schedules and test regularly. Descale according to the measured hardness reading; this varies from region to region and depends wholly on the hardness level.
Out-of-the-box, your machine will default to a level 4, which is usually not the same than your local mains water. Setting the descale to your reality means less descales than necessary. Less cleaning solution, and time.
Testing Your Water Hardness
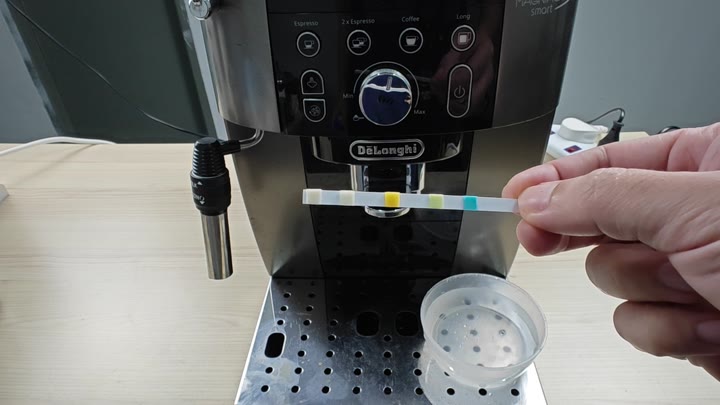
Remove one new piece of total hardness test indicator paper from its sealed package. It’s important not to get the paper wet until ready for testing.
Grab a small glass and add some tap water from your kitchen sink. Be sure there are no contaminants in the water. Clear water are necessary for an accurat reading.
Then you dip it completely in the water. It’s all about the timing here. Leave it in just long enough to make the color change (about 1 second). Any more or less and it will throw off the color change. Then you remove it from the water, lightly shake off some of the water and you’re good to go.
And then, well, just let it sit there a minute and let the reaction take place.
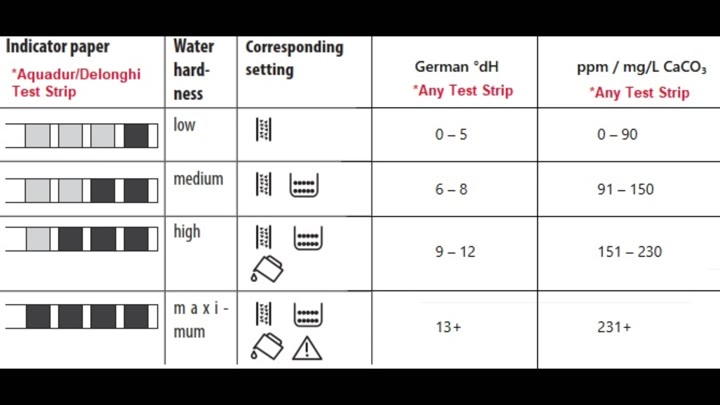
You get these little squares on the strip that come out in colors. One to four red squares is what should appear depending on how hard your water is. Each square represents one of the levels of hardness.
Next you take the strip and match it to the chart they give you from the maker. So if your water is returned as low hardness then you will put the machine on level 1. They have done a great job matching ppm values to German degree hardness and corresponding colors making it really simple to translate.
First, make sure your appliance is turned off before attempting to program it. Of course, it’s still plugged in to the wall outlet. That being said, the main on/off switch should be left in the on position so that the internal logic board can stay powered on and accept programming commands.
Only once the display is completely dark, though.
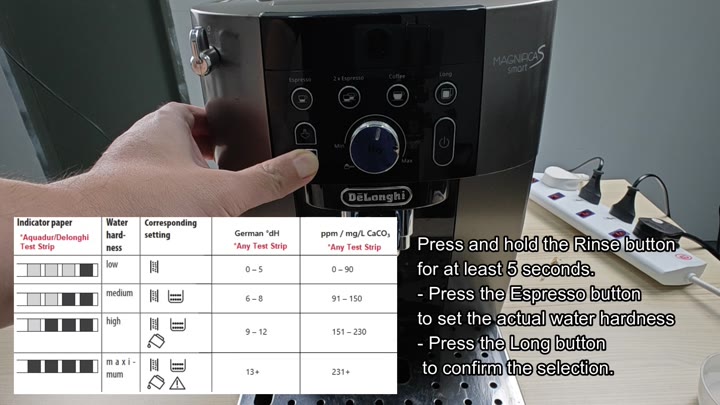
At this point, you will continue holding down the Rinse button (for no less than five seconds). The panel’s indicator lights will flash simultaneously. This indicates that it’s ready to recieve your input.
Now don’t let go of the button yet, as there is a reason: Timing is everything. Wait until the display is completely dark before proceeding.
With the lights on, you use the Espresso button to select your hardness level.
With the lights on, you hit the Espresso button for your hardness level. Pressing it again brings up that number, and you press it repeatedly until it’s displayed.
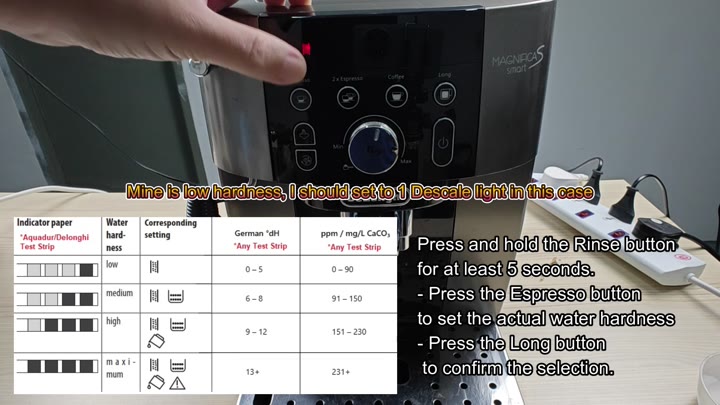
Since your test showed low water hardness, choose option 1. It’ll take a second for the machine to go all the way around to that one. Make certain that you’re matching what you got in your test to the number.
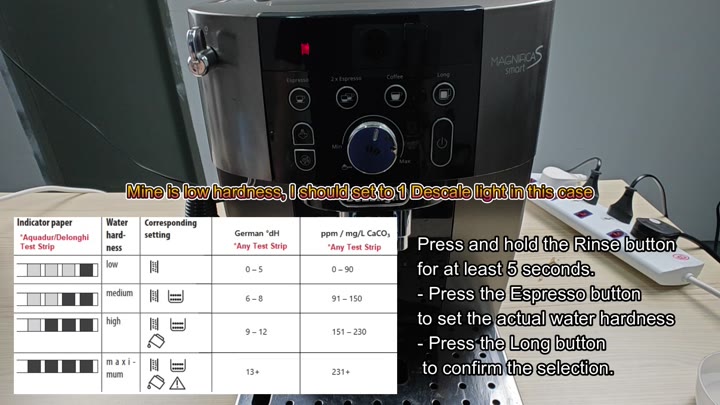
After selecting the level, you press the Long button to lock in the choice.
Next, you’ll choose the level. Once done, press the Long button and the choice is locked in. This will save your new hardness level in the system.
The machine saves the information immediately. Nothing more for you to do here. Your red descale light may still be on, but it will reset during a proper descale cycle.
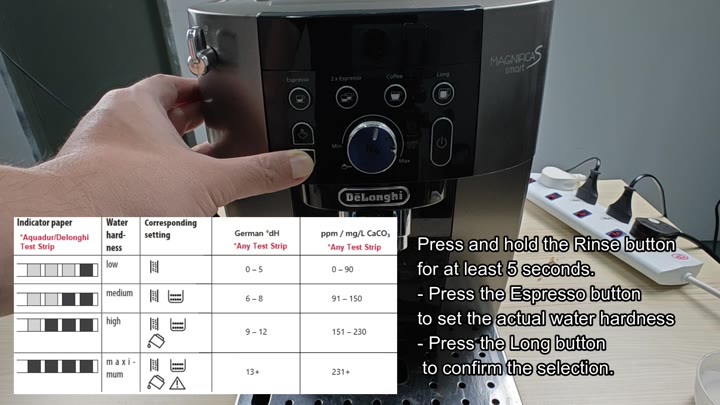
Now, we have the coffee maker all set to the new setting and that’s it! Based on what you just entered, your machine will know when to clean itself. You won’t have to run the descaling cycle as often as before anymore.
It was quick and painless. It feels nice knowing that you’ve optimized the coffee maker for your own water source.
Because the hardness of your water can change over time, you’re going to check the water again in a couple of months. That way you know if everything is running smoothly. Little adjustments like these make a huge impact on its lifespan. It is definitely worth of making this a habit.