A freezer is a necessary electronic appliance and is actually the most useful one. This is because it can store the food for later use and ensures freshness in the food. For this reason, people choose Hisense chest freezers because they are more reliable and have top-notch cooling features.
However, the development of frost on the chest freezer’s walls can increase the electricity bills and reduce efficiency. The majority of advanced freezers are designed with self-defrosting features, but if you are using a Hisense chest freezer, there are high chances that you won’t have the self-defrosting option. So, let’s see how to defrost the chest freezer!
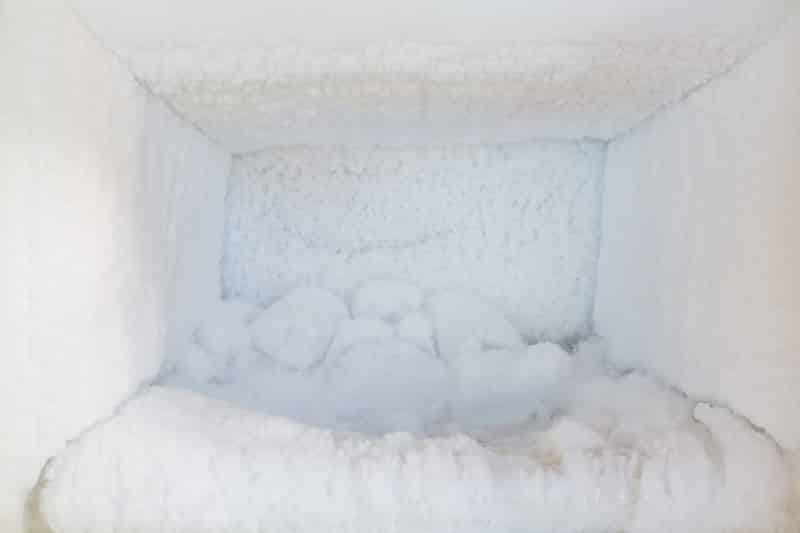
How To Defrost Hisense Chest Freezer?
When it comes down to the Hisense chest freezers, you need to defrost the freezer at least twice a year or simply when the ice seems to be thicker than an inch. However, before you start the defrosting process, you have to disconnect the chest freezer from the power connection because it’s a basic safety feature.
In addition to this, you need to remove the food from the refrigerator and lay down the towels and shower liners on the floor to make sure the floor is not flooded with melted ice. Now that you know some prerequisites, you can follow the below-mentioned ways of defrosting the chest freezers!
1. Just Wait
If you want to have an easy defrosting experience, all you’ve to do is to unplug the freezer, open the door, and just wait for the ice to melt on its own. This is the simplest defrosting method, but it might take a long time – it’s needless to say that this defrosting method is safe. After a few hours, the ice will start melting, and you can mop away the water. In addition, you need to place the old towels on the floor right in front of the chest freezer’s door to absorb the melting ice’s water.
2. Blow Dryer
The second way of defrosting the Hisense chest freezer is to use the blow dryers. If you have a portable hairdryer, just turn it on and warm up the built-up ice. However, make sure the freezer is unplugged and you don’t stand in the standing water. You need to be careful about this method to ensure the blow dryer doesn’t overheat. Moreover, make sure that the dryer doesn’t get too close to the freezer’s sides and coils because the high heat can result in damage to the unit. In addition, it can damage the freezer’s plastic construction. While you are using the blow dryer, you should aim it parallel to the freezer’s wall because you have to get the hot air of the dryer behind the ice.
3. Fan
A fan is another great option because it helps circulate the warm air into the Hisense chest freezer. With this method, you have to set up the fan just outside the freezer (the door of the freezer should be open, of course). This constant flow of air will result in faster melting, and you won’t have to stand in the freezer for too long.
4. Hot Water Pans Or Bowls
Another great way of speeding up the defrosting process is to put the pans or bowls filled with boiling hot water and close the door. This is because the Hisense chest freezers are sealed properly, and the hot water’s steam will help melt the ice. For the most part, thirty minutes to one hour of hot water pans will be enough (it can at least start the defrosting process). However, you need to put the folded towels beneath the hot pan or bowl to make sure the freezer’s shelves are not damaged.
5. Metal Spatula
Another defrosting method is to use the metal spatula and heat it up. For this purpose, we suggest that you wear an oven mitt and hold the metal spatula over the stove’s flame and press this spatula on the ice – it can help loosen up the ice. Keep in mind that you have to be extremely careful and don’t underestimate the importance of oven mitts.
These are some popular methods of defrosting the Hisense chest freezer when the thick ice layers are built up on the sides and the floor. However, always read the instruction manual to protect the freezer from damage!