Bread Cooling Time Calculator
Estimate when a loaf is ready to slice, bag, wrap, or store using loaf type, baked weight, pan retention, crust thickness, crumb moisture, room temperature, rack airflow, and carryover steam behavior.
Choose a realistic loaf, then tune the weight, crust, moisture, rack, slicing target, and bagging plan to match your bread.
Cooling estimate
Adjust the inputs to match the loaf on your rack.
Cooling Formula
Loaf Readiness
Cooling Timeline
- Steam vents from crust.
- Crumb starches set.
- Slice window opens.
- Bagging window opens.
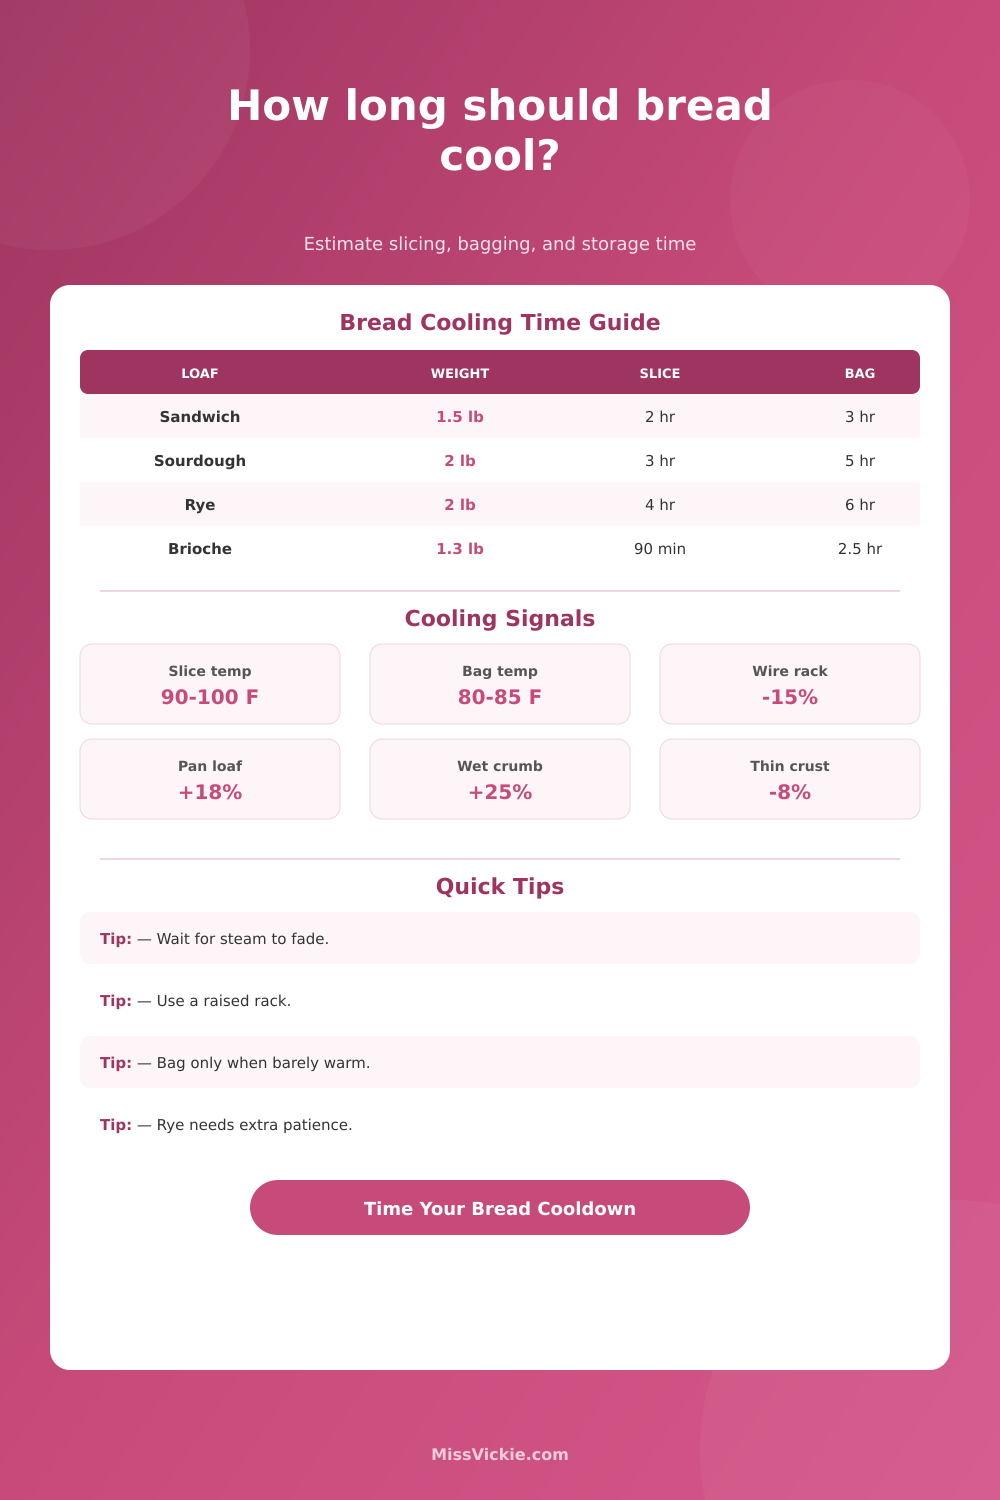
| Loaf Type | Typical Baked Weight | Slice Window | Bagging Window | Cooling Reason |
|---|---|---|---|---|
| Soft sandwich loaf | 1.3-1.8 lb / 590-815 g | 90-150 min | 2.5-4 hr | Pan sides hold heat and soft crust traps steam. |
| Rustic sourdough boule | 1.8-2.4 lb / 815-1090 g | 2.5-4 hr | 4-6 hr | Thick crust and high hydration need starch setting time. |
| Baguette or batard | 0.5-1.2 lb / 225-545 g | 35-90 min | 1.5-3 hr | Narrow shape vents heat quickly but crust can toughen if bagged early. |
| Dense rye loaf | 1.8-2.8 lb / 815-1270 g | 6-12 hr | 8-18 hr | Pentosans and moist crumb continue setting long after baking. |
| Brioche or enriched loaf | 1.1-1.7 lb / 500-770 g | 75-140 min | 2-3.5 hr | Fat slows steam escape but tender crumb slices sooner than rye. |
| Quick bread loaf | 1.5-2.2 lb / 680-1000 g | 2-4 hr | 4-6 hr | Sugar and fruit moisture keep the center warm and fragile. |
| Variable | Fastest Setting | Slowest Setting | Cooling Impact | Best Use |
|---|---|---|---|---|
| Shape | Rolls or baguette | Tall pan loaf | 0.62x to 1.28x | Use shape factor to account for surface area. |
| Rack setup | Raised rack with airflow | Counter or still in pan | 0.86x to 1.28x | Lift the loaf so bottom steam can leave. |
| Crust thickness | Thin soft crust | Thick dark crust | 0.92x to 1.18x | Dark, thick crust insulates the center. |
| Crumb moisture | Dry open crumb | Custardy or rye crumb | 0.9x to 1.35x | Wet crumbs keep slicing gluey if rushed. |
| Room temp | 65°F kitchen | 85°F kitchen | -9% to +18% | Warm rooms need extra bagging patience. |
| Target | Center Temp | Texture Result | Best For | Warning Sign |
|---|---|---|---|---|
| Warm tear-and-serve | 105-115°F / 41-46°C | Soft, steamy, irregular cuts | Crusty table bread | Knife smears the crumb. |
| Clean sandwich slices | 90-100°F / 32-38°C | Set crumb with light warmth | Pan loaves and sourdough | Slices compress at the base. |
| Thin deli slices | 80-90°F / 27-32°C | Firm enough for narrow cuts | Sandwich bread and rye | Crust separates from crumb. |
| Bagging or plastic wrap | 80-85°F / 27-29°C | Low condensation risk | Soft storage and freezing | Droplets form inside bag. |
| Rye overnight rest | Room temp | Fully set, less gummy | Rye, seeded, pumpernickel | Knife blade becomes sticky. |
| Storage Method | When To Start | Moisture Behavior | Crust Effect | Calculator Logic |
|---|---|---|---|---|
| Open rack | Until center is below 90°F | Steam leaves freely | Crust stays drier | Uses base bagging time with no early seal bonus. |
| Paper bag | When barely warm | Lets moisture escape slowly | Best for crusty bread | Allows a slightly earlier storage window. |
| Plastic bag | At 80-85°F | Traps remaining moisture | Softens crust | Adds condensation risk if warm or wet. |
| Freezer wrap | Fully cool, then slice if needed | Prevents ice crystals | Protects texture | Requires the most conservative cool target. |
| Rye rest | Cool, then rest covered overnight | Moisture redistributes | Crust softens gradually | Extends slicing and bagging windows. |
Soft crust, rectangular mass, and pan heat make it slower than the loaf looks.
Thick crust and wet crumb need extra time before clean slicing.
Small diameter cools quickly, but bagging too early ruins the crust.
Dense rye behaves like a set custard, so resting beats warm slicing.
Cooling estimates are practical kitchen ranges. Use a probe thermometer for the most precise slicing and wrapping decisions, especially with rye, seeded bread, or very large loaves.
When your loaf emerges from the oven it smells wonderful, its crust has turned golden brown and you want to cut right in. You shouldn’t, and here is why. If sliced too soon, you’ll damage the crumb structure. When you cut into hot bread, you’re trapping steam inside which will make the crumb gummy.
Cooling isn’t simply passive; it’s active cooking. Carryover baking means that as the loaf cools on the counter its starchy center continue to set up. Interrupt this setting period by slicing open a warm loaf and what do you get? You get sticky, dense slice instead of airy bread.
Why You Must Let Bread Cool Before Cutting
For most bakers, it’s just a question of trusting their gut (or relying only on feel or time), hoping the bread is cool enough to cut without burning themselves. But there are several factors that affect this. Like moisture content, airflow, loaf size, and crust thickness, that your gut doesn’t take into account (and even then, a freeform bake vs. One in a pan means that your loaf will retain more heat different than a pan would).
Room temperature plays a factor in whether something might condense before being bagged. With these factors understood, no, you don’t need a thermometer in-hand. The tool takes all those conditions into consideration and turns them into safe period of time, helping you go from guesswork to confident-slicing work.
But size does matter: The greater the surface area, the faster heat will escape, so think about what shape your bread is. Thin baguettes will cool quickly, while a taller sandwich loaf retain heat like a thermos. That’s why the calculator asks for pan retention and loaf type.
If you leave a loaf in its metal pan too long, the sides will keep cooking the crust and cause it to become soggy instead of crisp. Take it out after ten minutes and place it on a wire rack. This lets air get under it to vent steam that would otherwise soak into the bottom crust, making a huge difference in texture.
Another factor is moisture level. A dry sourdough crumb will set up quicker than a wet rye, or a custardy banana bread. Because of its high specific heat capacity, water hold onto internal heat. As it turns into steam, the heat take a while to escape, so it stays warm longer. The thick blocks in the list of references on the page require much more time to steady into something you can easily manage. And trying to rush this process would of result in fighting with a knife that’s dragging across a gummy interior instead of sliding over set-up structure.
What is the biggest mistake in keeping bread fresh? Bagging it prematurely. The plastic retains moisture, which keeps the bread soft. However, it does not keep things fresh if the bread is still warm. If you seal it up while it’s still warm, condensation will collect on inner surface of the bag, a moist environment that spells sogginess and mold. Ideally, wait until the internal temperature drops below eighty-five degrees Fahrenheit before sealing it up. That way your outer crust is still dry and crispy without being rock-hard, yet there’s no soggy middle.
Paper bags are better for really crusty artisan loaves where you want a little bit of snap back into the crust. They offer just a little more wiggle room. Seeded breads and ryes are another example that need your patience as the flour contains a lot of pentosans (flour proteins that bind water). These in turn slow down the setting time.
A loaf can be left to rest overnight which will give the moisture time to distribute itself more evenly through the loaf. Your wait will be rewarded with a tastier loaf, with less messy slices. It is not laziness, but technique.
Freezing works the same way. Don’t put a warm loaf into plastic wrap then into the freezer. When it defrosts, all those ice crystals will destroy the crumb structure. Equilibrium is what you are trying to reach with cooling. You want to get the inside and outside to a temperature where moisture isn’t steamed into place but is still locked in. You also want the starch to be firmed enough to hold its form but not so much that it sticks things together.
Time does it; airflow will help by removing heat from the surface. Ideally the slices of your final-cut loaf should come out cleanly, with no compression or sticking. The crust should offer resistance when you slice through it. Inside should be even all over. This part is what makes great bread from just good bread.
Trust your ingredients. Trust the process and the science of heat transfer. Resist rushing it. Master this stage. This one’s all about your patience, your oven will do most of the work, but you’ll bring it home in the end. Be patient, let the loaf rest. Wait until it no longer steams. Wait until it feels solid under your fingertips. Wait for that moment. And only then slice into it. When the first bite confirms a perfectly set crumb, every second spent waiting was worth it.