Chicken Thawing Time Calculator
Estimate safe thawing time for whole chicken, breasts, thighs, drumsticks, wings, tenders, and mixed packages using refrigerator, cold-water, microwave, or hybrid thawing.
🐔 Chicken Thawing Presets
Choose a kitchen scenario, then adjust weight, cut type, packaging, fridge temperature, water-change timing, microwave power, and your cook deadline.
🧮 Thawing Inputs
Chicken Thaw Plan
Adjust the inputs to see a safe thawing window.
Thaw Math
Safety Timeline
Plan Notes
📌 Chicken Thawing Quick Grid
Typical fridge range for a 3 to 6 lb bird, depending on packaging and fridge temperature.
Thin separated pieces thaw faster than a dense stacked freezer block.
Use leakproof packaging, keep submerged, and refresh the water on schedule.
Microwave thawing can warm edges, so cooking should follow right away.
📊 USDA-Style Thaw and Safety Tables
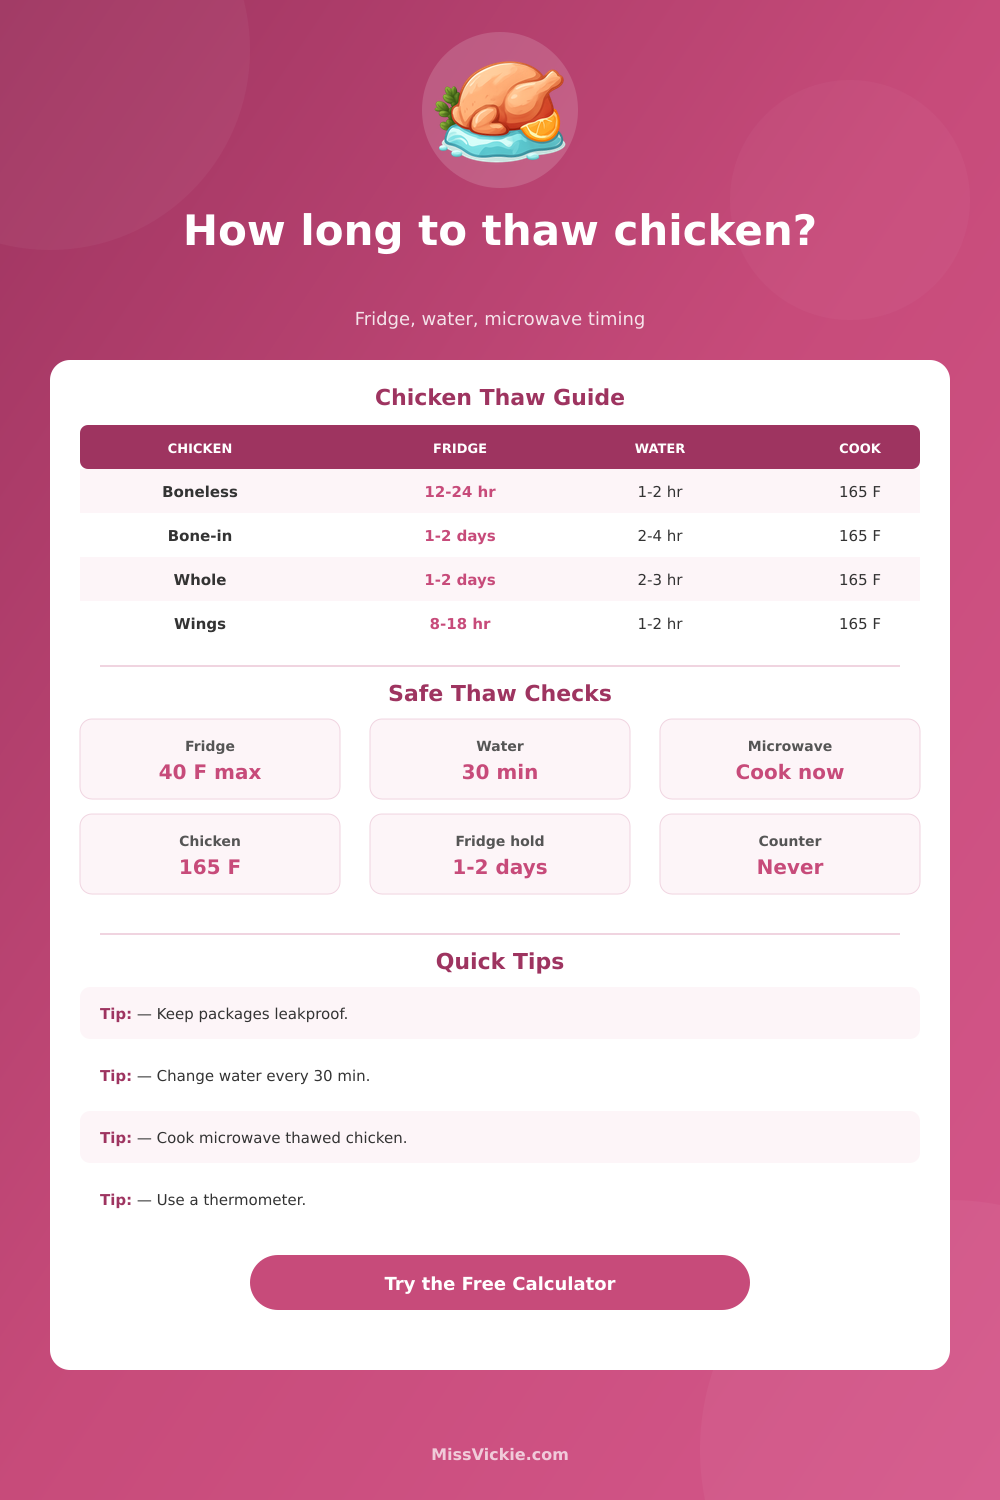
| Chicken Type | Fridge Estimate | Cold-Water Estimate | Best Check |
|---|---|---|---|
| Boneless breasts or tenders | 12 to 24 hours | 45 minutes to 2 hours | Pieces bend and separate |
| Bone-in breasts, thighs, drumsticks | 1 to 2 days | 2 to 4 hours | Joints are flexible |
| Whole chicken, 3 to 4 lb | 1 to 2 days | 2 to 3 hours | Cavity ice is gone |
| Whole chicken, 5 to 7 lb | 2 days or longer | 3 to 4 hours | Deep breast is pliable |
| Wings or small mixed parts | 8 to 18 hours | 1 to 2 hours | Pieces separate cleanly |
| Method | Safety Rule | After Thawing | Refreeze Raw? |
|---|---|---|---|
| Refrigerator | Keep at 40°F / 4°C or below | Cook within 1 to 2 days | Yes, quality may drop |
| Cold water | Submerge in leakproof packaging | Cook immediately | No, cook first |
| Microwave | Use defrost or low power | Cook immediately | No, cook first |
| Cook from frozen | Allowed when recipe supports it | Add cooking time | Not a thaw plan |
| Cold-Water Step | Timing | Why It Matters | Calculator Input |
|---|---|---|---|
| Seal the chicken | Before submerging | Prevents water absorption and contamination | Packaging |
| Submerge completely | Whole thaw | Keeps heat transfer even | Chicken type |
| Change water | Every 30 minutes | Keeps water cold and effective | Water interval |
| Cook immediately | When pliable | Cold-water thaw has no hold window | Cook deadline |
| Temperature Check | Target | Planning Meaning | Kitchen Action |
|---|---|---|---|
| Fridge air | 40°F / 4°C or colder | Safe slow thaw zone | Move to colder shelf if warm |
| Cold-water bath | Cold tap water | Fast but active thaw | Refresh on interval |
| Chicken cooking temp | 165°F / 74°C | Final doneness target | Check thickest part |
| Counter thawing | Do not use | Unsafe temperature exposure | Switch to safe method |
These tables follow USDA/FSIS-style handling rules for poultry thawing. Time is a planning estimate; final safety depends on cold handling and cooking chicken to 165°F / 74°C.
🧭 Thaw Method Comparison
Slow, low-effort, and best when you want a 1 to 2 day cooked-by window after thawing.
Good for same-day planning if the chicken is sealed, submerged, and cooked immediately.
Works for small packs, but uneven thawing means the chicken should go straight to the pan.
Starts gently in the fridge, then uses cold water to finish a partly frozen package.
💡 Chicken Thawing Tips
You can plan safely with this calculator. Simply input type of cut and weight, and it does the math for you. No more guesswork about whole roaster and thicker cuts like bone-in thighs. No more wondering if that frozen block will defrost in time for dinner as your fam’s waiting. You know not to put poultry on the counter, right? But sometimes it feel hard to do so in a safe way. That’s when planning ahead helps you avoid kitchen stress.
The gold standard for refrigerator thawing: It’s cool enough that ice crystals melt slowly while keeping the meat at a safe temperature. Plan ahead as this requires one day per 4-5 pounds of bird. Typicaly, refrigeration thawing is best when planning out your meals the night before. Put it on a plate or tray that will catch any drippings, then let the cold air work its magic. Don’t try to hurry the process or you risk compromising safety. If you know you’re cooking for a certain evening, start thawing two days beforehand; you’ll have plenty of wiggle room if something come up. Compared to other methods, meat stays moister, too. The result? Improved flavor and texture in finished dish.
How to Thaw Chicken Safely
Rapid thaw uses cold water. Requires active participation. The chicken need to be submerged under cool tap water in its package. Every half hour, drain and replace with fresh cold water so the temperature stay low enough to avoid encouraging bacteria growth. Great option if you forget to transfer your meat to the refrigerator earlier in the day and plan on same-day cooking. Two keys to this are consistency and frequent checking. Don’t let the chicken sit in lukewarm water, the bacteria will have a field day. This works best with small packages or with individual pieces that can be separated easy. With a whole chicken, it’ll take longer as more time is needed for heat to reach deep into the cavity. Commit and check often until ready for cooking.
While fast, defrosting in the microwave runs some risk of uneven heating, causing certain areas to begin cooking before others are completely thawed. If the thawed chicken isn’t cooked promptly, bacteria will have time to multiply within those cooler spots. For this reason, I’d only use the microwave with very small pieces (thin breasts or perhaps tenders) that I’m truly in a hurry for. Defrost using the microwave, then cook immediately. Don’t refreeze. Microwaves break apart cell walls very quickly, which can lead to dryness and a loss of texture. Rotate the packet halfway through defrosting to encourage more even thawing and if your microwave has a defrost button, use it. It is quick and handy if you decide at the last second you want chicken, but it lacks the elegance of any these other options.
The package also counts. Normally, original factory packages are sealed in a way that allows thawing without risk of contamination. On the other hand, some packages has too much bulk (like big foam trays) or do not seal well (loose wrap lets water seep inside and causes sogginess). For cold-water thawing, if it’s packaged in a bag, it should of be leak-proof so you don’t end up with soggy and contaminated chicken. Because the outer layer blocks heat from moving through, the inside pieces will slow down thaw time when stacked up in a bag. Loosen and separate the chicken to hasten thaw.
Defrosting times depend greatly based off surface area and density; see the chart on the page to learn which cut responds best to which method. “Plan to allow an hour or two over on top of that for anything going wrong. Doorknobs get opened and closed; appliances vary. That’s why you want to give yourself some room so you’re not scrambling with partially defrosted meat. That means uneven cooking because there will be a pocket of coldness left at the center of the meat. Remember: you have to check the inside temp to ensure that it hits 165 degrees F. It isn’t a safety issue, but it is important.
For all this talk of convenience, thawing is also about respect, and for more than just the food’s naturaly needs. It’s about care of self too. It’s all about being patient and prepared. What that looks like will depend on how soon you want things defrosted. There are pros and cons of each method: safety vs. Texture. If you can plan ahead, do so; if you’re under the gun, be alert. And always follow your thermometer. A good plan will help the panic subside.