Pork Chop Cooking Time Calculator
Estimate pork chop timing from thickness, boneless or bone-in style, cooking method, start temperature, brine, sear plan, oven or grill heat, target temperature, rest time, and carryover.
🕒Pork Chop Presets
Pick a common chop scenario, then adjust the thickness, heat, brine, rest, and target to match your pan, oven, grill, or air fryer.
📏Inputs
Pork chop timing estimate
Adjust the inputs and calculate to see your timing window.
Timing Breakdown
📊Quick Pork Chop Timing Metrics
⚖Method Comparison Grid
Best for 0.75-1.25 inch chops. Sear first, then lower the burner if the crust races ahead of the center.
Useful for thick chops because the oven finishes the center after a short surface sear.
Use two zones for bone-in or sugar-rubbed chops so flare-ups do not scorch the outside.
Slowest but most even for 1.5-2 inch chops, especially when you want a precise pull temperature.
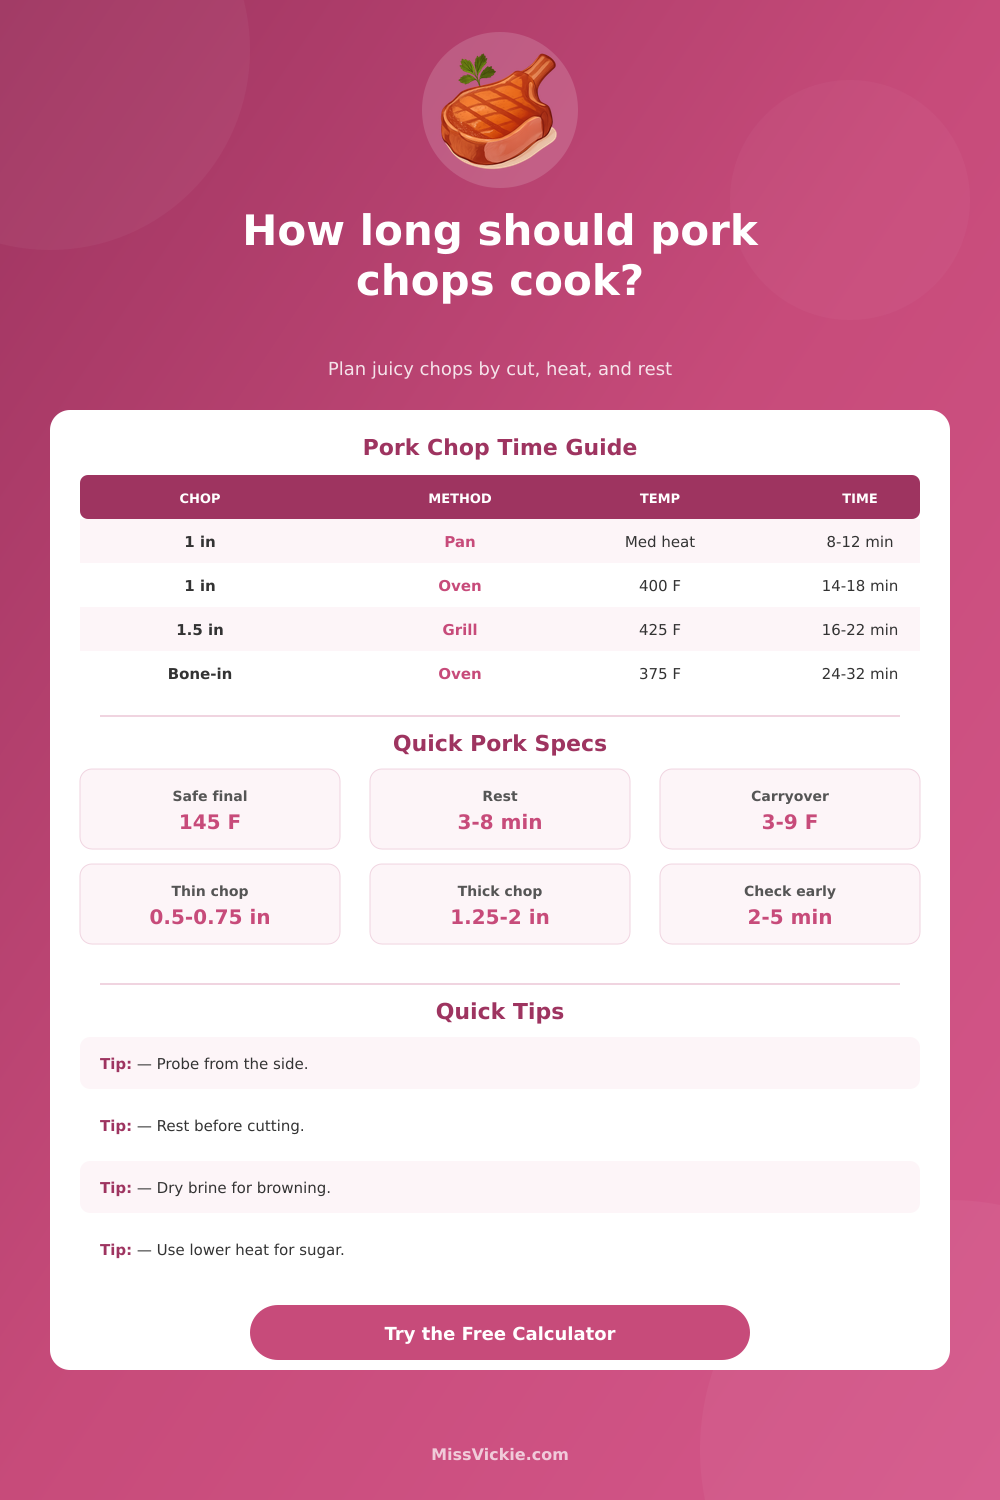
🍳Thickness and Method Time Table
| Thickness | Pan or skillet | Oven or sear-oven | Grill or air fryer |
|---|---|---|---|
| 0.5 inch thin cutlet | 4-7 minutes | 8-12 minutes at 400°F | 6-10 minutes |
| 0.75 inch boneless chop | 7-10 minutes | 12-16 minutes at 400°F | 10-14 minutes |
| 1 inch center-cut chop | 9-13 minutes | 14-20 minutes at 375-400°F | 12-18 minutes |
| 1.5 inch thick chop | 14-20 minutes with lower heat | 22-30 minutes at 350-375°F | 18-26 minutes over two zones |
| 2 inch double-cut chop | Not ideal without oven finish | 30-42 minutes reverse sear | 28-40 minutes two-zone grill |
Use the table as a planning range. Final doneness should be verified with an instant-read thermometer in the thickest part of the chop.
🌡Target Temperature and Carryover Table
| Final target | Common pull range | Rest guidance | Texture note |
|---|---|---|---|
| 145°F juicy pork | 138-142°F | At least 3 minutes | Juicy, slightly pink, best for loin and rib chops. |
| 150°F medium | 143-147°F | 4-6 minutes | Less pink, still tender if not overcooked. |
| 155°F firm | 149-152°F | 5-7 minutes | Firmer bite, useful for cautious diners. |
| 160°F well done | 154-157°F | 5-8 minutes | Fully firm; brine helps reduce dryness. |
| 165°F stuffed center | 160-162°F | 6-10 minutes | Use when filling is inside the chop. |
🔥Heat and Sear Table
| Heat setup | Best chop | Timing effect | Watch point |
|---|---|---|---|
| Medium skillet, 350-375°F surface | 0.75-1 inch boneless | Baseline timing with good browning. | Lower heat if the crust darkens before 120°F. |
| Hot sear, 425-475°F surface | Dry-brined thick chops | Fast crust, but center still needs lower heat. | Move to oven or covered low heat after searing. |
| Oven 350-400°F | Bone-in or thick chops | Even center, slightly longer total time. | Use a rack or open pan for airflow. |
| Two-zone grill, 375-450°F lid | Bone-in rib and loin chops | Direct sear plus indirect finish. | Keep sugar rubs away from direct flame. |
| Reverse sear, 250-300°F | 1.5-2 inch double-cut chops | Longer cook, narrower doneness band. | Pull low before the final hot sear. |
🧂Start Temperature, Bone, and Brine Table
| Input choice | Timing change | Carryover effect | Calculator note |
|---|---|---|---|
| Fridge-cold chop | Baseline | Moderate | Best default for predictable food safety and timing. |
| Tempered 15-30 minutes | Slightly faster | Slightly higher | Cook promptly after tempering. |
| Bone-in rib or loin chop | Adds 8-18 percent | Higher near the bone | Probe beside the bone without touching it. |
| Dry or wet brine | May cook slightly faster | Moderate | Pat wet-brined chops dry before searing. |
| Sugar glaze or breading | Often needs gentler heat | Lower to moderate | Reduce heat if browning gets dark early. |
💡Two Pork Chop Timing Tips
After that, just punch in the thickness of your chops into the above calculator along with which cooking method you used, and it will tell you how long they’re done. You won’t have to guess about carryover effects or heat transfer anymore. This takes those variables and computes them for you… You don’t need to do math yourself.
Pork loin is a very lean piece of meat. It doesn’t take much fat at all. If you cook it too long, it’ll dry out realy fast. A minute off can make all the difference in texture.
Why Thickness Matters More Than Weight
When setting cooking parameters, it’s not just weight that matters, its physical thickness. For example, a thin, boneless chop might have the same weight as a chunky bone-in one, but they’ll cook different than each other. Because heat travels from outside to inside, thinner one will reach safe temperature faster then the thicker piece. Unless you adjust accordingly, high-heat searing on a thick chop will result in burned exterior long before the interior reaches safety.
This is why the tool asks about your sear plan and oven finish separately. One browns surface, while the oven gently cooks the interior. The connection between the variables are clear on the screen, making following the process easier.
“The bone is an insulator. It will cook different than a boneless cut. Because heat has to work its way around that bone structure, Bone’s calculator factor additional time into any bone-in cut. “You don’t want the surrounding meat to dry out.” If you grill up a rib chop and pretend it’s a loin chop, you’ll likely end up pulling it prematurely (or overdoing it with the searing side).
One benefit of dry brining is that it draws moisture to surface, helping it brown nicely at lower temps. No need to submerge the meat in water: An hour ahead of grilling, just salt it; it’ll have the same effect without watering down the taste. The tool takes these factors into account as well, since they affect speed at which the outside turns nice and brown versus when inside reaches the right temp.
Letting it rest is critical for best tenderness. Wait five minutes. At 145 degrees Fahrenheit, the pork will be warm and juicy, but potentially not quite ready yet. Because of a thing called carryover cooking, the temperature will climb further, with heat moving from the center to the outer parts of meat. If you’re too impatient to let it rest, this will add a few more degrees to the overall cooked temperature. The pull temp calculation accounts for this, so you’ll have a sense of when to take it off the heat source.
As soon as you cut into the chop, the juices will start flowing…onto the cutting board. Let it sit for five minutes before cutting into it. (It’ll be hard, I know, but trust me.) That’ll keep the juices locked safely within the muscle fibers.
Pork varies; each batch will be different in terms of color and density. Trying to look for a certain shade of pink will result in inconsistent outcomes. For accurate results, use an instant-read thermometer, inserted from the side with the tip positioned directly in the middle of the thickest section of meat (not touching bone). If you stop too soon, you’ll miss the innermost temperature, and if you hit bone, you’ll get a false read.
The charts on the page makes it easy to understand what temp corresponds with how thick the cut is. So now you have a reliable starting point rather than guessing based off sight alone.
Cooking pork is all about understanding the physics of heat flow rather than just relying on exact times. Heat flow is what matters, and when you’re not against the clock things are less tense at dinner time. It can feel counterintuitive to take the chops out a little early, but they’ll taste even better for it. Then there’s the rest, which completes the cooking without drying them out. When you put meat in front of a hot pan, remember: Patience is an ingredient. Trust the thermometer; trust it with the timing, and then give it time once you get it off the grill. You shouldn’t of regret cutting in too soon when you finally dig in. And it’ll be juicy instead of dry.