Salmon Fillet Cooking Time Pan Calculator
Estimate skillet salmon time from fillet thickness, pan material, start temperature, skin, oil or fat, heat level, flip timing, rest, and target doneness.
🍳 Pan Salmon Presets
Choose a searing setup, then adjust the skillet, thickness, fat, flip plan, and doneness for the salmon in front of you.
⚖ Fillet And Skillet Inputs
Your skillet salmon timing
Use the lower end for a powerful burner or a very hot heavy skillet.
Timing Breakdown
Pan Schedule
🔥 Skillet Heat Reference
📋 Pan Salmon Reference Tables
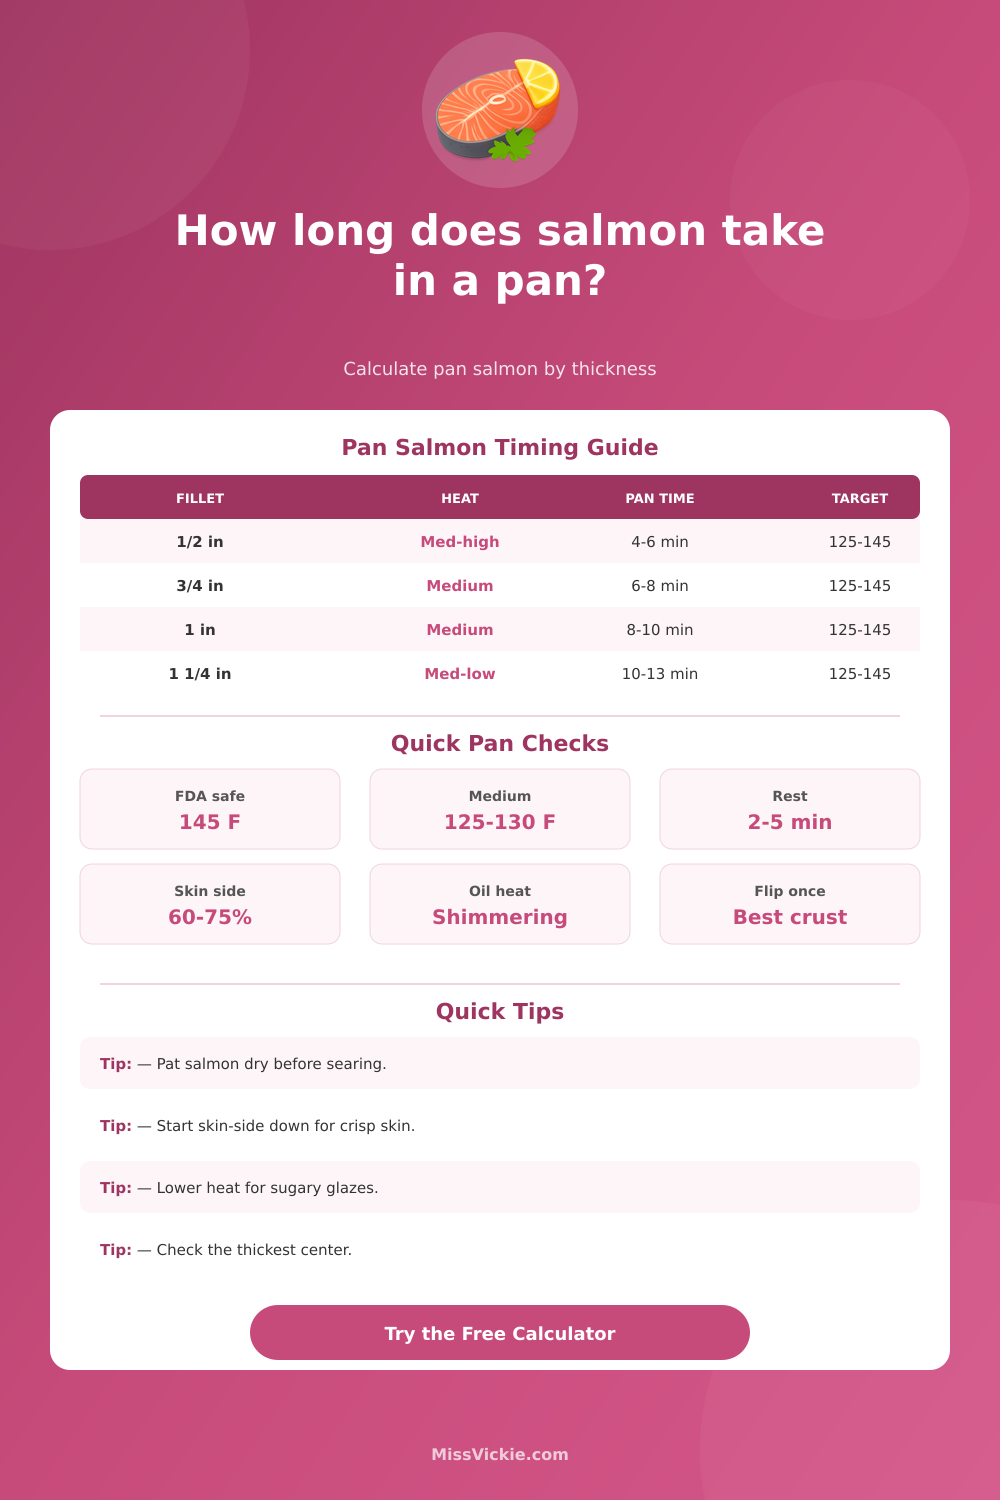
| Thickness | Medium Pan Time | Skin-Side Share | When To Check |
|---|---|---|---|
| 1/2 inch / 1.3 cm | 4 to 6 minutes | 55 to 65 percent | Start checking at 4 minutes |
| 3/4 inch / 1.9 cm | 6 to 8 minutes | 60 to 70 percent | Start checking at 6 minutes |
| 1 inch / 2.5 cm | 8 to 10 minutes | 65 to 75 percent | Start checking at 8 minutes |
| 1 1/4 inch / 3.2 cm | 10 to 13 minutes | 65 to 75 percent | Use gentler heat or lid finish |
| 1 1/2 inch / 3.8 cm | 12 to 15 minutes | 60 to 70 percent | Check center with thermometer |
| Final Doneness | Pull From Pan | Final Internal Temp | Texture Cue |
|---|---|---|---|
| Medium-rare | 118 to 122°F / 48 to 50°C | 120 to 125°F / 49 to 52°C | Deeply moist center |
| Medium | 123 to 127°F / 51 to 53°C | 125 to 130°F / 52 to 54°C | Moist, easy flakes |
| Medium-well | 132 to 136°F / 56 to 58°C | 135 to 140°F / 57 to 60°C | Firm flakes |
| FDA safe minimum | 140 to 142°F / 60 to 61°C | 145°F / 63°C | Opaque and firm |
| Cooked reheat | 160 to 162°F / 71 to 72°C | 165°F / 74°C | Hot throughout |
| Skillet Material | Preheat Cue | Timing Effect | Best Use |
|---|---|---|---|
| Cast iron | Oil shimmers quickly | Slightly faster, more carryover | Crisp skin and thick fillets |
| Carbon steel | Even shimmer, light smoke | Fast surface browning | Skin-on salmon and quick sears |
| Stainless steel | Water bead test, then oil | Standard timing | Firm crust and pan sauce |
| Nonstick | Medium heat only | Slightly slower browning | Skinless fillets and delicate fish |
| Enameled cast iron | Moderate preheat | Gentler bottom heat | Glazed salmon and sauce finishes |
| Oil Or Finish | Heat Fit | Timing Note | Pan Cue |
|---|---|---|---|
| Neutral oil | Medium to medium-high | Best for clean sear | Shimmering but not smoking hard |
| Olive oil | Medium | Keep heat moderate | Light shimmer, no acrid smoke |
| Butter finish | Medium-low after flip | Add late to avoid burning | Foamy and nutty, not black |
| Sweet glaze | Medium-low finish | Brush on near the end | Bubbling, glossy, not scorched |
| Cream sauce | Low after sear | Finish gently in sauce | Bare simmer around fillet |
⚙ Pan Method Comparison
Most time skin-side down in a hot heavy skillet.
Sear first, then lower heat and spoon butter over the flesh.
Useful for thick fillets when the surface browns before the center is done.
Cook mostly plain, then glaze late so sugar does not scorch.
💡 Pan Salmon Timing Tips
All the math are done by the calculator (above). Instead of guessing, it converts your vague variables into minutes right there. This is useful if it takes 20 minutes until dinner but pan isn’t hot yet.
How does it begin? It starts by considering thickness first since heat penetrates along this dimension. A thin fish like a half-inch fillet will cook through fast. A chunky center cut piece require longer than the middle gets up to temp. It handles all this automaticly. No need to mentally do geometry each night.
How the Calculator Works
Heat transfer is how your pan cooks the fish. Some materials conducts more heat, some less; some retain heat longer while others let it escape faster. Generally, cast iron conducts heat like a mofo. Great for crispy skin (good), but prone to overcooking if you aren’t paying attention. Non-stick pans is gentler and slower. They’re gentler, but will take a bit longer. See the chart below for why using an enameled vs. Using a stainless skillet might be tricky. Know your pan!
Drop a sliver of cold salmon in a smoking-hot pan and see what happens? That’s right: immediate temp drop. The calculator includes your initial fish temp. Does it matter if your salmon is fridge-cold or already room temperature? Big time. It makes all the difference on texture.
Food Safety vs. Doneness, This is where personal preference meets food safety reality. Home cooks tend to prefer the salmon all the way up to an opaque center because that’s what they learned was “done”. Professional kitchens typically serve salmon when it’s not quite as far along. Doneness, There’s an element of preference here, but mostly there’s safety. Home cooks tend to prefer the salmon all the way up to an opaque center because that’s what they learned was “done”. Professional kitchens typically serve salmon when it’s not quite as far along. That’s where the carryover cooking come in. Remove the fish from the pan at just the right time (and tool will tell you exactly when), then let them rest until they reaches your desired doneness.
Account for the number of pieces being cooked at one time. If the skillet get too crowded, those pieces won’t get a sear, only steam. This slows the process of getting brown on the outside and makes the inside boil off rather than crisp up. Give each piece some room to breathe.
Fat also affects the timing in another unexpected way. High-heat neutral oils is your friend. They provides a great starting sear. Because butter will burn quickly, apply this at the tail end and/or baste post-flip. When topping with a sweet glaze (like honey or teriyaki), you’ll want to back off the heat a lot at the end. Otherwise, that sugar will scorch. These decisions factors into the calculator’s estimate. A sugary sauce requires a gentler ending compared to a dry rub. It’s not only because of taste. It’s a matter of temperature control.
Never skip resting the fish. Just like steak, salmon continues to cook after it leaves the pan. It’s like putting steaks on a plate: they keep cooking even after they’re out of the skillet. If you don’t let them rest for a few minutes, you’ll end up with fish that has dry edges and an undercooked center. Letting them sit lets the juices settle back into place. While they do so, your thermometer will read a stable temperature inside. And with that, the freakout goes away.
With a gameplan, there’s no fear. You know how long to let it sit, skin-side-down. You know when to turn it. You know when to let it sit. There’s no more guessing. All that’s left is waiting for the crust to set in peace, satisfied. That’s worth more than any one dish.