Blanching Peas Time Calculator
Estimate blanching time for shelled peas, snow peas, or sugar snap peas with pod thickness, batch weight, boiling water or steam, altitude, ice bath, freezer prep, tenderness, and color retention.
🫛 Pea Blanching Presets
Load a realistic pea-freezing setup, then fine-tune pod type, thickness, batch size, water volume, altitude, cooling, and final tenderness.
⚖ Pea And Batch Setup
Pea Blanching Plan
Calculate to see timing, cooling, batches, and freezer packing.
Timing Breakdown
Batch And Freezer Prep
🧮 Pea Timing Reference
📋 Shelled Peas Vs Snap And Snow Peas
| Pea Style | Best Prep Before Blanching | Boiling Water Time | Steam Time | Quality Cue |
|---|---|---|---|---|
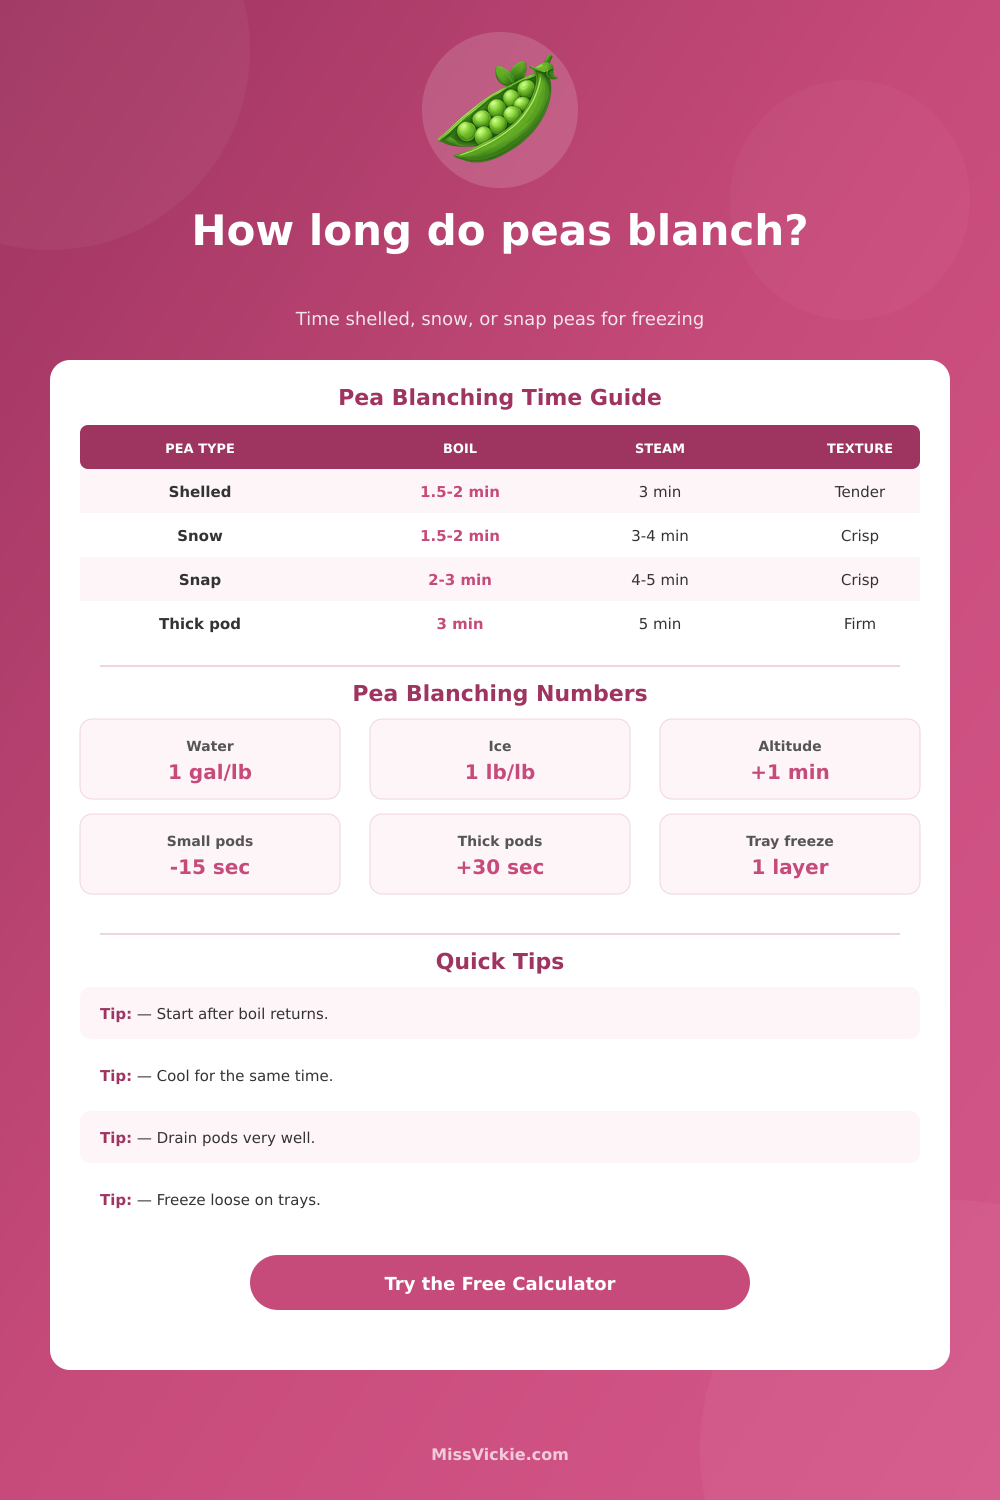
| Shelled green peas | Shell, rinse, remove tough or split peas | 1 1/2 to 2 minutes | About 3 minutes | Bright green and heated through, not wrinkled |
| Petite shelled peas | Sort out large peas so size stays even | 1 1/2 minutes | About 3 minutes | Small peas stay round and tender |
| Mature shelled peas | Shell and separate from petite peas | 2 to 2 1/2 minutes | 3 1/2 to 4 minutes | Interior softens without losing shape |
| Snow peas | Trim stem ends and remove strings | 1 1/2 to 2 minutes | 3 to 4 minutes | Pods stay flat, crisp, and glossy |
| Sugar snap peas | Trim both ends; pull strings if tough | 2 to 3 minutes | 4 to 5 minutes | Pod is bright and flexible, still crisp |
| Thick snap pods | Sort thick pods away from flat pods | 3 minutes | 5 minutes | Thick pod wall loses raw edge |
| Field or crowder peas | Shell, sort by maturity, rinse well | 2 to 3 minutes | 4 to 5 minutes | Use longer time for starchy mature peas |
Pea freezing guidance is adapted from home food preservation blanching recommendations such as the National Center for Home Food Preservation and Extension vegetable freezing charts. This calculator is pea-specific; spinach needs bulkier leafy-green handling, and tomatoes are usually peeled or packed by a different process.
🧊 Cooling, Color, And Freezer Packing
| Pea Condition | Time Adjustment | Ice Bath Target | Freezer Yield Cue | Color Or Texture Goal |
|---|---|---|---|---|
| Shelled peas, standard size | Use base time | Cool for the same time as blanching | About 4 cups per 2 lb shelled peas | Tender center and bright green skin |
| Flat snow peas | Use short pod time | Extra ice if pods are stacked | Trimmed pods freeze best in one layer | Crisp bite with glossy green color |
| Plump sugar snap peas | Add 15 to 30 seconds | Use 1 lb ice per 1 lb pods | Freeze loose before bagging | Pod wall tender, peas still firm |
| Thick snap pods over 1/2 in | Add about 30 seconds | Use extra-cold bath | Sort thick pods into their own bag | No raw edge at the pod seam |
| Altitude 5,000 ft or higher | Add 1 minute for freezer prep | Cool immediately after the longer blanch | Label high-altitude batches clearly | Protect enzyme control and color hold |
| Tender serving target | Add 10 to 20 percent | Drain once cold, not waterlogged | Best for casseroles, soup, or puree | Soft bite without dull olive color |
For water blanching, start the timer after the water returns to a full boil.
Cool peas for about the same time as blanching, then drain well.
Freeze peas loose on a tray before bagging for scoopable portions.
Small loads and plenty of ice help keep peas bright green.
🍳 Batch Planning Table
| Setup | Good Pea Load | Water Or Steam Setup | Ice Bath | Best Use |
|---|---|---|---|---|
| Small saucepan test | 1/2 lb shelled peas | 2 qt boiling water minimum | 1/2 lb ice | Checking tenderness before a large harvest |
| Home stockpot | 1 lb peas or pods | 1 gal boiling water | 1 lb ice | Reliable freezer bags with good color |
| Large pot with basket | 2 lb peas or pods | 2 gal boiling water | 2 lb ice | Garden harvest when boil recovery stays fast |
| Steam basket | Single layer pods | 1 to 2 inches water below basket | Equal cooling time | Snow peas and snap peas with delicate texture |
| Tray freezer pack | Any drained peas | Blanch first, then dry surface | Cold and well drained | Loose freezer peas that pour from the bag |
💡 Pea Blanching Tips
That’s the panic moment: The one where you yank out three pounds of peas from the garden, then look at them and know they will not last the night without turning into mushy, olive-colored memories. You’d like to preserve their sweetness and bright-green color for all-winter use in soups. But the clock’s ticking against you on this one, and the blancher is the link between just-harvested and longer-lasting.
It sounds easy enough, until the variables adds up quickly if you don’t work your way through it. After plugging in the batch size and type of pea (thick-walled sugar snap, flat snow pea, or shelled green pea), the calculator above does the rest. No need to guess your way through water volume ratios or enzyme activity: it’s all handled for you.
How to Blanch Peas for Freezing
It even factors in your freezer prep plan. Peas intended for immediate use may be processed slightly differently than those expected to last six months in a dark chest freezer. It also considers your altitude, which is more important than you’d think. If you’re in the mountains, the boiling point of water are lower, so it takes longer to cook the vegetable all the way through.
The enemy is overcooking, not undercooking (though most do blanch for too long due to fear of the latter). Different densities cooks differently; enzymes that make things lose their color, flavor and texture deactivates at varying speeds. For example, shelled peas have limited surface area so will reach doneness relatively fast, usually one or two minutes. Snap peas with thicker walls requires longer to soften the fiber without making them mushy inside the pod. The calculator takes all of these factors into account based on which type of thickness and cooking method you select.
Boiling water does it faster, but less gently: about double the time compared to steam blanching to get equivalent levels of enzyme inactivation. Speed vs. Retaining texture. Next is the cooling off. It’s a must-not-miss step. Even though you’ve stopped the cooking process by removing them from the pot, if they’re sitting in colander, their leftover heat will still be slowly breaking down those cell walls.
And this is why the ice-bath ratio matters, because here’s the catch: One pound of ice per pound of peas is the rule of thumb, so that the water never gets far out of freezing zone during the cooling process. Otherwise, the water warms and your peas are hotter than you want them to be; that additional heat messes with the color retention you labored over in the blanching process. To keep it all in balance, the calculator tell you to cool for the same length of time as you blanched.
Another common real-world limitation that catches folks out: It’s not like you can drop five pounds of peas into a regular old stockpot and still keep the water boiling. The water would cool down, and what you’d do is steam your peas in lukewarm soup instead of blanching them in rolling water. You really need enough volume that it’ll hold its heat; typically speaking, one gallon of product for each pound. So if you don’t have much room in your pot, you’ll work in smaller batches. You will also have more cooling cycles and more transfers.
The tool helps you visualize that: It calculates how many actual loads it will take you to get all of your total harvest done.
To save time later, sort first: Unevenly sized peas will cook unevenly; if some are big and others little (even in shells), the big ones will be crisp and the small ones soft when all is done. Ditto for snow peas and thicker snap-type pods. Also keep peas of one variety or type together to cook evenly. Drain well after cooking, then spread in a single layer on a tray to freeze loose before bagging so they don’t form lumps, which makes it easy to spoon out only as much as needed whenever called upon, thawing none along the way.
It is a tiny detail that’s worth it each time you pluck a pea from the freezer drawer in January. When it’s time to cook the peas months later, you want them to have a fresh-off-the-vine appearance; not just be sterile. And all that means is color and texture. Cooling thoroughly locks in that summery brightness; it is also important to watch the enzyme clock. Precision counts; sometimes it’s only a matter of minutes, rather than hours, that makes the difference between vibrant green gems and dull gray mush.
Have some ice on hand while the water heats up, and don’t rush the cool-down process; your future self will thank you for going the extra mile. Even when the world outside has snow falling, you’ll be enjoying peas that taste like they were picked yesterday.