Deep Fry Chicken Legs Time Calculator
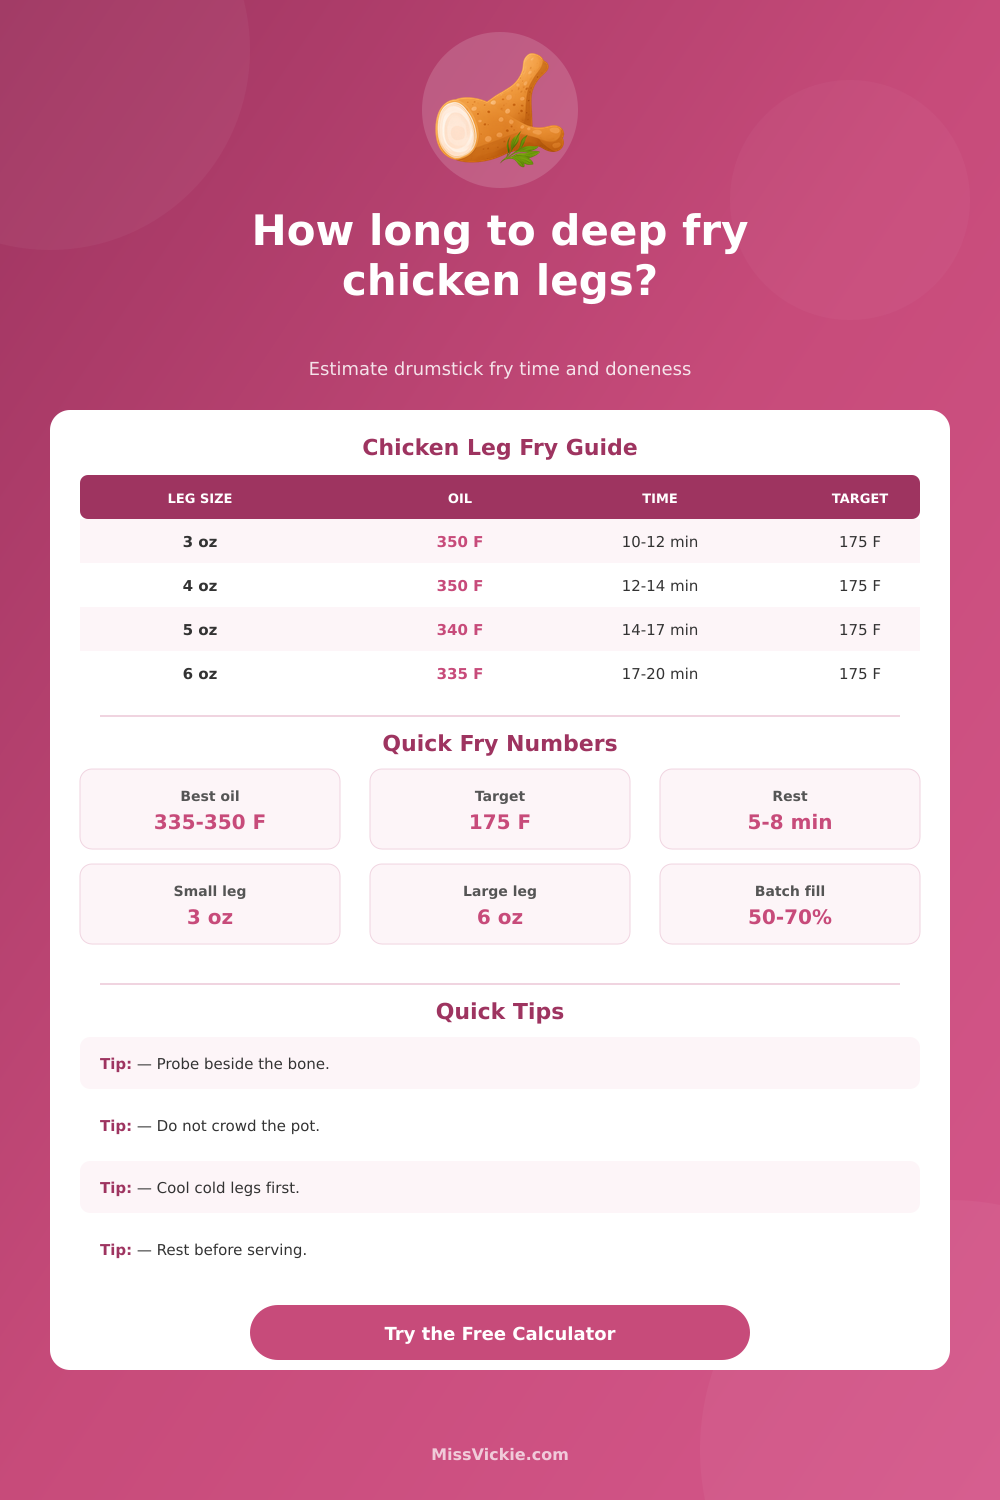
Estimate deep-fried drumstick timing by count, average leg weight, skin, flour or breading, oil temperature, starting temperature, batch crowding, rest time, crust shade, and a 175°F near-bone finish target.
Choose a real drumstick scenario, then adjust the exact weight, oil temperature, coating, crowding, starting temperature, and target shade. This calculator is for chicken legs or drumsticks, not thighs or whole chickens.
Your Drumstick Fry Plan
Set your fryer, fry in the suggested batches, then verify 175°F near the bone.
Timing Breakdown
Food Safety And Texture
| Average Drumstick Weight | Good Oil Temp | Typical Time | What To Watch |
|---|---|---|---|
| 2.5-3.5 oz / 70-100 g | 350°F / 177°C | 9-12 minutes | Small legs brown fast; probe early at the bone side. |
| 3.5-4.75 oz / 100-135 g | 345-350°F / 174-177°C | 12-15 minutes | The standard size for most family packs. |
| 4.75-6 oz / 135-170 g | 335-345°F / 168-174°C | 15-19 minutes | Lower oil slightly if the crust darkens before 170°F. |
| 6-8 oz / 170-225 g | 325-340°F / 163-171°C | 18-23 minutes | Big drumsticks need patience; thighs this size use a different model. |
| Coating Style | Time Change | Best Shade Target | Kitchen Cue |
|---|---|---|---|
| Bare seasoned skin | Subtract 1-2 minutes | Golden to classic | Skin texture is the timer, thermometer is the decision. |
| Light seasoned flour | Baseline | Classic golden brown | Let flour hydrate 10 minutes before frying. |
| Buttermilk flour | Add 1-3 minutes | Deep amber crunch | Lower oil if sugars darken too fast. |
| Wet batter | Add 2-4 minutes | Classic to deep amber | Give batter room so it sets before pieces touch. |
| Starting Condition | Chicken Temp | Timing Effect | Use This Note |
|---|---|---|---|
| Very cold from fridge | 34-38°F / 1-3°C | Add 1-3 minutes | Expect a bigger oil drop during the first 3 minutes. |
| Normal refrigerated | 39-42°F / 4-6°C | Baseline | Dry the surface before coating. |
| Tempered briefly | 50-60°F / 10-16°C | Subtract up to 1 minute | Do not leave raw chicken out for extended holding. |
| Wet marinade surface | Any safe temp | Add browning time | Drain well or the coating can shed in the fryer. |
| Batch Size | Basket Fill | Oil Recovery | Timing Adjustment |
|---|---|---|---|
| Loose single layer | 45-50% | Fast | Use the low end of the estimate. |
| Normal home batch | 55-65% | Moderate | Use the calculated center range. |
| Crowded basket | 70-80% | Slow | Add time and rotate legs halfway. |
| Overcrowded pot | Over 80% | Poor | Split the batch for safer, crisper chicken. |
Small bone-in dark meat. This tool centers on the narrow leg shape and near-bone probe point.
Thicker, flatter, and fattier. Thighs usually need a longer and less even fry than legs.
A whole bird should be broken down or cooked with a different time model.
Wings cook faster because they are smaller with thinner meat around the bone.
Use this calculator as a planning estimate. Always verify poultry doneness with a clean, accurate food thermometer before serving.
That’s what I mean. The oil is boiling furiously and you’ve got a ball of panic that grips your insides. You have no clue whether the chicken is burning on the outside while staying raw in the middle, or if it is actualy cooked through. It’s every home cook’s nightmare. Out you yank a leg and; holy crap!; the outer surface of the bird appears golden brown but closer inspection reveal the flesh next to the bone remains uncooked. Wait another hour (which was suppose to be how long the initial batch took to come up to temp), and you’ve got some sort of carbon-flavored, shoe-leather-tough dark-chocolate-hued skin on your hands.
Controlling the rate of heat transfer over time is the fine line between fried chicken perfection and fried chicken apocalypse, and that’s precisely why having a plan are essential before dropping so much as an atom of oil in your pan. If you enter the amount of time it takes your drums to cook with a light coating versus when you use a heavier one, the calculator does the rest, making it impossible to guess if adding three minutes or ten is necessary because cold meat make it take longer. Or if there’s some other variable that you forgot.
Why Frying Chicken Is Hard
What is the starting temperature of your chicken? Most home cooks don’t consider that until it’s too late, but if it comes out of fridge, its core will be around forty degrees Fahrenheit, which needs to warm through completely to the safe zone before the outside gets properly crisp. And what happens if you toss some ice-cold meat into hot oil? Well, the oil’s going to get cool as hell. When the oil suddenly gets cooler, it is like dumping a bucket on someone; now it is boiling instead of frying. Boiled chicken, no matter how long you fry it, will never, ever, ever be crispy.
Temperature isn’t all; size makes a difference too. A three-ounce drumstick of smaller bird will cook much faster then a six-ounce market-size leg because there is less mass for the heat to travel through. That’s where the tool comes in: it takes into account average weight and adjusts accordingly, which explains your frequent frustration with generic cooking charts. Those assume an average size likely not matching whatever you picked up off the shelf yesterday. For bigger legs being fried, therefore, you’ll want to back down the oil temperature a bit to ensure they has time to cook through without burning the outside first. There’s a balance between precision and patience here, and one can’t hurry heat transfer.
But there’s also the matter of crowding, which is perhaps the most frequent error made when people try frying at home. Not only do you pack more chicken into the pot (and it’s not even all chicken), but you’re blocking the oil from circulating around each piece, preventing proper frying and causing the coating to steam rather than fry. Why? Because a half-full pot behaves different than a full one. For this reason, the calculator factors in batch size. Though it can be tempting to fry everything at once and save some time, typically splitting your batch and allowing the oil to recover between batches result in a better outcome. A mere five minutes is all it takes for the oil to come back up to temperature and reach that same crisp level as before.
There’s more: coating. Bare skin nearly cooks immediately, and a light dusting of flour is not much slower. However, a heavy breading or thick buttermilk batter works like insulation. It keeps the meat away from direct heat to protect its juiciness, but this slow down the process of getting the inside up to the target temperature of one hundred seventy-five degrees Fahrenheit. The food is cooked-to-perfection under all those layers of crust, so you’ll need to cook right through the crust to reach it. Don’t pull it just because it looks sufficiently brown, or the middle will remain pink; you have to cook it until it reaches 175 degrees. That’s what the reference table on the page do: shows you how various coatings alter your timing window so you can adjust your expectations to match.
But really, there’s no hard and fast time limit to deep fry the bejesus out of chicken legs; it’s all about thermodynamics. If the thermometer isn’t confirming your suspicions, forget what you think you see in the color of the skin. Probing as close to bone (where heat tends to hang around the longest) will always ensure accuracy. Your timer doesn’t apply to everyone. Variables such as size, starting temp, and crowding determine when each batch is done, and realizing this help you learn the predictable nature of things.
No more guesswork, just cooking with purpose. And that means getting the perfect pairing of crisp exterior and moist interior, the kind that is tender all the way through to the bone.