Goose Breast Cooking Time Calculator
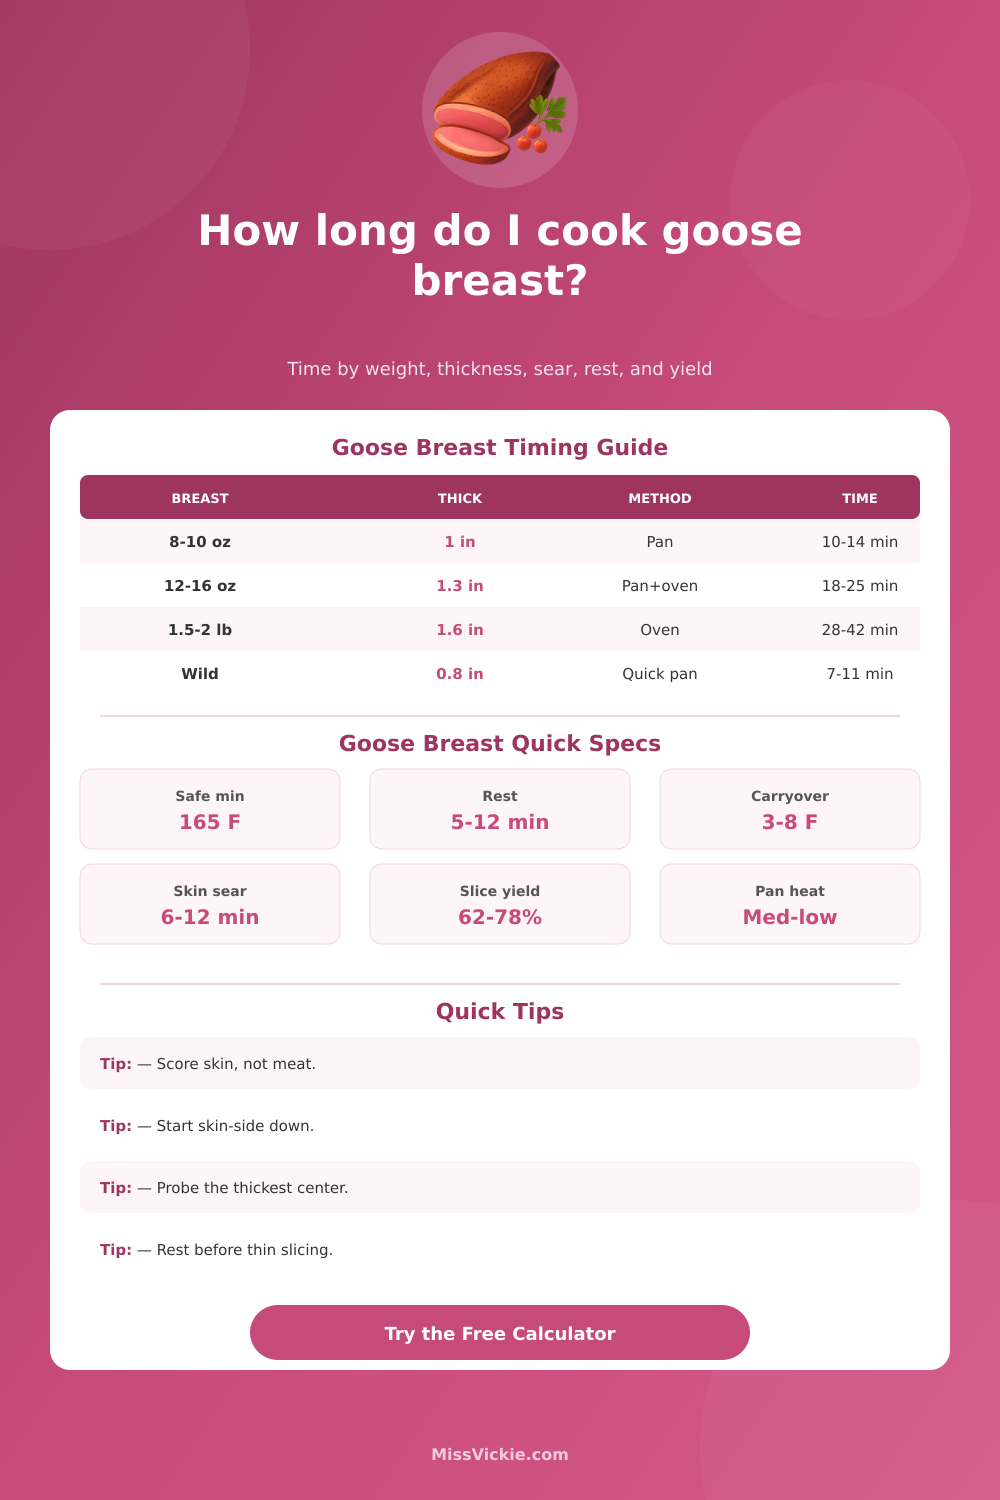
Estimate goose breast cooking time by raw breast weight, thickest point, skin-on fat rendering, pan sear, oven finish, starting temperature, target doneness, pull temperature, carryover, rest, and slice yield.
Pick a realistic breast setup, then tune the weight, thickness, skin, sear, oven finish, starting temperature, target doneness, carryover, rest, and slicing yield.
Food safety reference: USDA/FSIS and FoodSafety.gov list 165°F / 74°C as the safe minimum internal temperature for poultry pieces, including breasts. Lower chef-style targets are texture preferences and are flagged in the results.
Goose Breast Timing Estimate
Plan, probe, rest, and slice after the calculator runs.
Timing Breakdown
Temperature and Yield
| Target Choice | Finish Temperature | Typical Pull With Carryover | Safety Note |
|---|---|---|---|
| USDA safe minimum poultry | 165°F / 74°C | 157-162°F depending on rest rise | Official safe minimum for poultry pieces. |
| Well done | 160°F / 71°C | 152-157°F depending on thickness | Below the USDA poultry safe minimum. |
| Medium-well | 155°F / 68°C | 147-152°F depending on thickness | Chef preference, not the official safe minimum. |
| Medium | 145°F / 63°C | 137-142°F depending on thickness | Pink center; below official poultry guidance. |
| Medium-rare | 135°F / 57°C | 127-132°F depending on thickness | Restaurant-style texture preference only. |
| Rare | 125°F / 52°C | 118-122°F depending on thickness | Not recommended for vulnerable diners. |
Use a calibrated instant-read thermometer in the thickest center of the breast. Color, juices, and skin browning are not reliable doneness tests.
| Method | Best For | Breast Timing Pattern | Skin and Fat Handling |
|---|---|---|---|
| Pan sear only | Small or thin breasts under 1.1 inches | Long skin-side render, brief meat-side finish | Pour off fat if the pan pools heavily. |
| Pan sear plus oven finish | Most domestic skin-on breasts | Render skin, flip, then finish in a moderate oven | Best balance of crisp skin and controlled center heat. |
| Oven roast on rack | Skinless or meal-prep safe cooking | Slower even heat with less pan browning | Brush with fat if skinless to reduce surface drying. |
| Convection oven finish | Two or more breasts on a rack | Shorter oven finish than still-air roasting | Watch the thin end because fan heat dries it faster. |
| Low oven then crisp skin | Thick breasts where exact pull temp matters | Gentle core heat, then a short skin crisping pass | Dry skin well before the final pan sear. |
| Grill sear then indirect | Outdoor cooking with smoke or char | Direct skin-side sear, then indirect lid-down finish | Control flare-ups from rendered goose fat. |
| Raw Breast Size | Typical Thickness | Cooked Yield | Slice Estimate |
|---|---|---|---|
| Wild breast, 5 to 8 oz | 0.6 to 0.9 in | 65% to 76% | 8 to 14 thin slices |
| Small domestic breast, 10 to 14 oz | 1.0 to 1.25 in | 66% to 78% | 14 to 24 thin slices |
| Standard skin-on breast, 1 to 1.5 lb | 1.2 to 1.6 in | 64% to 76% | 20 to 34 thin slices |
| Large fatty breast, 1.5 to 2.25 lb | 1.5 to 2.0 in | 62% to 74% | 30 to 50 thin slices |
| Skinless breast, 8 to 20 oz | 0.8 to 1.5 in | 70% to 82% | 12 to 32 thin slices |
Start skin-side down over medium-low heat so fat renders before the meat overcooks.
The most common domestic breast setup for pan sear plus oven finish.
Fat escapes more slowly and the skin may brown before enough fat renders.
Skip render time and use shorter direct heat plus a careful thermometer check.
Cooking goose breast is a challenge: how do you get the heat into the skin so the fat melts off without overcooking the flesh below? It is such a thick slab of meat with so much fat in the way that the fat need time to render out. You want to prevent that meat from drying up and turning grey, yet still maintain its tenderness. Cook it fast enough and the meat turns chewy and tough. Cook it slow enough, and all the moistness will evaporate leaving you with a bland bird.
To help figure out your cook time, there’s a simple-to-use calculator that takes into account several factors. It eliminates uncertainty between thickness and cooking time. That one factor is the maximum thickness, which for me is the thickest part of the breast. Most folks just weigh it, but remember: Heat radiates in from all directions. Just because something looks done doesn’t mean it is. Relying only on sight may result in a completely-cooked thin portion next to a cool middle. So yes, you need to break out the thermometer. Poke it in the meaty middle and then take it off the heat.
How to Cook Goose Breast Perfectly
Keep in mind that a goose are cold when it comes out of fridge (the starting temp will impact your cook time). To speed things up, I’ll let the goose breasts warms on the counter for about twenty minutes before searing them. Letting the meat sit out for twenty minutes before searing can shave several minutes off total duration. This also prevents an overcooked gray band of meat from forming below skin.
To use the calculator, plug in your specific variables like thickness and starting temperature to handle the math for you. The fat will render according to your cooking method. For thin cuts you can pan sear only. On big breasts, it’s typically a two-step process. Gently render the fat over lower heat to avoid burning skin. Then finish it off in the oven to cook through evenly, making sure the center of the breast reach the right temperature. This differs slightly depending on if you are finishing under the broiler, on the grill, or in a convection oven, as indicated in table above. Always aim for that balance between crispy skin and well cooked interior meat.
Balancing texture preferences and safety guidelines defines doneness. For example, the USDA advises that poultry is cooked to an internal temperature of one-hundred sixty-five degrees for safe eating. Many chefs will take goose breast off earlier; anywhere from one forty-five to one-fifty degrees. Why? They’ll let it continue to cook (known as “carry-over” cooking) during a rest period. During the rest, there’s still more residual heat inside the meat, pushing the internal temperature up a few more degrees.
Take it out too soon and the meat won’t be cooked through enough. Leave it in too long and it’ll get tough. By taking into account the rest period you’d like to use, the tool can help show the sweet spot. Never forget: Resting is crucial for keeping things tender. When we slice into a piece of hot goose breast, all that juice rushes out right away (leaving us with dry meat at the end). Letting the meat rest gives proteins time to relax, allowing them to soak up more moisture. It might sound like a long time when your stomach’s growling but it will make everything better in the end. That’s what separates a good meal from a luxurius meal.
Lastly, think about how thinly sliced your goose breast should be. Goose breast is best served in thin medallions against the grain. Cutting against the grain creates smaller bites with shorter muscle fibers that breaks down into tender chunks of meat. If you have thicker slices and want to cook them until they reach well done, they’ll end up being more chewy then tender. Use the amounts to estimate portion sizes so there’s enough for everybody.
Precision and patience are key. Get it right, and what was once a problem becomes crackling skin.