Deep Fry Fish Time Calculator
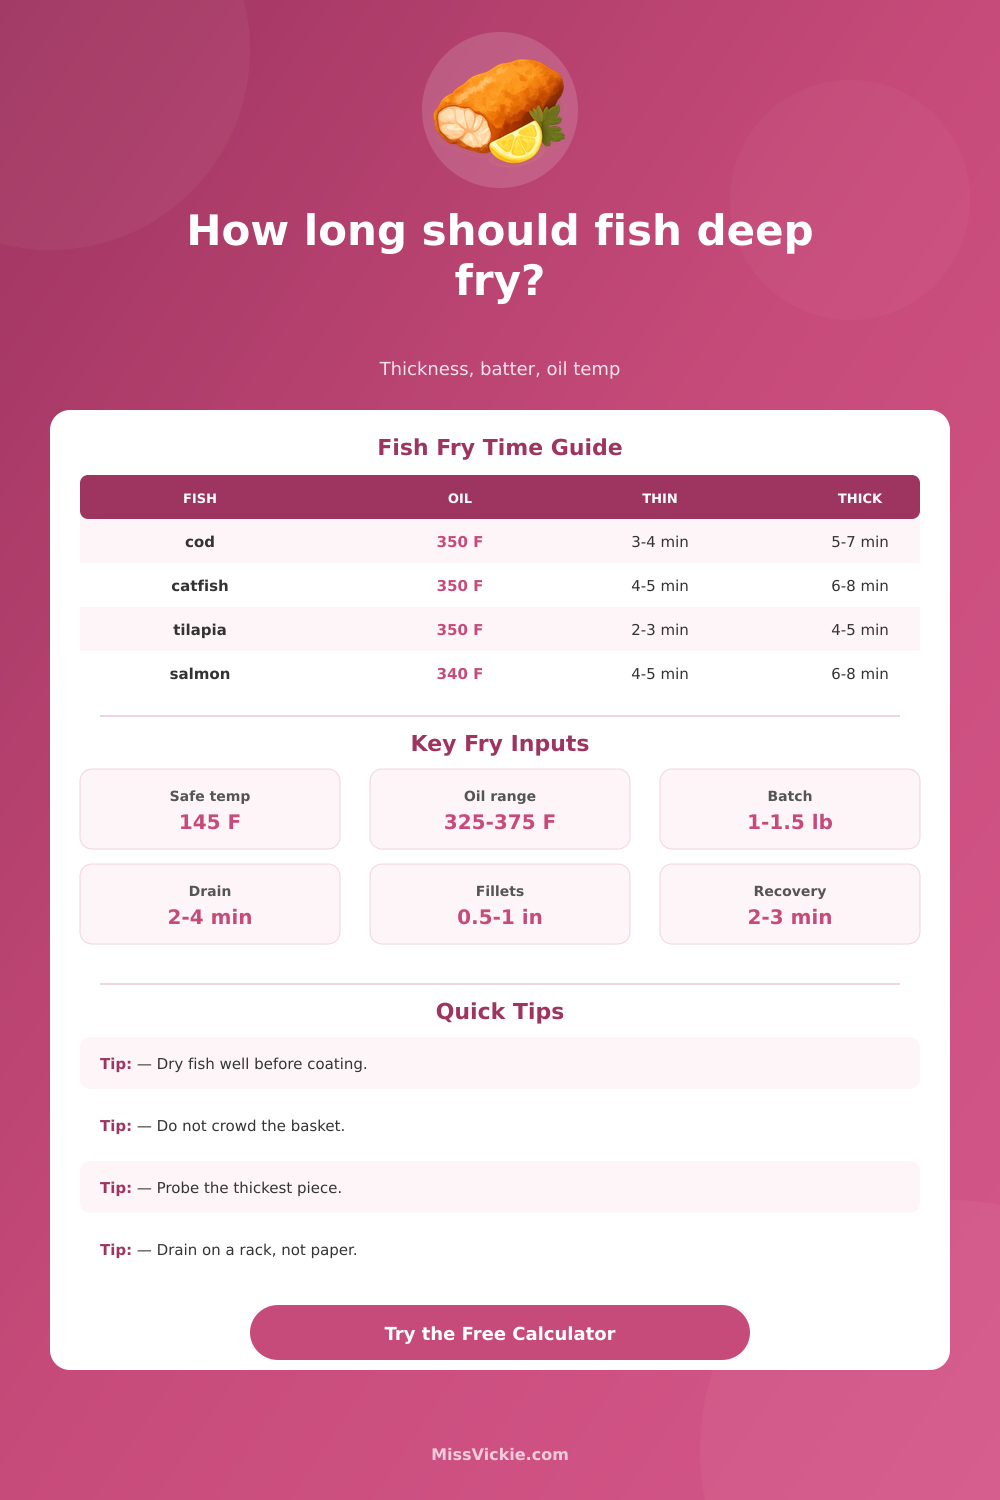
Estimate deep fry time for fillets, nuggets, and portions using fish type, fillet thickness, batter or breading, oil temperature, batch weight, frozen or fresh state, fryer load, target internal temperature, crispness, and rack drain time.
🐟Fried fish presets
Choose a common fish fry setup, then fine tune the thickness, coating, oil temperature, batch size, fryer load, target internal temperature, crispness, and drain time.
⚖Units
🔥Fish, thickness, and oil setup
🍳Starting state, coating, and finish
Fish fry timing estimate
Timing breakdown
Use an instant-read thermometer for the thickest piece.
📌Fish fry quick checks
Probe the thickest part before serving.
Good starting point for most fillets.
Leaves room for oil recovery.
Keeps crust crisp after frying.
Usually needs a slower check window.
Use for thick fish or dark coatings.
Best for small strips and tempura.
Wait between baskets if oil drops.
📋Thickness fry time reference
| Thickness | Typical pieces | Oil temperature | Fresh or thawed timing | Thermometer check |
|---|---|---|---|---|
| 1/4 to 1/2 inch | Tilapia, strips, small perch | 355 to 375°F | 2 to 4 minutes | Check as soon as crust sets. |
| 1/2 to 3/4 inch | Cod, haddock, catfish | 340 to 360°F | 3 to 6 minutes | Probe center after first color change. |
| 3/4 to 1 inch | Thick fillets, salmon portions | 330 to 350°F | 5 to 8 minutes | Start checking near 5 minutes. |
| 1 to 1 1/2 inches | Loins, grouper, whole small fish | 325 to 345°F | 7 to 11 minutes | Probe the thickest center and near bone. |
🍞Batter and breading reference
| Coating | Best oil range | Timing effect | Crispness effect | Handling note |
|---|---|---|---|---|
| No coating or light seasoning | 350 to 375°F | Fastest heat transfer | Delicate surface | Use very dry fish. |
| Seasoned flour or cornmeal | 340 to 360°F | Adds about 10 percent | Classic crisp crust | Shake off loose coating. |
| Beer batter or tempura | 350 to 375°F | Needs crust set time | Puffy, crisp coating | Lower gently and avoid crowding. |
| Panko or heavy breading | 325 to 350°F | Slower heat-through | Very crunchy crust | Watch color before center is done. |
🍴Fish type reference
| Fish type | Texture | Typical coating | Target center | Frying note |
|---|---|---|---|---|
| Cod, pollock, haddock | Flaky white | Beer batter, flour, panko | 145°F | Good all-purpose fish fry timing. |
| Catfish | Firm and moist | Cornmeal or seasoned flour | 145°F | Handles a slightly longer crisp fry. |
| Tilapia, perch, trout | Thin and delicate | Flour, tempura, light crumbs | 145°F | Start checking early to avoid drying. |
| Salmon, snapper, grouper | Dense portions | Panko, flour, light batter | 145°F | Use thickness more than color alone. |
💡Fried fish timing tips
Dry surfaces first: Pat fish dry before flour, cornmeal, batter, or panko so the coating sticks and the oil does not foam aggressively.
Use the thickest point: Thin tails finish early, so base timing on the deepest center and check with an instant-read thermometer.
Leave basket space: Fry in smaller batches when using wet batter because pieces that touch can glue together and cook unevenly.
Drain on a rack: A wire rack lets steam escape; paper towels can trap moisture against the crust and soften the bottom.
The key to deep frying fish is making sure you don’t overcook it or let it get too soggy. There is many factors that affect the cooking time. Is the fish frozen? How thick is it? What kind of coating do you put on it? And what’s the temperature of your oil? The easy answer fails here. It doesn’t consider those things, so you are mostly guessing and will end up destroying your fish.
This is where the calculator (above) does calculation for you after inputting your parameters. Because fish conducts heat poorly, fillet thickness are especially important. When will the middle reach safety? The answer is that it is safe once thickest portion reaches a safe temperature. Coating adds time; first you need to wait for breading/crumbs/batter to brown/set. Also, oil temp is important. Cooking take longer at low temps, but high temps can burns the exterior before interior is cooked. Packed baskets and frozen items will requires more time. The calculator adjusts for these variations so you don’t have to keep up with them in your head.
How to Cook Fish Perfectly Every Time
The calculator will tell you when to probe it with a thermometer. They’ll even guess at the total time required for several batch. First number. The time it takes each batch of fry. The second number tells you when to begin probing the thickest piece. That last part is important: Crust color isn’t always a good indicator. You might have a dark-looking coating that looks ready when it’s not quite safe in the middle. Or you might have a pale-looking crust that are still cooking even after it has reached temperature. With those two numbers, the calculator provides a range. Giving you a margin of error so you can account for the fact that every fryer run a little different than each day.
The tool can’t account for some real world variables in actual kitchens. These include how quickly the oil recover, how consistent the batch-to-batch temperatures is, and how evenly your fish pieces were cut. That’s why there’s a confidence score at the end. If you’ve got a lot in the basket, used frozen fish, put too much batter on something, all that stuff lowers the score. Then, it suggests checking a few instead of just trusting one reading. That’s helpful because it reminds you when you should of be extra careful. Not that it guarantees anything given any input.
For safety, we want the thickest part of the fish to hit 145 degrees inside. To achieve that target with a crispy crust there are multiple trade-offs to balance out. Lighter coatings and thinner cuts will cook more quickly and tolerate a few seconds here or there on either side of your estimate. Heavier coatings and thicker cuts mean earlier checking times and lower oil temps so they don’t burns on the outside before being done in the middle. That’s where the connections becomes apparent but you won’t have to memorize all the combinations because the calculator shows them.
It’s when you realize that all of these inputs affect your outcome, that the process isn’t so much guessing anymore. It becomes clear why some batches finishes faster then others or need an additional minute. The following round will go better because you has more confidence in what adjustments should be made. This is where the actual benefit comes from working out the variables. It’s not as good when you hope there’s just one rule for everything.