Blended frappuccino texture dosing
Xanthan Gum for Frappuccino Calculator
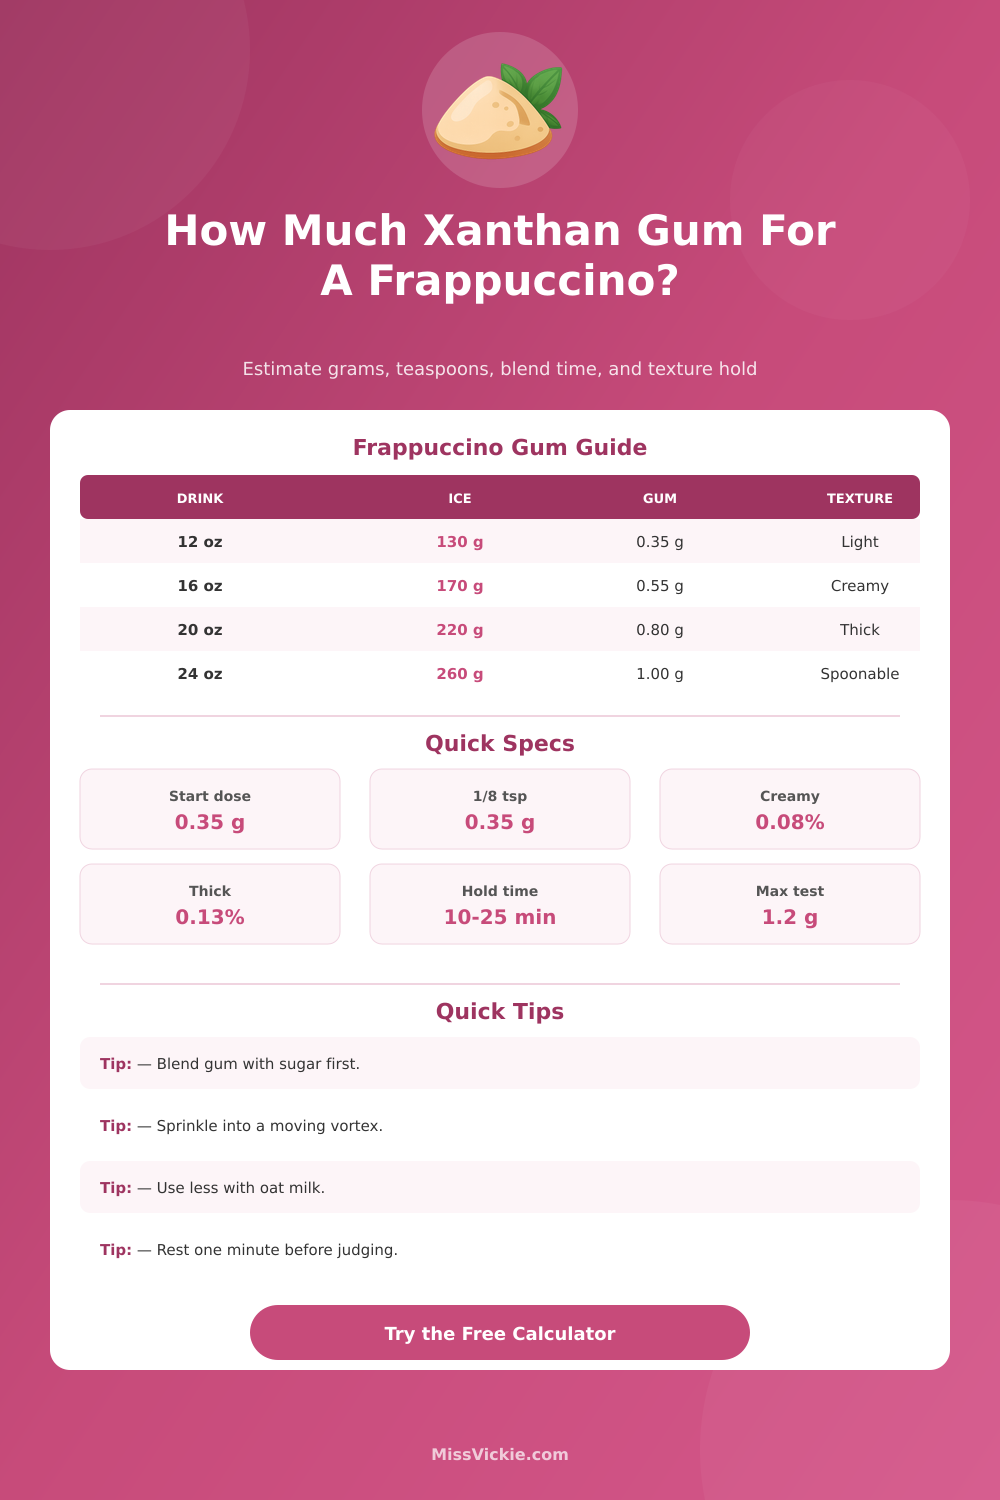
Estimate a practical xanthan gum starting dose for blended coffee drinks using drink ounces, ice weight, milk style, syrup level, coffee concentrate, blender power, hold time, desired thickness, and gum dispersion method.
This estimates xanthan gum by total blended weight. It is meant for kitchen testing, so start with the calculated dose and adjust in tiny pinches after a full blend and a short rest.
Full Frappuccino Breakdown
Light Slush
0.05%
Loose, icy, and easy to pour from the jar.
Classic
0.08%
Smooth enough for a straw with a gentle frozen body.
Thick Straw
0.12%
Dense, creamy, and slower to separate as ice melts.
Spoonable
0.16%
Dessert style texture that needs strong dispersion.
| Finished Style | Liquid Before Ice | Typical Ice | Starter Gum | Texture Note |
|---|---|---|---|---|
| Small coffee frappe | 10 to 12 fl oz | 110 to 140 g | 0.30 to 0.45 g | Use a tiny pinch when syrup is heavy. |
| Medium blended latte | 14 to 16 fl oz | 150 to 190 g | 0.45 to 0.65 g | Classic straw texture for most home blenders. |
| Large mocha blend | 18 to 20 fl oz | 200 to 240 g | 0.65 to 0.90 g | Chocolate sauce often reduces the gum needed. |
| Dessert cup blend | 20 to 24 fl oz | 230 to 290 g | 0.85 to 1.15 g | Best with premixed gum and a high power blender. |
| Base Choice | Texture Effect | Gum Adjustment | Best Pairing | Watch For |
|---|---|---|---|---|
| Skim milk or water | Thin and icy | Add 5 to 10 percent | Classic or thick target | Melts fast without enough ice. |
| Whole milk | Creamier mouthfeel | Reduce 5 percent | Mocha, vanilla, caramel | Can feel pasty if over-thickened. |
| Oat milk | Natural body | Reduce 10 percent | Vanilla and brown sugar | Too much gum turns ropey. |
| Sugar free syrup | Less solids | Add 8 percent | Low sugar coffee blends | Needs strong blending to hydrate. |
| Method | Clump Risk | When To Use | Dose Change | Blend Cue |
|---|---|---|---|---|
| Premix with sugar | Low | Most sweet frappuccinos | No change | Blend until the surface glosses. |
| Whisk into syrup | Low to medium | Sauce based mocha or caramel | Reduce 3 percent | Blend once syrup streaks vanish. |
| Dry sprinkle | Medium | Unsweetened or low sugar drinks | Add 4 percent | Sprinkle into the moving vortex. |
| Dump on top | High | Only for quick rough tests | Add no extra | Stop and scrape if specks appear. |
| Blender Setup | Typical Time | Texture Result | Hold Support | Best Move |
|---|---|---|---|---|
| Older low power | 45 to 60 sec | Coarser ice | Needs help | Crush ice first, then add gum. |
| Personal blender | 35 to 50 sec | Fine but warmer | Fair | Pulse first, then blend steadily. |
| Counter blender | 28 to 40 sec | Smooth frozen body | Good | Run until the center vortex folds. |
| High power blender | 18 to 30 sec | Very smooth | Strong | Stop before friction warms the drink. |
Turns out, making a frappuccino at home require more than just milk and ice (but it can stay creamy for more than a few minutes if you do it right). The secret ingredient is something most people don’t even think about. It is an emulsifier called xanthan gum that forms a stable network binding water together to keep everything suspended. Without enough of it, your drink will turn into separated slush.
The number of variables are large, including every decision you make. If you use sugar-free syrup, that will thin the mixture and make it more likely to separate. Using oat milk different than skim milk adds body and therefore requires less assistance in holding everything together. The ice you add also counts. More ice mean more water is released when it melts, which can wash away thickness you built up. Then there’s the power of your blender. If your blender isn’t very strong, it’ll leave bigger chunks of ice, which will release water faster after sitting for a while.
How to Make Perfect Frappuccinos at Home
Once you input your preferred holding time, syrup amount, milk type, ice weight and drink volume, the calculator does the rest. It will take into account whether you are sprinkling or premixing. The gum’s dispersion matter, as it will adjust for clumping risk. If you’re just pouring in dry pieces, the distribution is uneven and needs more gum to make sure particles gets hydrated everywhere (no pockets of gum).
That’s most people’s error: they think xanthan gum is just another thickener, one that performs equally well in all recipes. It doesn’t: it depends on temperature at which you blend, total solids, and how long you wait before consumption. A dose that seems great immediately out of the blender will tighten up more as the gum continues to hydrate. That’s why there’s a brief rest period built into the hold-time recommendations in the tool. You might judge it too soon and end up with an over-thickened batch, which leads to the next batch being over-thickened as well.
On the page itself, there’s a set of reference tables that map out various styles to their usual ice weight/liquid volume ratios. These aren’t meant as a “memorize this” guide, just a way to spot trends. You typically make a medium blended latte somewhere near center of the spectrum; the gum amount shifts once you change milk or decide if you want it spoonable vs. Straw-sippable. Straw-sippable, the gum factor changes depending upon the milk. Those tables provides enough context so you know at a glance if what you’re planning is in classic territory or skewing toward thick side.
If you use too few, it’ll become watered down in minutes. If you use too many, it’s heavy in your mouth, almost like it becomes a bit elastic. This calculator provides a good starting point that factors those trade-offs in. It allows you to test just once, then make adjustments in small increments instead of having to guess how much to put in every time. It’s that one adjustment step that transforms a decent home-made frappuccino to one that stays together all the way to final sip. You should of used it more often to get perfect results naturaly.